Adding and deleting rows in an offline repeating dynamic layout
When creating a mobile application, you might want to provide application users with the ability to add or delete a row to a repeating dynamic layout while offline. To implement the add and delete row functionality, add a button, icon, or other UI control for the add and delete functions to the user interface. Then, the add row and delete row functions are called from the Pega API.
You can use one of the following techniques:
- Inline – Both the button and repeating dynamic layout are in same section. Use the inline option if you plan to reuse the section.
- Modal – The button is available in the modal dialog box. Use this option if your row edit is displayed in a modal dialog box.
To enable offline row addition and deletion, call the Pega API function AddRDLrow in the Actions tab of the repeating dynamic layout. Adding and deleting a row are separate actions and must be configured separately. The following steps are performed within a repeating dynamic layout.
Adding a row inline
- Add a control (button, icon, and so on) in a layout, and drop the layout below or above the repeating dynamic layout to control row addition.
- Open the Cell Properties of the control by clicking the Gear icon.
- On the Actions tab, click Create an action set.
- Under Action set 1, click Add an event and select the event that you want. In this example, the event is double-click.
- Click Add an action,and then click All Actions to view all available actions.
- Select the Run script action.
- Enter
addRDLRowin the Function Name field.

- In the Parameters section, enter the name of the property associated with the repeating dynamic layout as the first parameter.
- Click Submit to close and save the actions.
Adding a row from a modal dialog box
Adding a row from a modal dialog box requires two actions. You configure the repeating dynamic layout in a section. When the Add button is clicked, a local action launches. When the modal dialog box is submitted, a row is added to the repeating dynamic layout.
Add the event
- Add a control (button, icon, and so on) in the custom modal template configured in the launch local action.
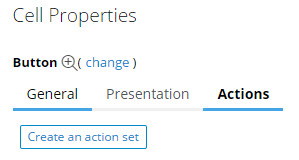
- Open the Cell Properties of the control by clicking the Gear icon.
- On the Actions tab, click Create an action set.
- Under Action set 1, click Add an event and select the event that you want.
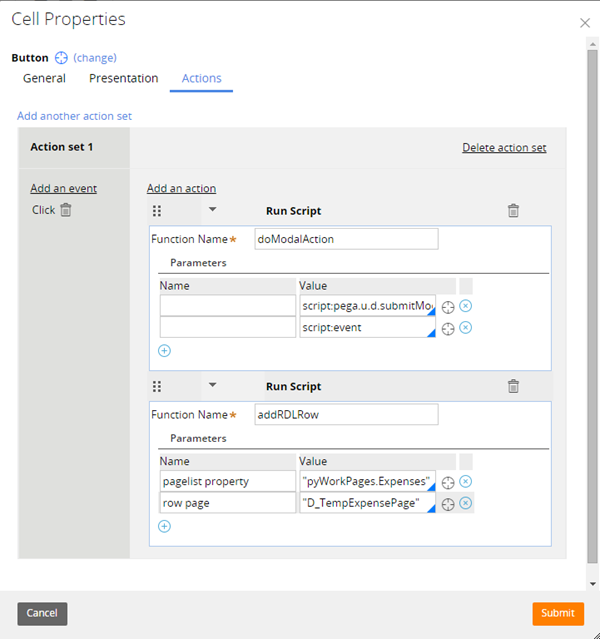
Add the first action
- Click Add an action, and then click All Actions to view all available actions.
- Select the Run script action.
- Enter
doModalActionin the Function Name field. - Enter
script:pega.u.d.submitModalDlgParamfor the first parameter value. - Enter
script:eventfor the second parameter value.
Add the second action
- Click Add an action, and then click All Actions to view all available actions.
- Select the Run script action.
- Enter
addRDLRowin the Function Name field. - In the Parameters section, the first parameter is the name of the property that is associated with the repeating dynamic layout.
- Click to close and save the actions.
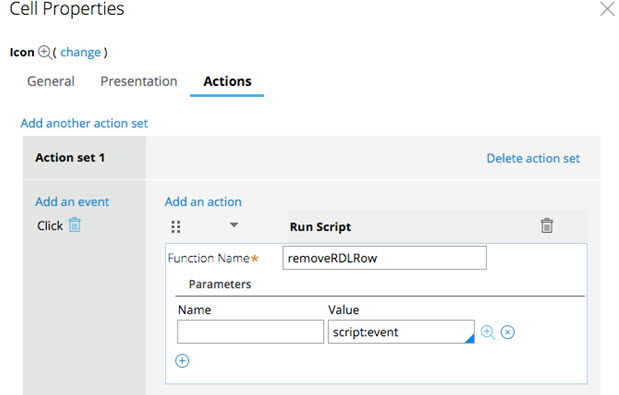
Deleting a row
The process for enabling row deletion is similar to adding a row.
- Within the UI element included in the repeating dynamic layout where you want to enable deleting, open the Cell Properties dialog box.
- Place the Remove button inside each repeating dynamic layout row that has the run script configured.
- In the Actions tab, create an action set and enter
removeRDLRowas the function name. - In the Parameters section, set the first parameter to
script:event.