Creating a document in an application
Create a document to share or discuss information with other users in your application. For example, you can create a document and then use Pulse to discuss the document with your team.
The user who creates a document becomes the owner of
the document.
- Depending on the purpose of your document, create a document in one of the following
places:
Choices Actions To share general information, for example, the latest quarterly results of your organization, create a document on the Documents landing page. - In the navigation pane of your portal, click Documents.
- Click Create document.
- Enter a name for the document.
- On a selected tab, create document content in the rich text editor or select
a file from a local or external repository or system.The options depend on your settings. By default, you can create a new document by using the rich text editor or upload locally saved documents.
An example of document creation options on the tabs of the New Document dialog box 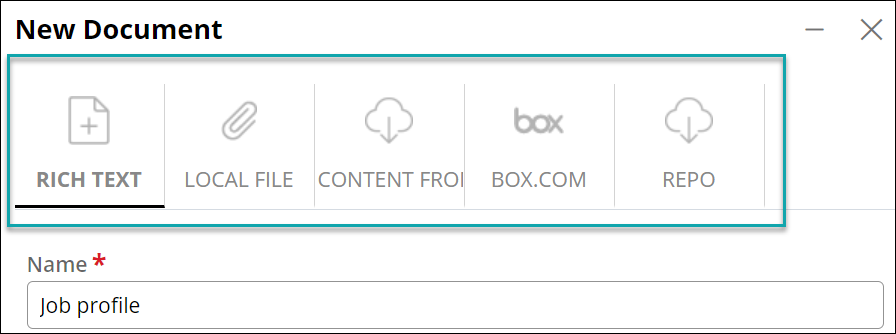
To add information to a case, for example, an invoice in a Sales Order case, create a document from the case. - Open the case in which you want to create a document, and then click Expand the utility pane.
- In the Files & documents section, click the
Manage files and documents icon, and then in the
Manage content dialog box, on a selected tab, create
document content in the rich text editor, or select a file from a local or
external repository or system.The options depend on your settings. By default, you can create a new document by using the rich text editor or by uploading a locally saved document.
- Click Submit.
To add information to a space, for example, a job profile in the Hiring space, create a document from the space. - Open the space in which you want to create a document,
- On the Activity tab, click Expand the utility pane icon, and then click the Related tab.
- In the Files & documents section, click the
Manage files and documents icon, and then in the
Manage content dialog box, on a selected tab, create
document content in the rich text editor, or select a file from a local or
external repository or system.The options depend on your settings. By default, you can create a new document by using the rich text editor or by uploading a locally saved document.
- Click Submit.
- Optional: To provide only relevant content for the users, grant access to the document to members
of a space or case by performing the following actions:
- In the New Document dialog box, in the Available to section, select Limited.
- In the Select type list, select Space or Case.
- In the Name field, enter the name of a space or case.
- Click Publish.
Previous topic Collaborating on shared content by using Documents Next topic Discussing and managing a document