Configuring App Studio for publishing
Publish application updates in App Studio using an existing deployment pipeline to seamlessly create patch versions of an application and start a deployment.
Enable Deployment Manager integration
You must properly configure and integrate Deployment Manager with App Studio before you can publish changes. These integration steps enable communication between the candidate environments and the orchestrator for seamless publishing of deployment pipelines.
- Navigate to the Deployment Manager Pega Marketplace page and download the latest version of Deployment Manager.
- Extract the contents of the downloaded file.
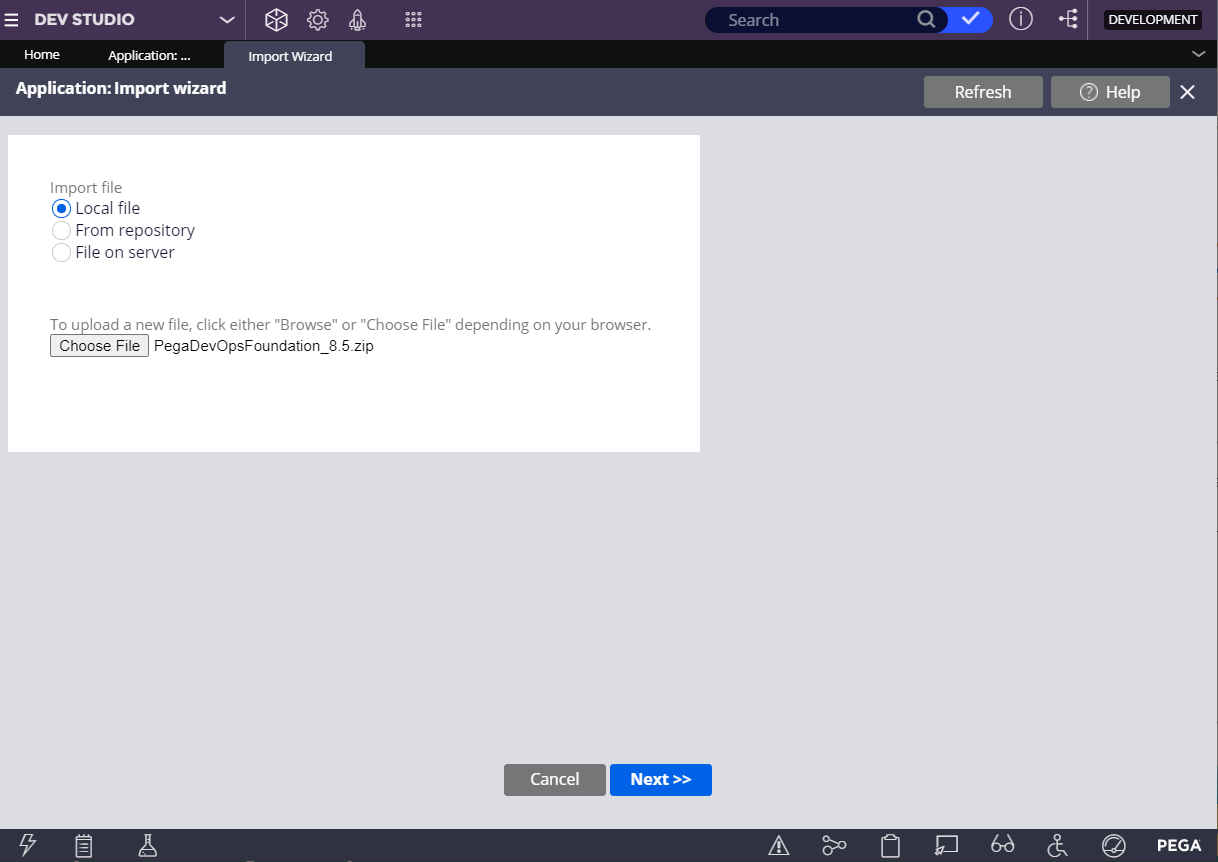
- Use the Import wizard to import files into the appropriate systems. For more information on using the Import wizard, see Importing rules and data by using the Import wizard.
- On the development environment, switch to Dev Studio and
click and import the PegaDevOpsFoundation_8.5.zip file.
- Next, configure the authentication profile. Deployment Manager cannot automatically populate the client secret to candidate environments, as
it is not recommended to share this information across systems. To manually
update the client secret information on your candidate environment:
- In Dev Studio, click to receive a list of profile names available on the candidate environment.
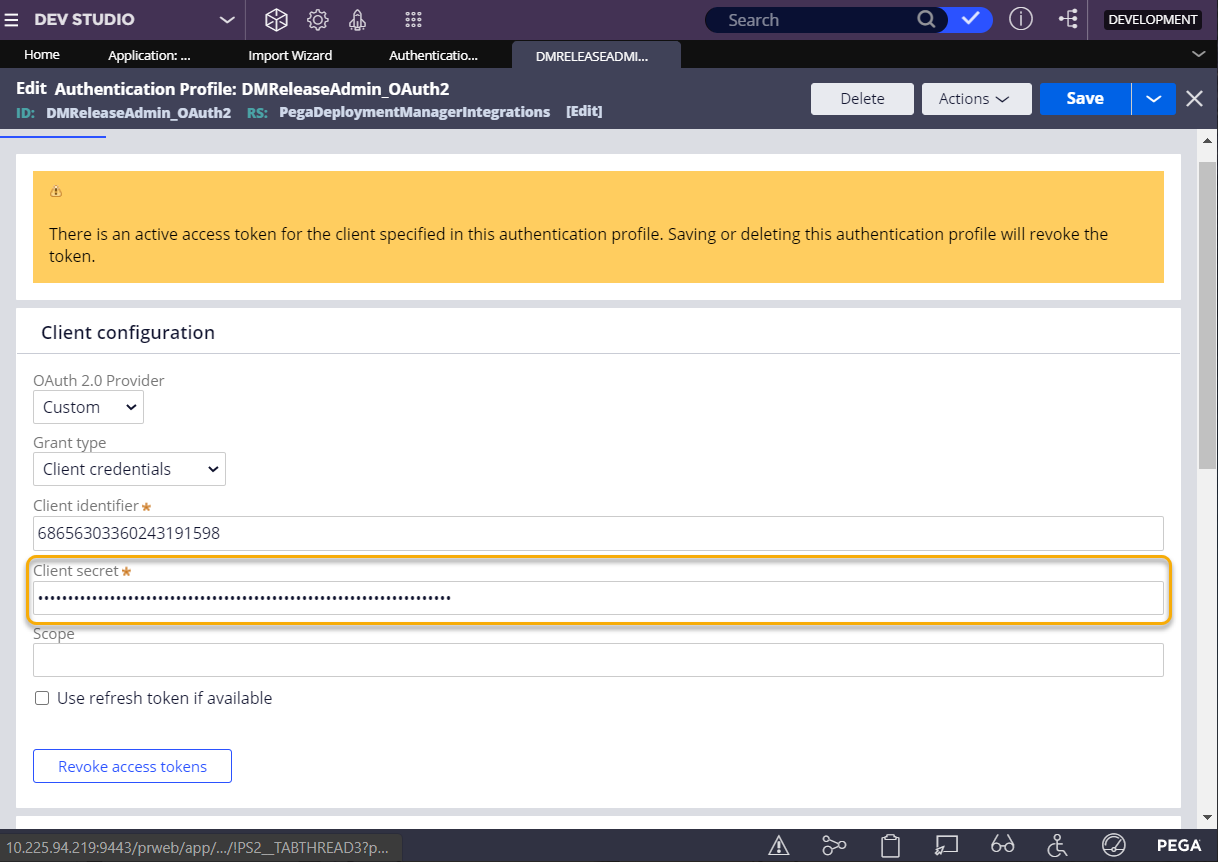
- Select the DMReleaseAdmin_OAuth2 authentication profile.
- Update the client secret on the authentication profile. On the OAuth
2.0 tab, under the Client configuration section, enter the client secret
in the Client secret field.
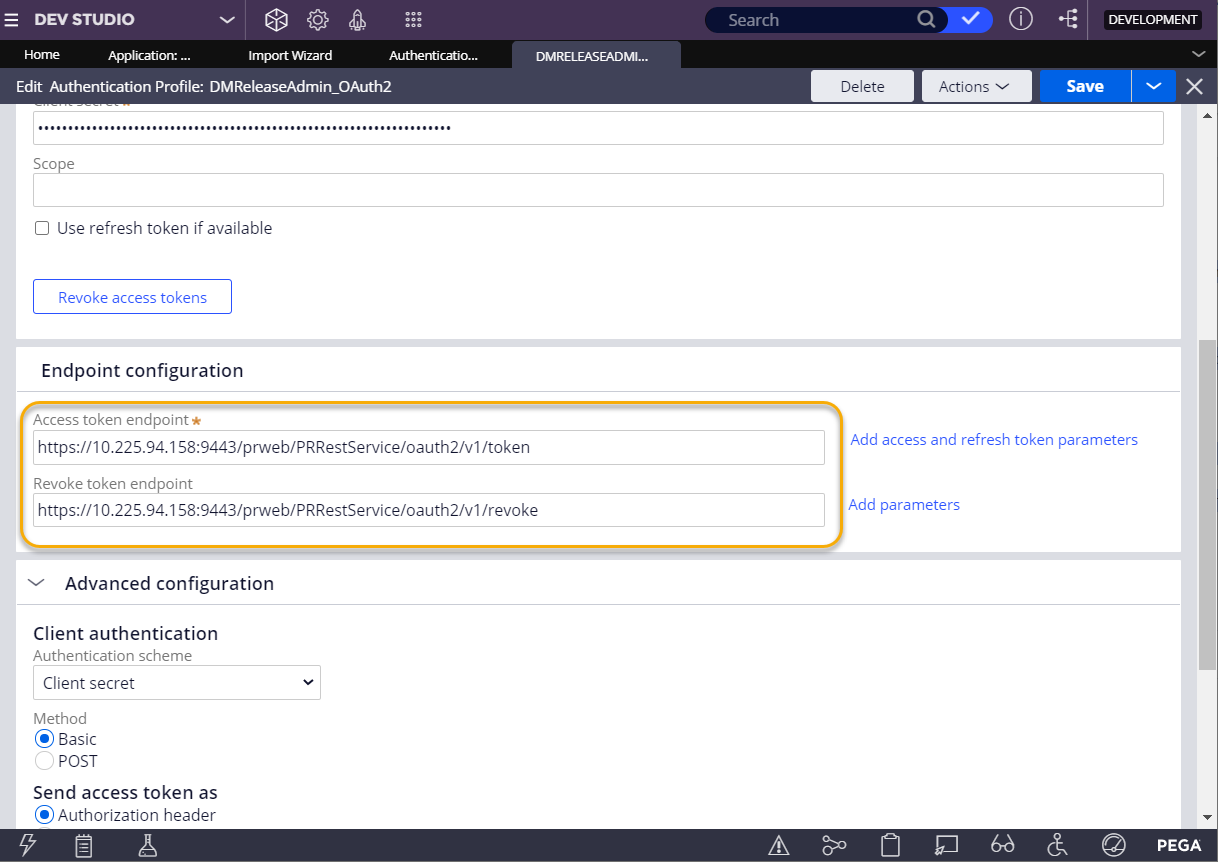
- Enter the Access token endpoint and the
Revoke token endpoint in the Endpoint configuration
section.
- Confirm the changes by clicking Save.
- To update the orchestrator server to manage this application deployment, you
must update the OrchestratorURL on the environment.
- In the PegaDevopsShared ruleset, search OrchestratorURL Dynamic System Setting.
- Update the Value field to point to the orchestrator URL. Use this setting for Dev Studio and App Studio integration.
- Confirm the changes by clicking Save.
Configure a deployment pipeline
Create a deployment pipeline to model the release process set for your application or team. For more information on creating a deployment pipeline, see Creating a deployment pipeline.
Configure an application to enable publishing
You must properly configure an application before you can publish updates using deployment pipelines.
- A product rule exists with the same name and version as the application being deployed. For more information see Creating a product rule that does not include associated data by using the Application Packaging wizard.
- A pipeline has been created in Deployment Manager for the application being deployed.
- There is at least one unlocked ruleset in the application.
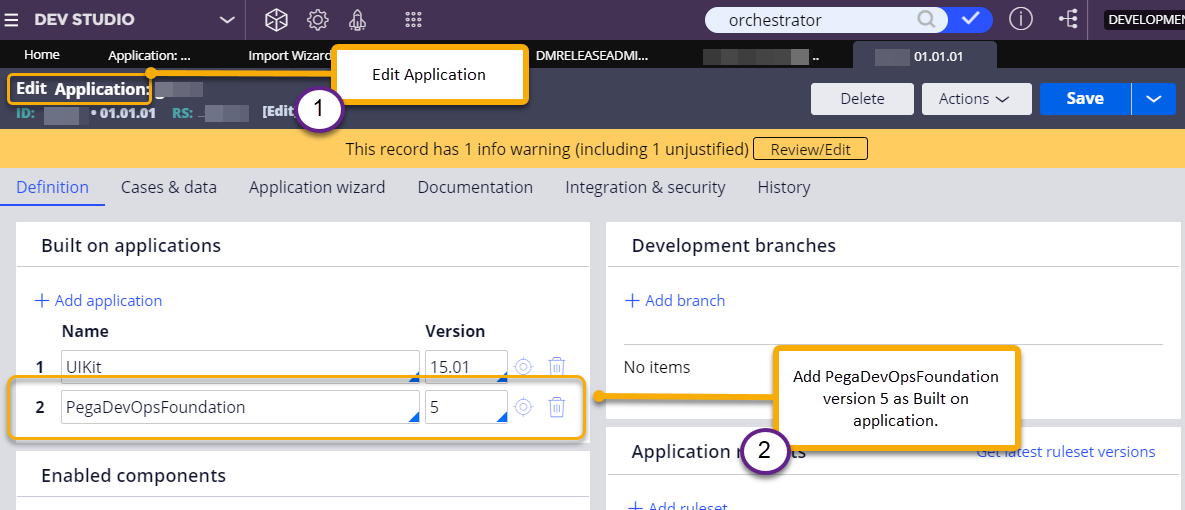
- The application is built on PegaDevOpsFoundation. Switch to Dev Studio, navigate from the Application drop down to
definition. Add built-on application and enter PegaDevOpsFoundation under
name field and update the major version used under
version.
Configure user access
As an App Studio user, log in to the application you are deploying on the development system.
- Switch to Deployment Manager from Dev Studio.
- In the navigation pane of Deployment Manager, click .
- On the People page, click Add user.
- In the Add user dialog box, click the User field and do
one of the following actions:
- Select the user that you want to add.
- Enter an email address.
- Click Add.
- From the role list, select PipelineUser.
- If you selected the App admin role or a custom role in the Applications field, enter the application name that the user can access.
- Click Send invite to send an email containing the user name and a randomly generated password for Deployment Manager log in credentials.
Previous topic Understanding App Studio publishing Next topic Publishing application changes in App Studio