Managing application inventory
Plan the development of your application, manage the workload in your team, and prioritize your work accordingly by following the application backlog on your Inventory landing page. The Inventory landing page lists features, personas, and draft data associations across your Microjourney, so that your team can map items to specific releases.
By analyzing the application inventory, you can also determine how different elements of your application, such as personas and case types, interact with each other.You associate personas and data objects with case types when you plan your Microjourney. By making these associations, you can clearly visualize the data and participants that your business processes require. After you create these associations, or draft relationships, you can analyze your application inventory, so that you can prioritize work by checking releases associated with personas and data objects. You can also group and filter personas and data objects for a better understanding of how these elements are related. For more detailed planning, on the Inventory page, you can also manage your application features. For example, you can associate a feature with a release, so that you can estimate your work more accurately.
- In the navigation pane of App Studio, click Overview.
- In the Application profile section, click Manage.
- On the Inventory tab, in the
Inventory section, select the items of information that
you want to view:
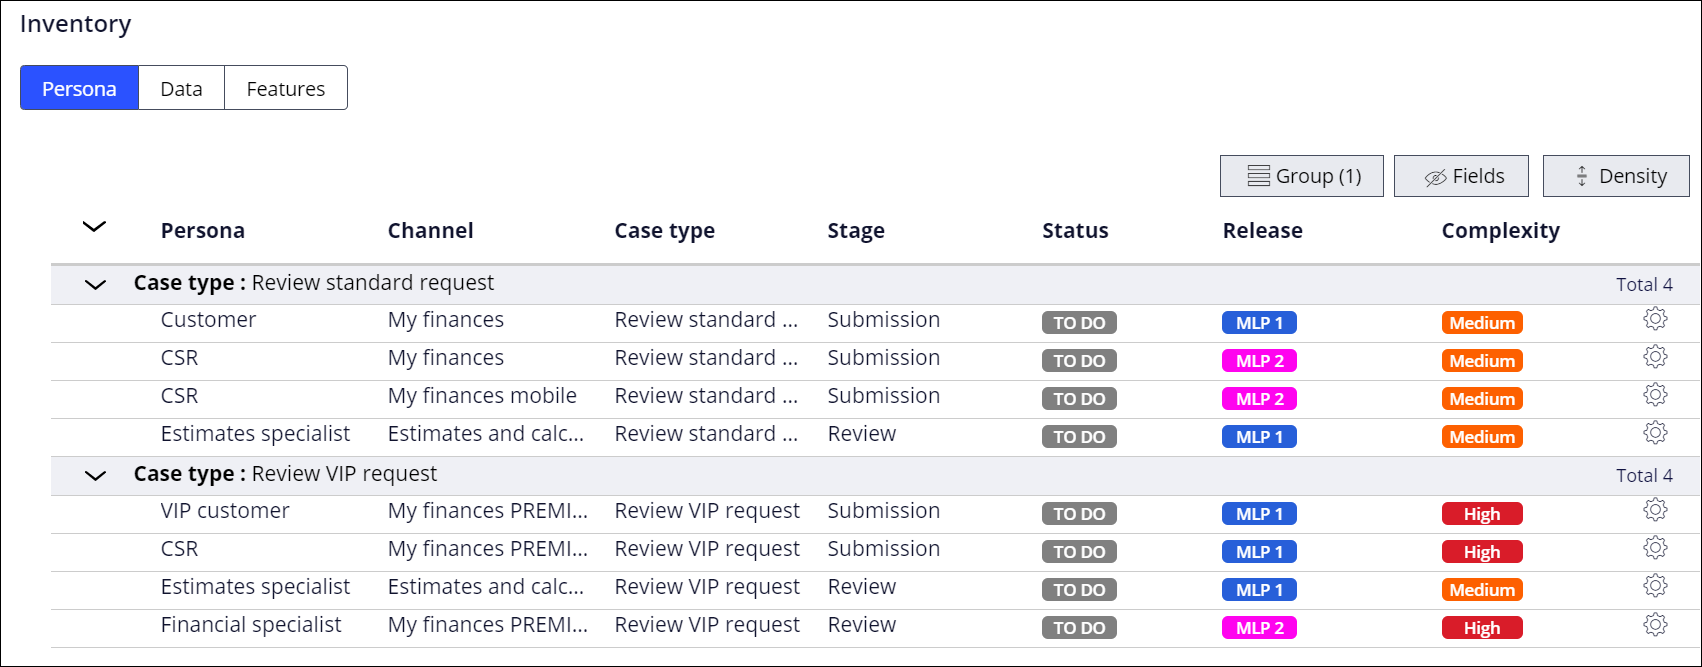
- To manage draft personas, click Persona.
- To manage draft data objects, click Data.
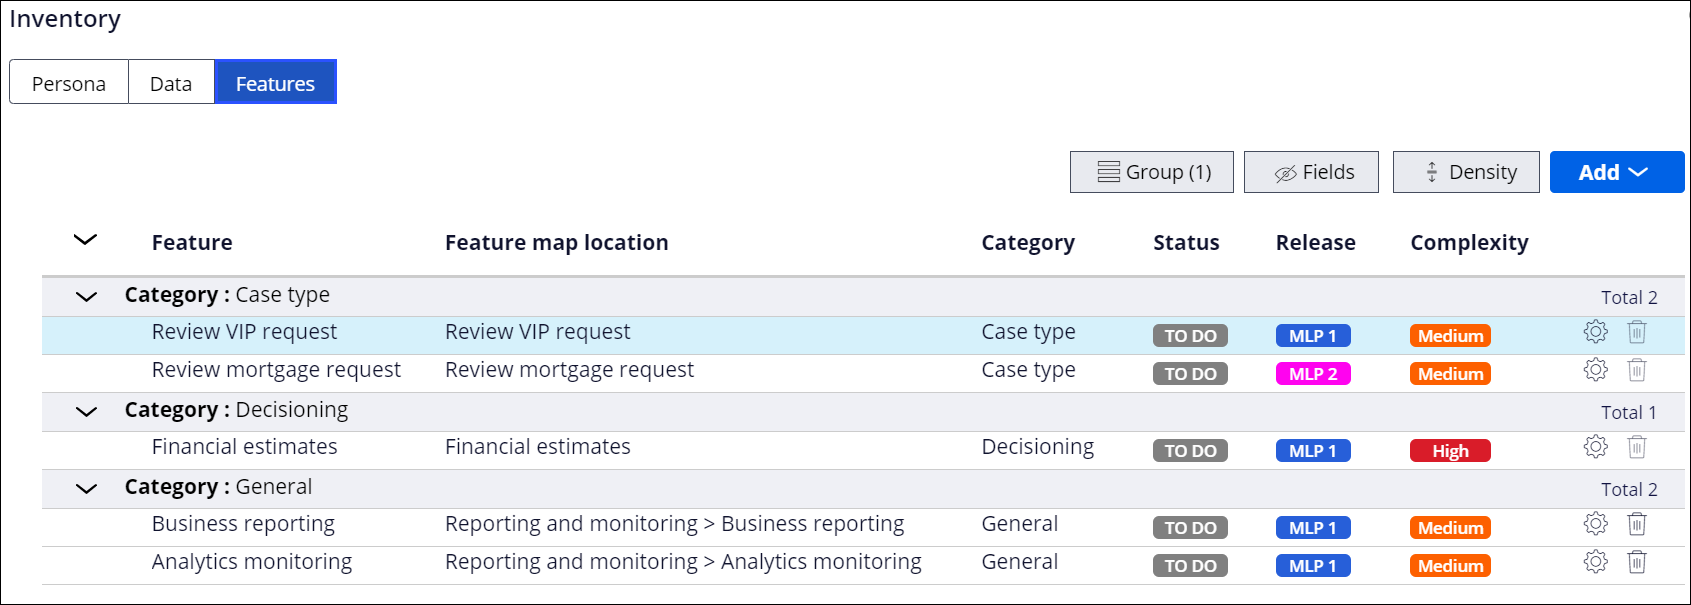
- To manage application features, click Features.
- Organize the list of items to display only the information that you need:
- To group items, click Group, and then select the grouping method that you want to apply, for example Complexity.
- To display only selected information about items, click Fields, and then select the fields that you want to display, for example Channel and Status.
- To change how the information is displayed, click Density, and then select a format that you want to apply, for example Compact.
- Update the information to reflect the latest changes that you make in your
application by clicking Edit details, and then performing
the following actions in the Edit details window:
- To change the iteration of your application in which you want to implement the item, in the Release list, select a release.
- To change the amount of time that the development team needs to implement the item, in the Complexity list, select a new value.
- To provide more information about an item, such as business value, in the Comment text box, enter some additional description.
- To mark the item as implemented, select the Mark as done check box.
- Click Submit.
Adding features to application inventory
Get a quick overview of the functionalities that your development team needs to implement by adding features to your application inventory. When you analyze your application inventory, you can conveniently plan your application development in a more detailed way.
For example, you can create features that represent language packs and case types to ensure that you deliver an application that meets the requirements defined with your stakeholders. During application development, your team then turns features into usable functionalities.You can assign each feature a complexity level. Complexity indicates the time and effort that a team needs to implement a feature and impacts further estimation of the time required for application development.
- In the navigation pane of App Studio, click Overview.
- In the Application profile section, click Manage.
- In the Inventory section, click Feature map.
- Add a feature to your application:
Choices Actions Reuse a feature from a built-on application - Hover over the features list, and then click .
- In the Add from existing features dialog box, in the Feature list, select a feature to reuse.
- Optional: To manage your features in a more convenient way, from the Category list, select a category that best describes your feature.
- In the Release list, associate the feature with the iteration of your application.
- Optional: To modify the feature for your current application, in the
Complexity list, select an option
that indicates how much time a development team needs to
implement the feature.Feature complexity impacts estimation of project completion time. Complex features elongate the estimated application development process.
- Optional: To provide more information about the feature, in the Comment text box, enter some additional description.
- Optional: To communicate that the feature is ready, select the
Mark as done check box.Features that you mark as done have no impact on development time estimations.
- Optional: To add more features, click Submit & add another, and then repeat steps 4.b through 4.g.
- Click Submit.
Create a new feature - Hover over the features list, and then click .
- In the Add new feature dialog box, in the Name field, enter some text that uniquely identifies the feature.
- Optional: To manage your features in a more convenient way, from the Category list, select a category that best describes your feature.
- Optional: To associate the feature with the iteration of your application, in the Release list, select a release.
- To indicate how much time a development team needs to
implement the feature, in the
Complexity list, select a
relevant option.Feature complexity impacts estimation of project completion time. Complex features elongate the estimated application development process.
- Optional: To provide more information about the feature, in the Comment text box, enter some additional description.
- Optional: To communicate that the feature is ready, select the
Mark as done check box.Features that you mark as done have no impact on development time estimations.
- Optional: To add more features, click Submit & add another, and then repeat steps 4.b through 4.g.
- Click Submit.
Previous topic Deleting a feature Next topic Feature-driven development tracking