How to Refactor RuleSets on Import
Summary
Purpose
Beginning with V5.4, you can use the Refactor on Import wizard to rename classes in a RuleSet archive or product archive as it is imported. This allows you to integrate the imported class structure into the existing class hierarchy on your system. For example, you could import a RuleSet or Rule-Admin-Product containing features developed for another Process Commander project and rename the classes to integrate with the inheritance patterns in your application.
To refactor the classes on import, you upload and select a .jar or .zip file containing a Process Commander archive, as you would with the Import tool. But before importing, the Refactor on Import wizard displays a listing of the classes in the archive and allows you to specify changes to the names of the top-level and Data- classes.
You cannot specify class names that already exist on your system. Then, on import, the rules contained in the *.jar or *.zip file, are read into memory, renamed with your specified changes, and then copied to the Process Commander database. The import archive is not modified.
Follow the procedure below to complete the Refactor on Import wizard.
Suggested Approach
Starting the wizard
Select File > Import > Refactor on Import to start the wizard.
For instructions on the wizard, click the help icon on each page..
Follow the procedure below to apply new class names to a RuleSet or Rule-Admin-Product before importing it to your Process Commander system.
- Upload A File
You use the first page to copy the archive you want to Import to the staging directory on the server. If you know the file has already been uploaded to the Process Commander server, click Next to continue with the import.
If you need to upload the file, click Browse to find and select the Pega archive file you want to import, and then click Next. Imported archives are stored in your Process Commander temp directory in the StaticContent/global/ServiceExport subdirectory.
Note: The file must be a Pegasystems archive ZIP or JAR file. Pega archives are created in Process Commander by the Export Archive tool, the Purge/Archive wizard, the Product Package wizard, or the Product or Patch rule forms; or in the Rulebase Utilities application (prdbutil.war) by the Export Process Commander Application Instances utility.
- Select Import Archive
This page lists all the archives currently uploaded to the Process Commander server ServiceExport directory. Select the name of the file you want to import, and click Next.
If you do not see the name of the file you want to import, click Backand use the Upload form to copy the file to the server.
- Provide Refactor Parameters
The wizard reads the archive file and displays a list of the top-level Classes and RuleSets it contains:
This table lists the top-level classes and RuleSets in the import archive in the left column. In the right column, specify the New Class Names and optionally specify New Ruleset Names that you want to apply to each class or, optionally, to each ruleset as they are imported. You cannot use a class name that already exists in the system.
If the import archive contains a Rule-Admin-Product rule, the Refactor on Import tool looks for a previous import of the same Rule-Admin-Product name. If there is a previous import of this product, the tool will provide the refactor parameters used in that import as the default values for the current import. You only need to confirm that the changes are still valid.
When the changes are specified correctly, click Next.
Click Next. to continue to the next page of the wizard.
- Verify Classes
The next page lets you confirm the changes that will be made before any modifications are made. This page lists all the classes and RuleSet names that will be renamed, including the subclasses of the class you specified that are associated by pattern inheritance with the new name. The matching substring within each name is highlighted in red.
If you see any changes that you do not want to make, you can click Back to return to earlier pages and enter new information, or click Cancel to exit from the wizard without making any changes.
When you have confirmed that the changes are as you intend, click Next.
- Display and Refactor
- Rules That Will be Changed
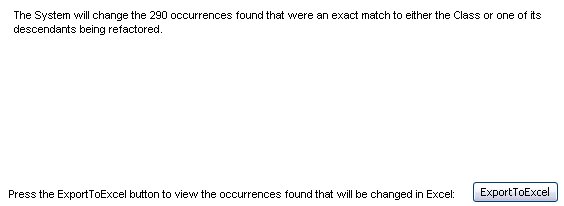
This page reports the number of occurrences of the names that will be changed automatically. These occurrences are matches to the names you asked to change that could be clearly identified as a class or RuleSet name. They will be changed automatically, without further review, when you begin the process.
You can review all the individual instances that will be changed, by clicking Export To Excel. This command creates an Excel spreadsheet containing a detailed listing of the rules that will be changed. You can use the spreadsheet to evaluate the effects of renaming the class before beginning the processing.
Click Next to continue.
- Select Rules to be Changed
The next page reports matches with the names you have asked to change that are found in the system but that the wizard cannot clearly identify as a class or RuleSet name. These are additional occurrences not included in the previous page, "Rules That Will Be Changed."
For example, the name may be embedded in a Java class name, a URL string, or some other property. These may be incidental occurrences of the class name that you do not wish to change. For example, if you had used your organization name for the original class name, you might want to keep the name where it appears in strings displayed in the user interface.
The rules are identified by their Rule Type and Name:
The specific item that will be changed is identified in the Path and Value columns:

The Path column specifies the property that contains the value, and the Value column contains the string that will be changed. In this case, for example, the occurrences of AlphaCorp embedded in these strings would be changed to BetaCorp and OrderEntrySystem would be changed to BetaOrderEntrySystem.
The final columns specify the RuleSet and RuleSet Version of each rule.
To select instances to rename.
Page through the listing and review the Value column to see the item that will be changed. Select the check box next to each instance that you want to rename, or select the checkbox at the top of the Rule Type column to select all the instances on the current page. Note that the checkbox at the top of the column only selects the instances on this page. To select all the instances found, you must go to each page of the report and select the checkbox at the top of the Rule Type column on that page.
You can move between pages using the navigation tools above the table on the right:
![]()
Click Next or Previous to move one page forward or back, or click the number of the page to move directly to the page.
To export the listing to a spreadsheet
To review these rules outside the wizard, you can export the report table to a spreadsheet:
- To export the instances on the current page only, click Export To Excel button above the navigation tools.
- To create a spreadsheet of the entire report, containing the rules listed on all the pages, click the Export All To Excel button at the bottom of any page:
![]()
When you are satisfied with the selection, click Next to begin the import. Depending on the rule you chose to rename and the number of rules in your system, this can take some minutes to complete.
- Results
When the rename processing is complete, the wizard displays a listing of all rule instances that you selected to be renamed that could not be changed successfully..

Hover the pointer over the error message in the Status column to see more details on the error. The Status column reports the following error conditions:
- FAIL— The system was unable to refactor the rule.
- SKIPPED — The rule was not selected for refactoring on the previous page of the wizard.
-
REFACTORED WITH ERRORS— The refactored rule was saved to the system, but the rule could not be validated. Review these rules in Process Commander and correct the validation errors.
Click Export All To Excel to get a complete listing of the results for all the rules, both successful and unsuccessful.
Click Finish to exit from the wizard.