DCO 6.1 - Creating an Application Profile
An Application Profile is the output of the Application Profiler, a guided DCO development tool that supports an iterative approach to capturing high level processing details for the application or implementation you are planning to build.
This article describes creating application profiles in V6.1. For V6.2, see DCO 6.2 - Creating Application Profiles and Discovery Maps.
Profiles are created through the collaborative effort of business analysts, lead architects, and other project team members who specify in business terms the initial design and process requirements. On average, it takes 2-3 days of dedicated effort to build and complete a profile.
Using the profiler tool, you can:
- specify application processing data including business processes, use cases, requirements, reports, correspondence and interfaces
- perform process discovery using a flexible, visible, interactive mapping tool
- create sizing estimates for development efforts
- use parallel teams to add and refine project details and merge them into a single profile
- create iterative on-demand professional looking work-based proposals
- prime the Application Accelerator with data from the profile to create a new application, an additional application based on an existing framework, or extension of an application
Starting a Profile
Profiles can be created and maintained by users who have access to the Designer Studio.
Note: Do not run the profiler using the operator ID [email protected] or operators that use the access group PegaRULES:Administrators.
Click ![]() next to your current application in the portal header to display the Application menu and select an option.
next to your current application in the portal header to display the Application menu and select an option.
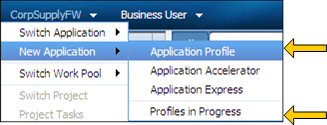
- New Application > Application Profile starts a profile
- New Application > Profiles in Progress displays a list of profiles in progress and a list of profiles you have the security to modify. Click a row to open a profile. Click New Application Profile to start a profile.
Alternatively, you can open a profile from the Tools menu of the Application landing page category.
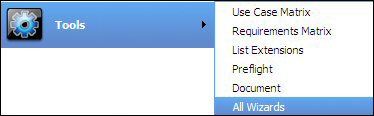
- Tools > All Wizardsdisplays a list of open and resolved wizard objects in your system. Click a row to display a profile.
This option is useful when you want to find Application Profiles that have previously been resolved or created by others.
- Tools > All Wizardsdisplays a list of open and resolved wizard objects in your system. Click a row to display a profile.
Navigating the Profiler
When the profiler starts, a Profile ID prefixed with AP- is assigned and displayed in the header of the profile window. A set of input tabs display on the left side of the screen, an overview entry window pops up in the center of the screen and an actions list and help icon appear on the right side of the header.

The Application Overview Window
This modal window is the first input screen that displays when you start a profile. It can be updated at any time by selecting ![]() from the Actions list. It is here that you enter the information about the type of application, the project, its business objectives and description. This screen must be completed before you enter information into the process tabs.
from the Actions list. It is here that you enter the information about the type of application, the project, its business objectives and description. This screen must be completed before you enter information into the process tabs.
The Processing Tabs
Located on the left side of the profiler, the tabs step you through the input screens to capture information in the profile.
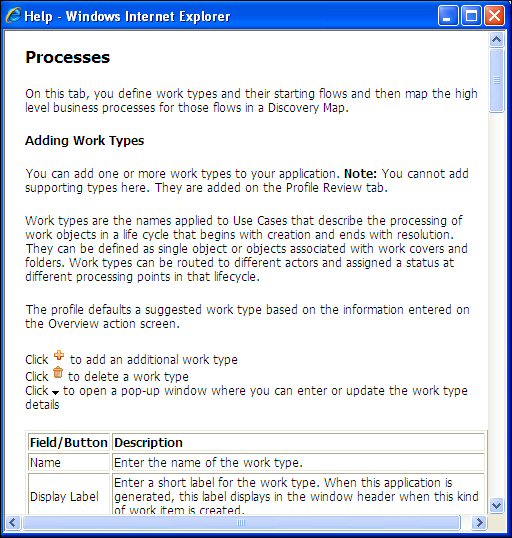
![]() Defines work types and their starting flows and maps the high level business processes for those flows in a Discovery Map
Defines work types and their starting flows and maps the high level business processes for those flows in a Discovery Map
![]() Lists interfaces to external systems that the application will either connect to or be called from as a service
Lists interfaces to external systems that the application will either connect to or be called from as a service
![]() Lists the detail for reports or the estimated number of reports to be created during the project
Lists the detail for reports or the estimated number of reports to be created during the project
![]() Lists the detail for correspondence or the estimated number of correspondence records to be created during the project
Lists the detail for correspondence or the estimated number of correspondence records to be created during the project
![]() Captures a list of project related assumptions that are included in the profile document
Captures a list of project related assumptions that are included in the profile document
 Lists project participants and their roles to identify the anticipated resources needed to implement the project. Participants are listed as Internal Resources or External Consultants. Each group is pre-populated with a generic set of project roles.
![]() Displays categorized groups of use cases for work types and supporting types; you can add and edit the work types and supporting types, use cases and requirements for the work types and supporting types. Click Finish from this tab to resolve the profile and use it as input to the Application Accelerator.
Displays categorized groups of use cases for work types and supporting types; you can add and edit the work types and supporting types, use cases and requirements for the work types and supporting types. Click Finish from this tab to resolve the profile and use it as input to the Application Accelerator.
The Actions list
The action list is located on the right side of the profiler header. It gives you quick access to a number of profile related actions and input screens that you are likely to use while in the profile but that are not directly related to the creation of the profile. Move back and forth between the tabs and action windows by clicking a tab or action.
| Action | Description |
 | Creates a list of actors who perform work in the application. Actors referenced in use cases are entered here. |
 | Creates delegated application profiles when multiple resources need to work on the profile content simultaneously. |
Creates the Application Profile document in Microsoft Word. | |
| Displays as the first input screen when you create a new profile and can be updated at any time by selecting this option. Contains information about the type of application, the project, and business objectives the profile defines. Note: Changing options on this screen while in the process of completing the Application Profile can result in the removal of previously entered information. | |
Creates a list of users who can access and change the profile. | |
Creates and attaches a sizing estimate for the project based on information in the profile and sizing spreadsheet. | |
Creates a zip file of the profile. | |
| Saves work in progress before you exit a window or the profile. | |
| Withdraws the profile. |
Entering Profile Data
Profile data is entered in the Overview window, the actors action, and the processing tabs. To complete the profile:
- Enter the data in the tab or window.
Click ![]() on the header of a tab or the action window to display instructions that can help you complete the tab or perform the action.
on the header of a tab or the action window to display instructions that can help you complete the tab or perform the action.
- Move back and forth between the tabs and actions by clicking a tab or selecting an action from the list.
- Click
 at any time to save work in progress on the current screen. Although detail entered in the profile tabs are is saved automatically as you move from tab to tab, saving work is useful on steps where you enter large amounts of data over a long period of time like the Discovery Map, Work Types, Use Cases, and Requirements.
 - Click
 to resolve the profile with a status of Resolved-Withdrawn. When a profile is in this status it is not available for selection in the Application Accelerator.
 - Click Finish on the Review Profile tab to complete the profile, resolve it and make it available for use by the Application Accelerator.
- Click X in the top right corner of the screen or window to exit the wizard or action. You can modify it later by selecting it from the Profiles in Progress menu option.
Completing the Profile
When you have entered all the data, click Finish on the Profile Review tab to resolve it. The status changes to Resolved-Completed and it is now available for use by the Application Accelerator.
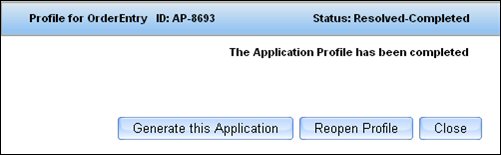
From the resolve window, you can select the following options:
- Generate this Application - displays if your security level allows you to check out rules; opens the Application Accelerator using the profile as the initial input. If you select this option, you should no longer update the profile.
- Reopen Profile- reopens the profile for update
- Close - closes and saves the profile
Creating Profile and Project Sizing Documents
Profile and sizing documents can be created and attached to the profile any time during the life of the project. This enables you to interactively track information gathering progress and content and monitor estimated timelines and project size.
Creating a Profile Document
- Select
 from the action list to display the document window.
- Select
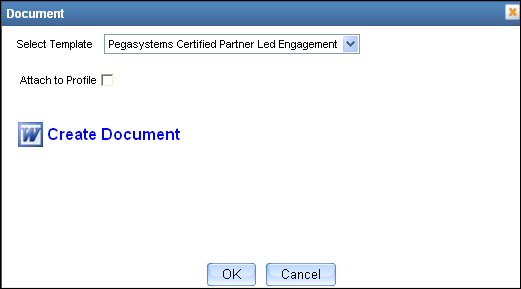
- Select the template.
- Check the Attach to Profile box if you want to automatically attach the document when it is saved.
- Select a document option. Options appear when a profile is created for an application built on a framework or an extension of an application. Indicate whether you want to document the full content of the application or only what is changing or added to the application.
- Click
 to launch Microsoft Word in a separate window.
 - Review and edit the document in Word.
- Save the document.
- Repeat this process when you want to document and save the most current version of the profile.
Estimating the Size of a Project
- Select
 from the action list to display a window that includes a graphic of the estimated timeline for the project phases.
- Select

- Click Create Project Sizing to launch Microsoft Excel in a separate window and display a modeling tool that pulls in information you have entered in the profile.
- When the sizing sheet displays, you can review it, edit the data, and save it to a file.
- When you edit the spreadsheet, do not update values defaulted from data entered through the input steps. Instead, change them in the profile step and create the sizing again.
- Adjustments can be made to the hours and other sizing data fields other than what is captured and defaulted from the profile. Changes are preserved in the sizing document if you attach it to the profile.
- Information not maintained by the profiler can be stored in the spreadsheet.
- When you create a new sizing, the last saved version of the spreadsheet displays.
- Click Attach Project Sizing to attach the spreadsheet to the profile.
- Click OK to save the screen data. Click Cancel to close the window.
- Repeat this process when you want to resize the project and save the most recent sizing estimate..
Customizing Profile Documents
You can create profile documents to meet your company's document styles and standards.
The three default profile documents are defined by the following Word Template rules:
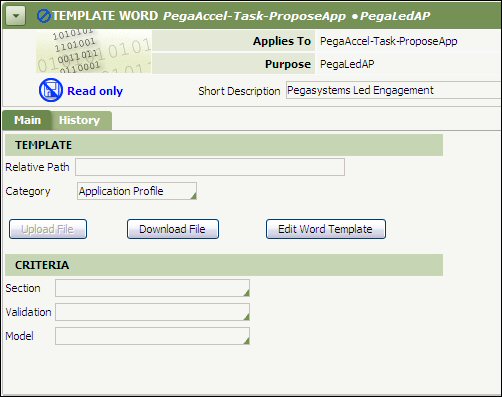
- PegaAccel-Task-ProposeApp.PegaLedAP for Pegasystems-led projects
- PegaAccel-Task-ProposeApp.PartnerLedAP for Partner-led projects
- PegaAccel-Task-ProposeApp-SelfLedAP for Self-led projects
To customize the document:
- In the Search tool located in the header of the Designer Studio, enter the keyword LedAP. Press Enter.
- Perform a Save As to a new name and to a RuleSet that lists the Pega-AppDefinition RuleSet as a prerequisite.
- Enter a short but meaningful description of the template. The text you enter here is the text that displays in the template selection box on the Document step.
- Select Application Profile as the category.
- Click Edit Word Template to display and edit the template.
- Save the template.
- Click Upload File.
- When the load completes, click Save.
For more information about setting up Template rules, see the Knowledge Base article How to use Word Template-based Correspondence Generation.
This article links to the following articles describing features and functions of the DCO 6.1 release.
Upgrading from Older Versions of DCO
Sharing and Merging Application Profiles
Using the Application Accelerator
Using the DCO Application Enablement Wizard
Using the Application Document Wizard
Extending the Document Wizard and Document Templates
Working with Application Use Cases
Working with Application Requirements
Return to About the Direct Capture of Objectives
Previous topic DCO 6.1 - Creating Discovery Maps Next topic DCO 6.1 - Extending the Document wizard