How to create reports that offer users two distinct SmartInfo displays
Summary
You can create a report that allows the report user to display a SmartInfo window using any one of three interactions:
- hovering the mouse pointer over a row
- right-clicking on a value in a row
- clicking a double-arrow at the left of a row.
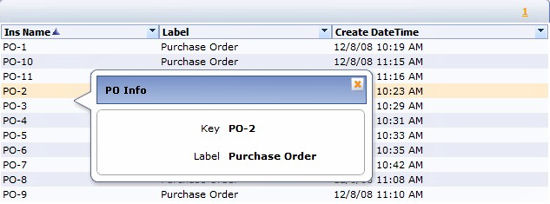
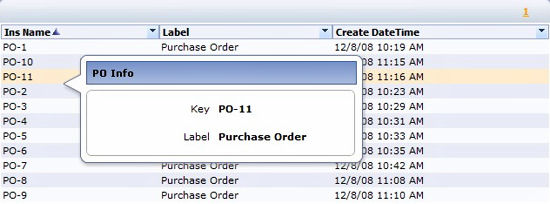
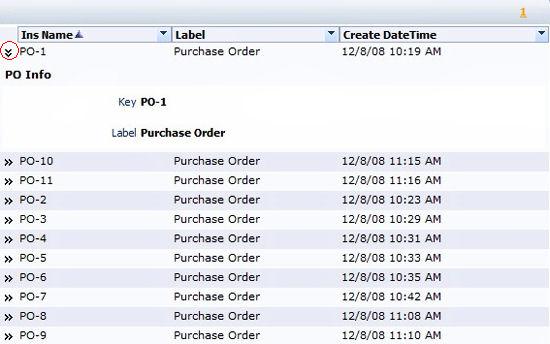
In the first two cases, the SmartInfo window appears as a pop-up. In the third approach, the SmartInfo information is embedded into the report display, below the row.
If you want, your report can provide two distinct SmartInfo displays, one produced by right-click and the other by hovering or clicking the embed arrow.
Suggested Approach
To create a report that uses both a SmartInfo window and also a right-click SmartInfo window:
From the Rules by Type explorer, select Reports > List View.
- Click the New
 button. The New List View or Summary View Rule dialog box displays.
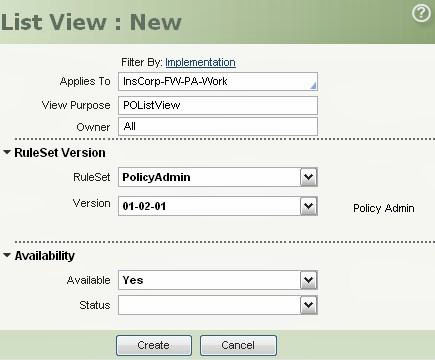
- In the View Purpose field, enter the name of the List View or Summary View rule. Choose the appropriate RuleSet and Version Number and the owner of the report. Then click Create.
- Complete the Display Fields tab, Content tab, and other tabs to define the report criteria and content.
- On the Format tab, under the SmartInfo Settings and the Right Click SmartInfo Settings sections, enter the following information:
- In the Header field, enter a text name for the SmartInfo window.
- In the Content field, identify an activity that will provide the SmartInfo window with data. For example, if the Applies To key part of the report is derived from the Assign- base class, you can reference the standard activity Assign-.getWorkItemSmartInfo. In other cases, you can reference the standard activity @baseclass.getSmartInfo. (Each of these activities references a section rule that determines the content of the SmartInfo display. Override that section rule in your application RuleSet to present the information you want to appear.)
- By default, the first SmartInfo window displays as a pop-up. If you want the window to display inside the list view display itself, check the Embedded? check box.

- Click Save.
If you entered information in the SmartInfo Settings section, a user can display the SmartInfo window at runtime by hovering the mouse pointer over an item.
If the Embedded? check box is checked, the SmartInfo window appears when a user clicks the double arrow icon at the left of the row.
If you completed the Right Click SmartInfo Settings fields, a SmartInfo window appears when a user right-clicks an item.