

         This documentation site is for previous versions. Visit our new documentation site for current releases.      
 

Adding associated static data in the Customer Profile Designer

Updated on May 30, 2022

Associate static data, such as database tables, with profile contexts. For example, you can associate an investment portfolio table with the Account context. You can then use the data source to build engagement policies and as predictors in adaptive models.

Caution: The relationship with associated entities can be one-to-one or one-to-many. Pega Customer Decision Hub does not support many-to-many relationships.
Note: Organizations in the financial services, healthcare, or insurance industries can use the Customer Profile Designer accelerator component to speed up MLP implementation, and as an example for building additional Customer Profile Designer summaries. However, the component is not required for Customer Profile Designer to work, and you can also complete the steps below without installing the accelerator.
Before you begin: In Dev Studio, create a Database Table data set for the associated entity.
  1. Add the data set that you created to profile data sources:
    1. In the navigation pane of the Pega Customer Decision Hub interaction portal, click DataProfile Data Sources.
    2. Click AddData set.
    3. In the Add data set window, select the data set, and then click Add.
  2. In the navigation pane of the Customer Decision Hub portal, click DataProfile Designer.
  3. In the upper-right corner of the Profile Designer landing page, click Edit.
  4. Identify the context with which you want to associate the data set, for example, Account.
  5. In the lower-left corner of the context section, click Add associated data, hover on Data set, and then select the data set from the list.
    Tip: A single data source can only be associated with a single profile context. You cannot associate the same data source with multiple contexts.
    The Add associated data option in Customer Profile Designer
    The Account section with an expanded menu for adding associated data.
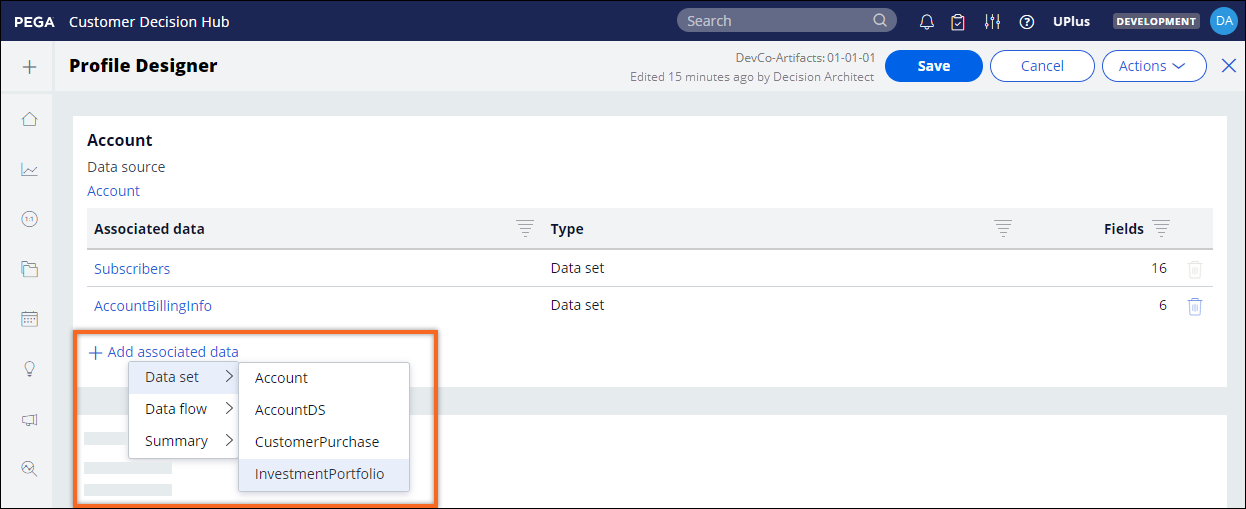
  6. If the data source has multiple keys, in the Data source key list, select the data source key that maps to the context key.
    Caution: The context key is the parent class key of the context entity, for example, CustomerID. For the mapping, select the same key from the associated data source keys.
    For example: If the context key is CustomerID, select CustomerID from the data source keys, as in the following figure:
    Data source and context key mapping
    A window with the data source name, ID, and key mapping.

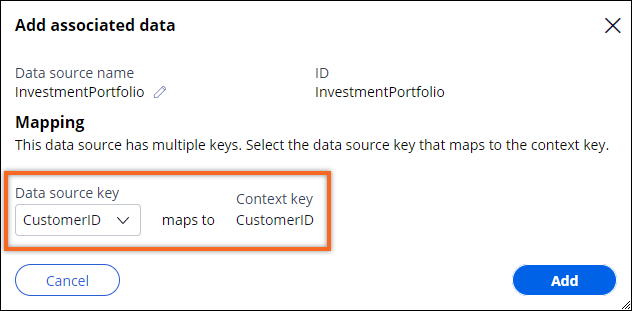
    The mapping creates the association rule and corresponding page or page-list property in the context entity.

  7. Click Add.
  8. Click Save.
    Result: The data set is now associated with the context:
    Context and the associated data

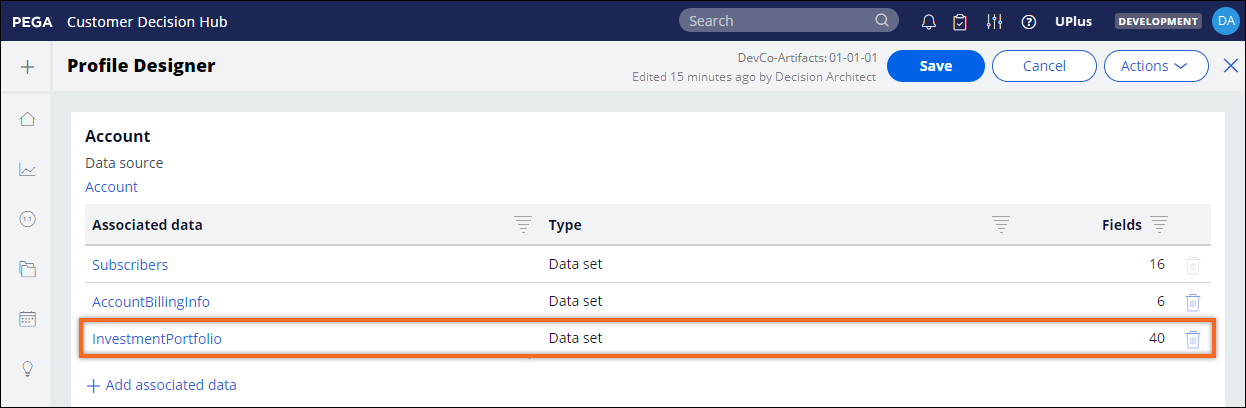
    You can review the updated context in the Context Dictionary. To view the Context Dictionary, go to App Studio, and then in the navigation pane, click SettingsContext Dictionary. The data set that you associated with the context is now listed in that context's section:

    Newly associated data in the Context Dictionary
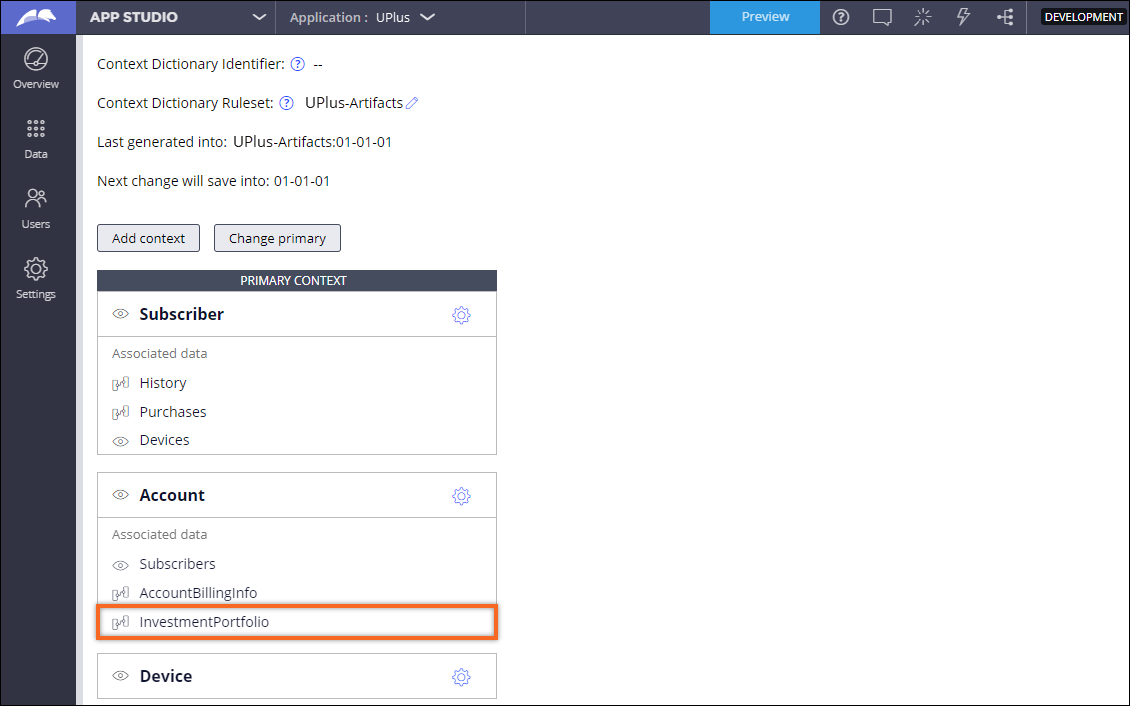
    The Context Dictionary in App Studio contains three contexts with associated data.
What to do next: For a property on an associated entity to be available as criteria in a segment, it must be added to the External Mappings of the appropriate context class.

Have a question? Get answers now.

Visit the Support Center to ask questions, engage in discussions, share ideas, and help others.

Did you find this content helpful?

Want to help us improve this content?

We'd prefer it if you saw us at our best.

Pega.com is not optimized for Internet Explorer. For the optimal experience, please use:

Close Deprecation Notice
Contact us