Adding a post-chat survey report to the Dashboard
Start analyzing customer responses as the web chatbot summarizes survey results, by adding a survey report widget to your Dashboard.
Pega Customer Service
Implementation Guide
To add a survey report widget to the dashboard, perform
the following steps:
- Log in to the Interaction Portal.
- On the left-hand side of the Home page, select Dashboard.
- In the top-right corner, select the Personalize dashboard icon to display slots in which you can add report widgets.
- In the Customer Satisfaction Dashboard section, select
Add widget(s) to display the Add widgets
to slot dialog box. You can add a report widget to a slot in which a report already exists, or delete the existing report in the slot and then add the new report widget.
- In the Add widgets to slot dialog box, under the
CUSTOMER SERVICE category, choose a report to add to
the slot:
- CES for chat-Summarizes customer ease of interaction scores.
- CSAT for chat-Summarizes customer satisfaction scores.
- NPS for chat-Summarizes customer Net promoter scores.
- Select the report that corresponds to the survey type configured in the App
Studio Post-chat survey setting, and then click Add
selected.The figure below shows each report type in a slot:
OOTB survey reports added to slots 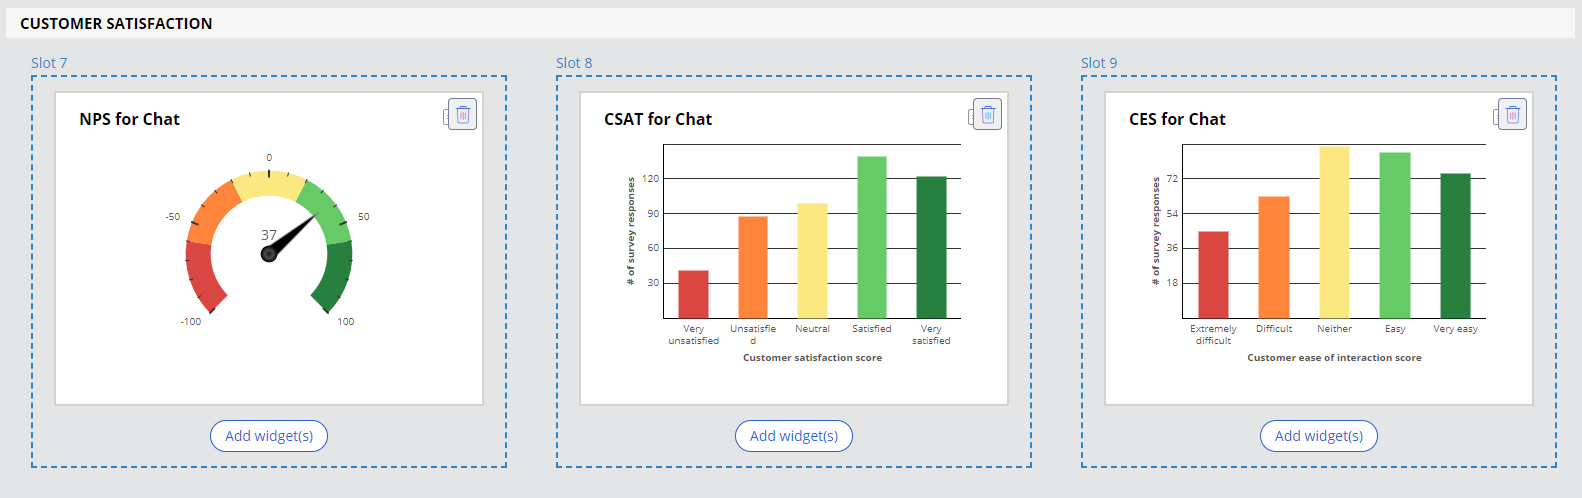
- To save the added survey report widget to the Dashboard, click Publish.
Previous topic Displaying knowledge articles for a service case Next topic Chat security and infrastructure (Appendix)