Private Data API for secure data transmission
The Private Data API allows private or sensitive data transmission related to a customer's chat session from your premises to your Pega instance using the Digital Messaging Service. After the API transmits the data, Pega applications can use such data in custom integrations, or CSRs can visualize or consume that data.
General requirements
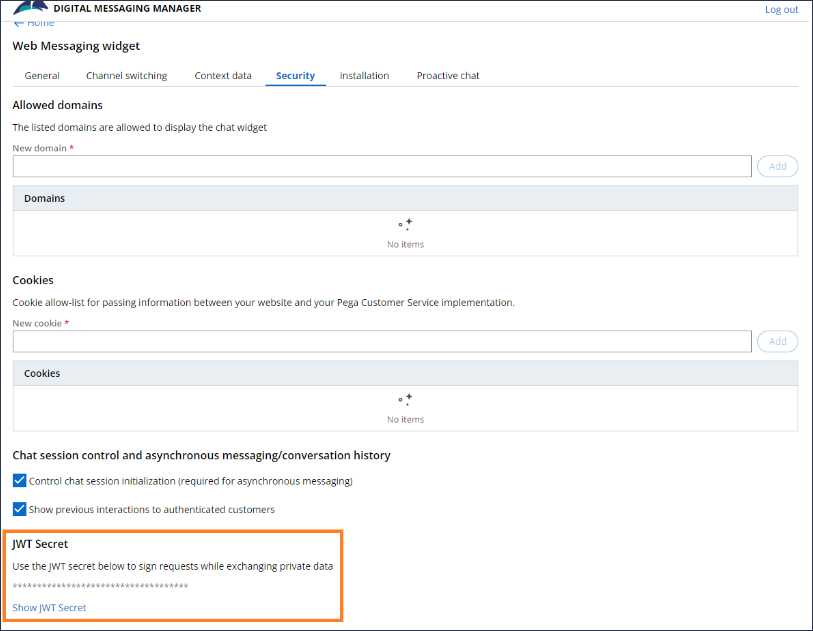
- You are responsible for signing every request with a valid JWT signature. Your JWT Secret is available in your Digital Messaging Manager settings. For more information, see
- When exchanging data, your premises must use JSON format for all payloads.
Customer authentication using private data
Your Customer Service application stores the private data exchanged as key value pairs in the pyCustomerPrivateData property.
For every message from the customer, the Pega Customer Service application calls the pyPreProcess activity, which can access the pyCustomerPrivateData property.
Authenticating customers
Configure the pxAuthenticate activity in the pyPreProcess activity to authenticate the customer. You can get access to the Private Data API details in the Pega Customer Service application using the key-value pairs in the pyPreProcess activity in Dev Studio.
- Log in to Dev Studio.
- In the search box, search for the pyPreProcess activity of the Work-Channel-Interaction class, and then open the activity.
- On the Steps tab of the pyPreProcess
activity, perform the following steps:
- In the Step 2.1 when rule, depending on the key that you use, you get
the corresponding value which is set up in the step as shown in the
following figure:
Configuring key value 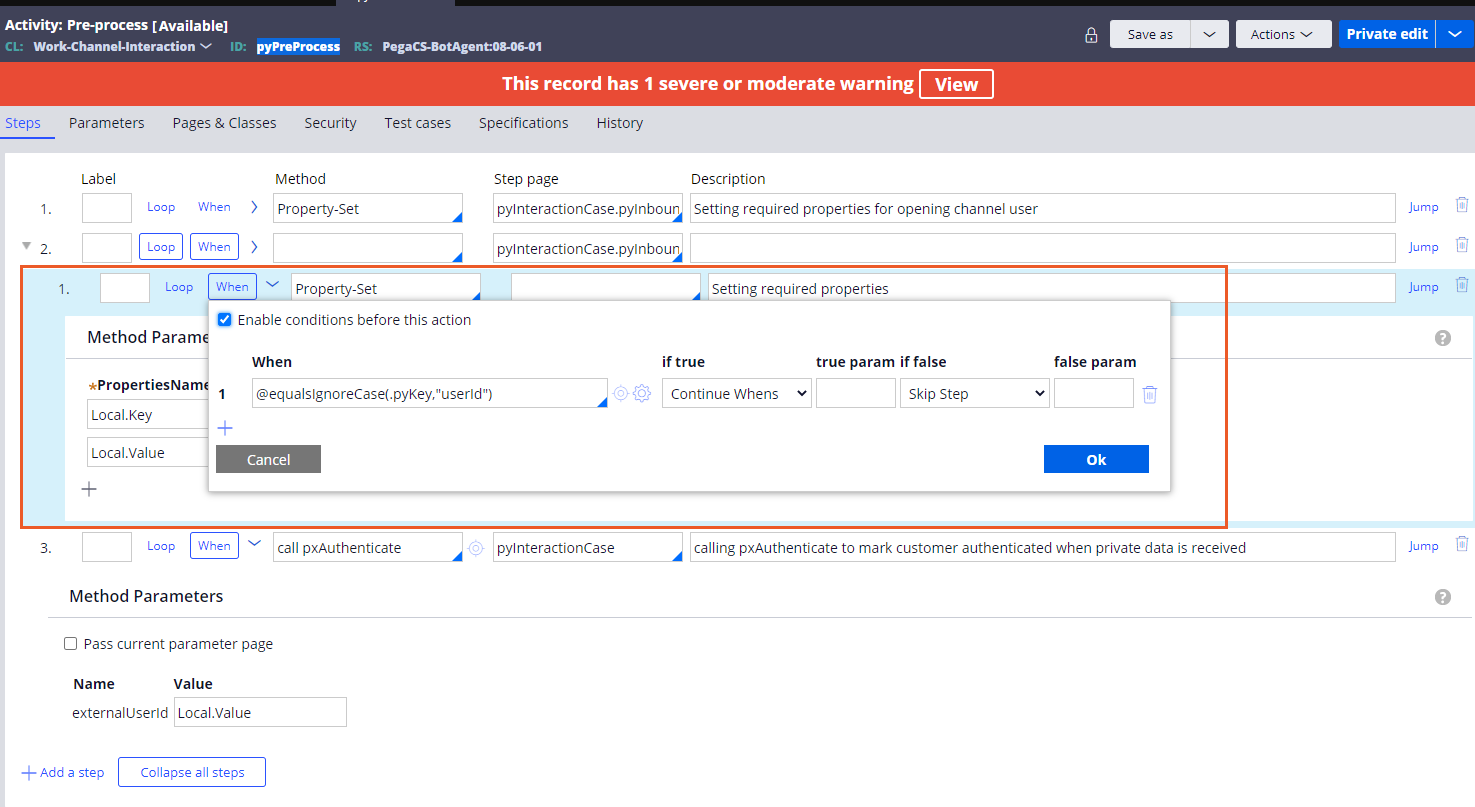
- In the Step 3 when rule, the system displays the pxAuthenticate
activity. The pxAuthenticate activity is to invoke authentication.
Note: After the externalUserId value is identified, pxAuthenticate is invoked with the value of the externalUserId as a parameter to mark the customer as authenticated when the system sends the private data. Passing externalUserID parameter value 
Note: After the authentication is successful, the system calls the pyOnAuthenticationsuccess extension point, which can be overridden by adding your logic. The pyOnAuthenticationsuccess is available in the pxAuthenticate activity as shown in the following figure: pyOnAuthenticationSuccess extension point 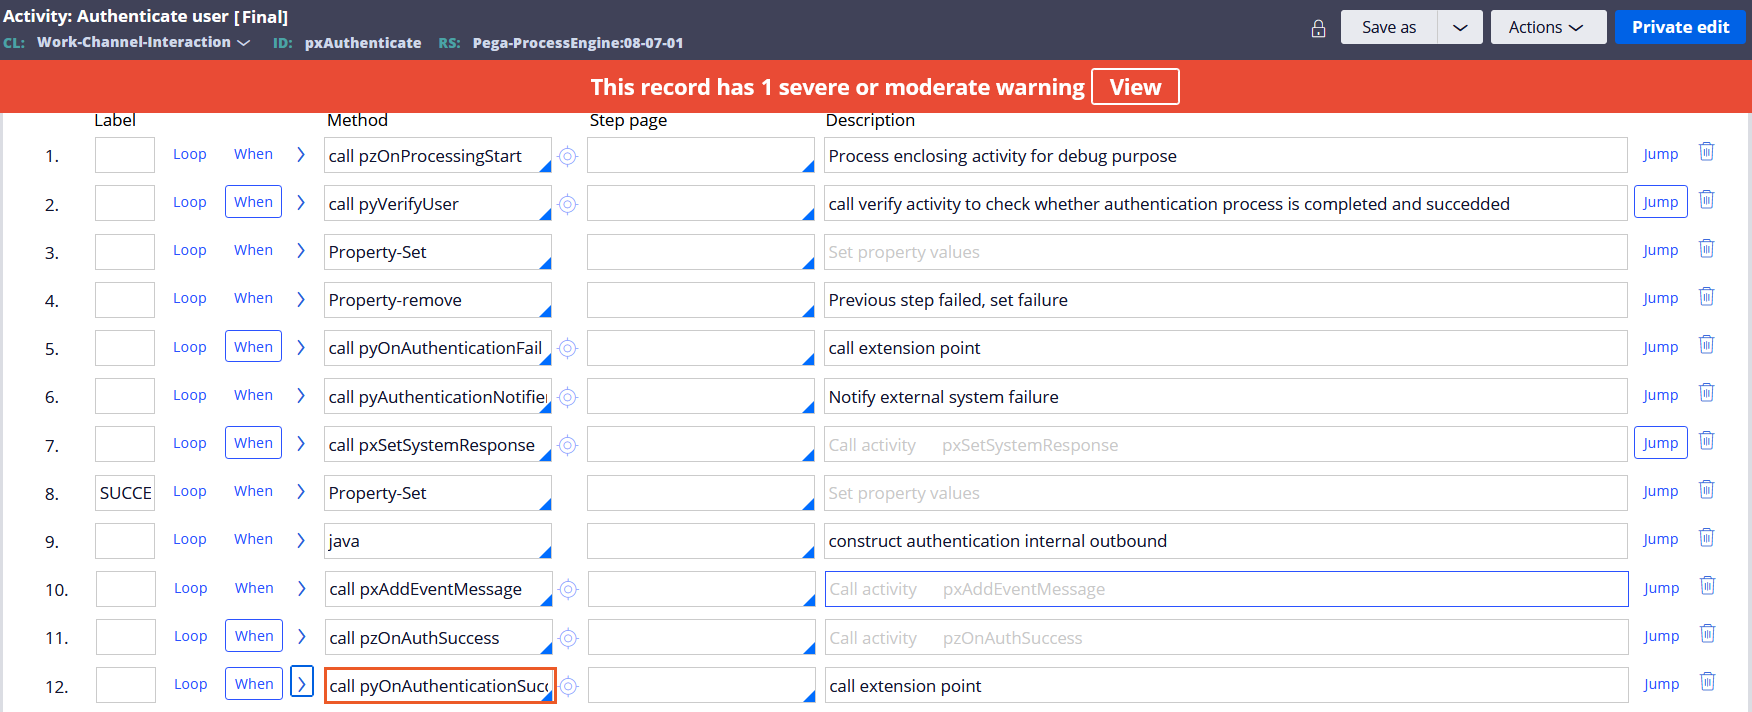
- In the Step 2.1 when rule, depending on the key that you use, you get
the corresponding value which is set up in the step as shown in the
following figure:
Configuring private data exchange using Private Data API
To use the Private Data API with Mobile Messaging SDK, perform the following tasks:
Retrieve the current chat session ID in a Mobile Messaging SDK Android app
When you set the sessionIdCallback field as part of the chat configuration, the SDK sends the sessionId that you can use in the Private Data API.
Whenever the customer starts a new chat session by clicking on the chat bubble, the Mobile Messaging SDK will trigger sessionIdCallback.
The callback receives the current session id as a string parameter. The following code is an example of how to set up the callback on your app where the SDK is running:
    override fun configuration() = ChatConfiguration(
    apiUrl = "…",
    apiId =”…”,
    customerToken = "…",
    sessionIdCallback = ::sessionId
)
fun sessionId(id: String) {
    Log.d("Session ID", "Session ID received $id")

} | Parameter | Optional/Required | Description |
| apiURL | Required | URL of the API |
| apiId | Required | A unique identifier for the API |
| customerToken | Required | A unique identifier for the customer. |
| sessionIdCallback | Required | A parameter that the callback function receives when the app invokes sessionIdCallback. |
Retrieve the current chat session ID in a Mobile Messaging SDK iOS app
When you set privateDataDelegate: PDMPrivateDataDelegate of the PDMChatViewController class to a viewController and implement the sessionInitialized delegate method, the SDK sends the sessionId that you can use in the Private Data API.
- Assign privateDataDelegate of PDMChatViewController to your viewController .
- Have the required view controller conform to the PDMPrivateDataDelegate
- Implement the sessionInitialized function.
Whenever the customer starts a new chat session, the Mobile Messaging SDK will trigger the sessionInitialized callback method.
The callback receives the current session id as a string parameter. The following code is an example of how to set up the callback on your app where the SDK is running:
public protocol PDMPrivateDataDelegate: AnyObject {
    /// A method you can implement to be notified when session is initalized

func sessionInitialized(sessionID id: String) {...}
}
Generate a JWT to sign your request
To generate the JWT when issuing requests to the private data endpoint, you need the chat sessionId (retrieved in the callback) and the JWT Secret. You use the session id as the issuer (iss) parameter. Your JWT Secret appears in your Digital Messaging Manager settings, on the Security tab.
- Ensure to maintain the confidentiality and security of your JWT Secret.
- You must include JWTs in every request that is made to the Private Data API.
- The maximum age accepted for the JWT is 5 minutes.
The following code is an example of how to create a JWT using the JavaScript library jsonwebtoken:
var jwt = require("jsonwebtoken")
const token = jwt.sign({iss: "session_id"}, 'jwt_secret');
Invoke the Private Data API to exchange information
The following code shows how the Private Data API can transmit the private or sensitive data from your premises to your instance using the Digital Messaging Service in a secure way:
HTTP Endpoint: apiUrl/private-data (e.g https://widget.use1.chat.pega.digital/private-data)
Method: POST
Required header params: authorization: Bearer JWT
Body: JSON Payload
All requests to the private-data endpoint must be JWT signed.
The endpoint varies according to the Digital Messaging Service region for which your credentials were provisioned:
- Canada (CA): https://widget.ca.chat.pega.digital/private-data
- Europe (EU): https://widget.euw1.chat.pega.digital/private-data
- United Kingdom (UK): https://widget.uk.chat.pega.digital/private-data
- United States (US): https://widget.use1.chat.pega.digital/private-data
The following code is an example of how to transmit private data using the generated JWT:
PegaUnifiedChatWidget.onSessionInitialized = (sessionId) => {
// your custom logic to handle the sessionId
// this operation needs to be performed on your back-end, after receiving a sessionId.
      var privateData = {
              customerId: “[email protected]”,
              package: “standard”
}
var token = jwt.sign({ iss: sessionId }, JWT_SECRET);
var url = “https://widget.use1.chat.pega.digital/private-data”
fetch(url, {
    method: 'POST',
    body: JSON.stringify(privateData),
    headers: {
      'Content-Type': 'application/json',
      'authorization': 'Bearer ' + token},
   }
);
Receive private data with customer messages
If the private data exchange call is successful, all the customer chat messages that the Private Data API delivers to your instance should contain the private data as follows:
{
    "content": {
        "text": "Hi, I need help with my order"
    },
    "customer_private_data": {
        "customerId": “[email protected]”,
        "package”: “standard”
    },
     ...
}
Previous topic Mobile Messaging SDK configuration in your iOS app project Next topic Setting up social channels