Creating content
As an author, you can create content by defining key attributes such as content title, abstract, category, and publication date. The status of the content is assigned as New-Draft and remains in this status until you click Submit to advance the content to the Approval stage. After submitting the content for approval, the status changes to Pending-Approval. At any time during the creation process you can save the article as a draft to continue working on it before submitting for approval.
Pega Knowledge supports two types of content:
- Authored (You add and format text manually).
- URL (You create a link to external content. Clicking the article name opens the URL content).
- From the Knowledge portal, click Knowledge > Content.
- On the Knowledge Content landing page, click New content. A
New-Draft version is created to enter the details, as in the
following example:
- In the Title field, enter a clear and concise title for your
content. When you enter the article title and move to the next field, the application automatically searches for and displays the titles of any articles with the same or similar title. If you identify duplicate content, click Resolve as duplicate to close the new article you were about to create. To continue creating the article, click Continue, and then modify the article title if necessary.
- In the Abstract field, enter a brief description for your content.
- In the Categories section, click Add category to select the taxonomy category to which the content belongs. You can select multiple categories for the same content.
- Add text in the Content section by using one of the following
methods:
- To add and format text manually, enter text in the rich text editor. To include reusable text snippets in your content, see Using snippets.
- To add a source URL that links to the content, select URL in the Content type drop down box, and then enter the content URL details in the Content Source URL text field, as in the following example:

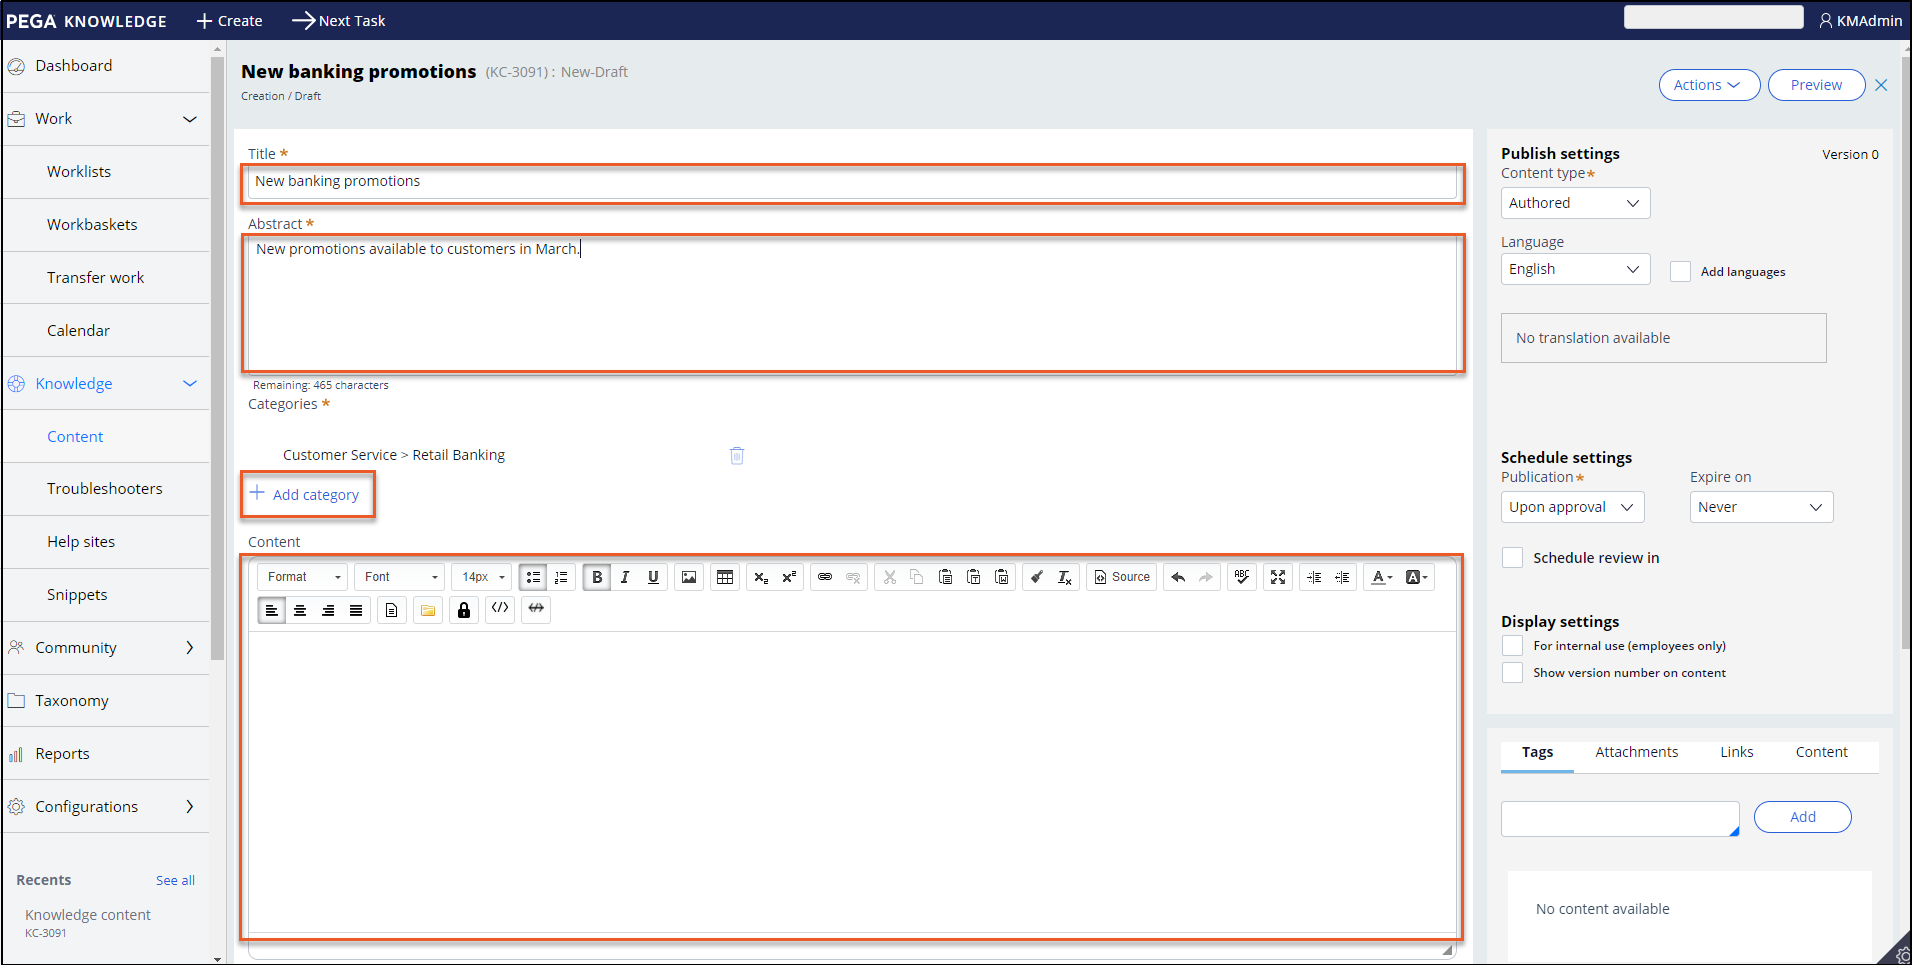
- Click the Language drop down box under Publish settings to select the default language for the article.
- If you plan to post a translated version of this article in one or more additional languages, select the Add languages check box. If this article will not be translated, continue to step 11.
- Click the New translation link that appears, select a language,
click Add, and then click Submit. You can
select multiple languages.
 When you publish the article, Pega Knowledge creates cloned draft versions of the original article that can be translated into the selected languages. The draft articles are routed to the Knowledge Content - Translations work basket, where an author can translate it to the specified language or export it to a CSV file to send to a vendor for translation. For more information, see Multi-language management.
 - Configure when you want to publish and archive the article. By default, the article
will be published upon approval and will never be archived.

- To publish the article at a specified time - In the Publication drop down box, select At selected time, and then click the calendar icon that appears to select a date on which you want to publish the article.
- To archive the article on a specific date - Click the Expire on drop down box, select At selected time, and then click the calendar icon that appears to select a date. The article will be automatically archived on this date and will no longer be available to end users.
- Optional: To set up an automatic content review notification in a specified time period
(for example, 6, 12, or 18 months), select the Schedule review in
check box, and then select the time period from the drop down box that appears. On the
scheduled review date, a notification is automatically emailed to each author in the
system with a valid email address, and the articles are routed to the
Pending-Publish work basket.To send email notifications, the related Pega Knowledge email account must be configured and active. For more information, see Configuring email accounts in the Pega Knowledge Implementation guide.
- Configure who can view this content and whether to show the version number on the
content:

- For internal use (employees only) – select this check box to make this content visible only to employees. Note that other Pega Knowledge security restrictions, if specified in the associated Taxonomy category, are also applied to employees. For more information, see Defining security.
- Show version number on content- select this check box to show the version number on the content page viewed by end users.
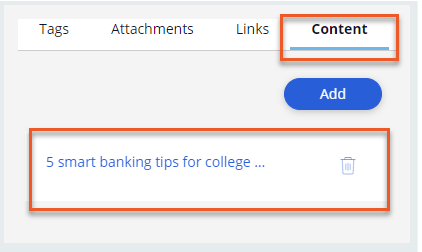
- Optional: You can add tags, attachments, links to internal or external web sites, and
references to other Pega Knowledge articles to your content. These references are useful
for providing information related to your content. After adding a reference on any of
these tabs, the item that is referenced displays when you select the tab, as in the
following example:
- To add tags to the article, click the Tags tab and begin entering a tag name. The text box shows a list of tags to choose from. Select a tag and then click Add. You can select more than one tag. You can also enable auto-tagging. For more information, see Enabling auto-tagging.
- To add attachments to the article, click the Attachments tab, and then click Add. On the Attach file(s) dialog box, click Select file(s) to browse for a file, or drag-and-drop a file in the designated area. Click Attach.
- To add a link, click the Link tab, and then click Add. In the Attach a link dialog box, enter a name for the link, and then enter the URL. Click Submit.
- To add a reference to a related article, click the Content tab, and then click Add. In the Add article references page, select the articles that you want to reference, and then click Submit.
- If the content is ready for submission, click Submit to move the content to the Approval stage and change the status to Pending-Approval. If the content is not ready for submission, click Save Draft to save the draft content and continue working on it later.
Previous topic Defining security Next topic Publishing content