Pega Process Extender for SAP Business Suite
The Pega Process Extender for SAP Business Suite allows PRPC applications to work seamlessly with your SAP R/3 (ECC) and NetWeaver systems.
Use Connect-SAP rules in your PRPC application to connect to an existing SAP SOAP web service. Create Service-SAP rules in your PRPC application when you want to allow an SAP system to connect to PRPC using SOAP web service protocols.
Pega also provides support for the SAP Java Connector Architecture (JCo) with Connect-SAPJCo and Service-SAPJCo rules.
The PRPC Connector and Metadata Accelerator can automatically generate Connect-SAP connectors using an SAP WSDL specifying Business API calls used by the target SAP system. Connect-SAPJCo connectors can be generated with the accelerator by providing the appropriate JCo Java class.
The Pega Process Extender for SAP Business Suite is designed for both traditional SAP R/3 (ECC) application integration as well as SAP NetWeaver application integration.
This article describes how to create:
Connect SAP Connector
This section describes how to:
- Create a Connect SAP connector using the Connector and Metadata Wizard
- View the Connect SAP connector in Designer Studio
Creating a Connect SAP connector using the Connector and Metadata Wizard
NOTE: Connect-SAP connectors are SOAP-based and generated by the wizard the same way as a SOAP connector. Refer to "About generating connector rules" in the Developer Help for details on entering information in tabs other than the Service tab.
- Click the
 .
. - In the Purpose field, select Generate Connector Rules.
- In the Metadata Type field, select SAP WSDL File.

- In the Where would you like to build it? section, select appropriate RuleSet and Class information.
- Click Next >>.
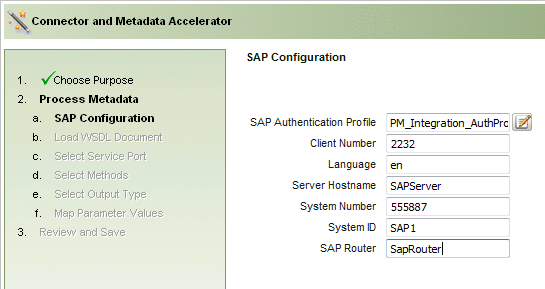
- On the SAP Configuration page, select an SAP Authentication Profile. This profile is created using in Rules Explorer to enable authentication (HTTP Basic or NTLMv1).
- Enter values in the fields Client Number, Language, Server Hostname, System Number, System ID, and SAP Router appropriate for obtaining connection to your target SAP system.
Note: These values are only for documentation purposes of collecting the SAP-specific information and are reserved for future use. - Click Next >>.
- On the Load WSDL Document page, specify the location of your WSDL file (URL or local path) or paste the document content.
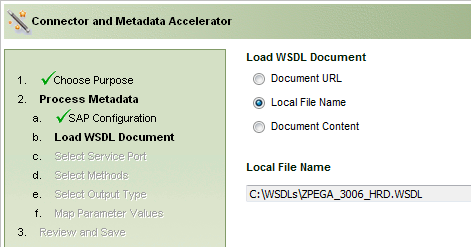
- Click Next >>.
- Select the methods for which you want to generate connectors and click Next >>.
- Continue through the wizard as for SOAP connectors: Select the output type, map request and response parameters for the methods. Review generated rules and click Finish.
View the Connect SAP connector in Designer Studio
- In the Rules Explorer, expand Integration-Connectors.
- Click Connect SAP.
- Click your connector and verify the values in the SAP Configuration section. These values are read-only.
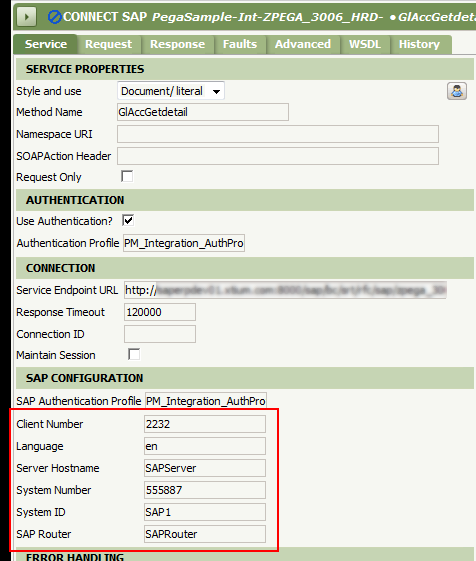
Note: The SAP Configuration values are only for documenting the collection of SAP-specific information and are reserved for future use.
Service-SAP Service
This section describes how to:
Create a PRPC Service SAP web service and WSDL
You can create an SAP Service in Rules Explorer, then create and deploy a WSDL for the service using the Service Package feature.
Create a PRPC Service SAP web service
NOTE: Service SAP services are SOAP-based and defined the same way as a SOAP service. Refer to "About Service SOAP rules" in the Developer Help for details on entering information in tabs other than theService tab.
- In the Rules Explorer, expand Integration-Services.
- Right-click Service SAP and click New.
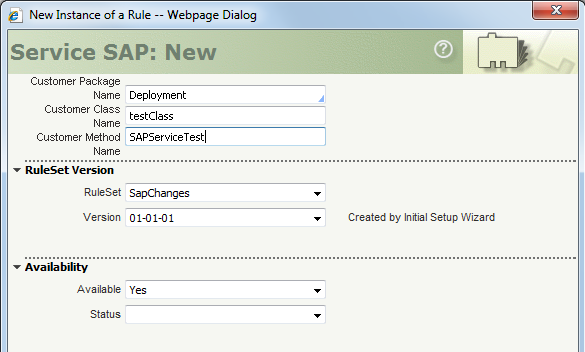
- In the Customer Package Name field, select the name of the service package (instance of the Data-Admin-ServicePackage class); this package groups related Service rules. Choose a name already defined through a Service Package data instance.
- In the Customer Class Name field, enter a class name to logically group related methods. This name need not match the PRPC class that the activity belongs to, but must be a valid Java identifier.
- In the Customer Method Name field, enter an identifier that describes the function of the PRPC activity that the service calls.
- Enter the appropriate values in the RuleSet and Version fields.
- Enter Availability information as needed.
- Click Create. The new rule is shown here.
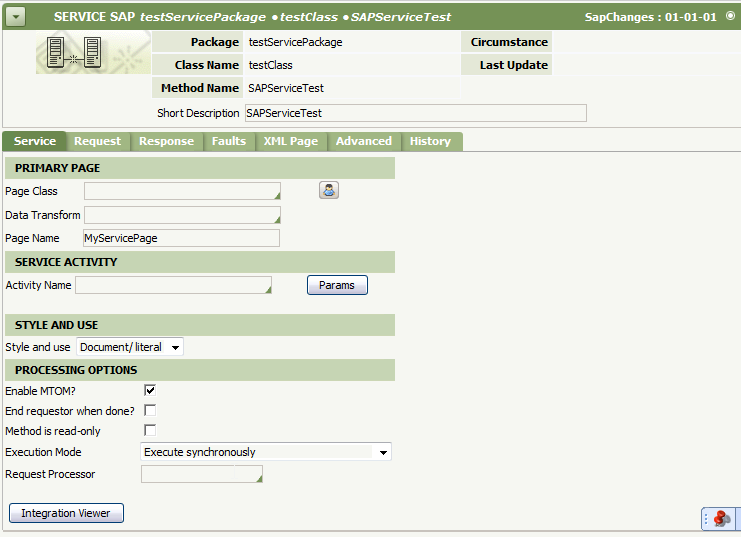
- On the Service tab, enter the appropriate information in the Primary Page, Service Activity, Style and Use, and Processing Options sections. These fields work the same as those in SOAP services.
- Complete the remaining fields in the Service SAP tabs as needed and save the service.
Deploy an SAP WSDL with Service Package
Specify an SAP WSDL to be generated by Service Package using the Deployment tab. For information on working with Service Packages, refer to About Service Package data instances in the Developer Help.
- In the Rules Explorer, expand Integration-Resources.
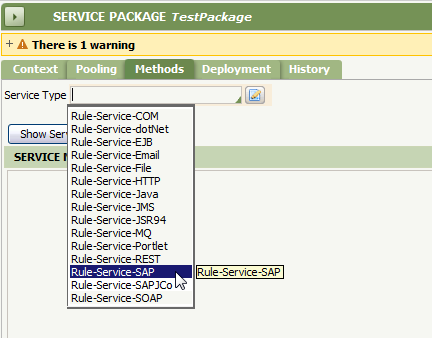
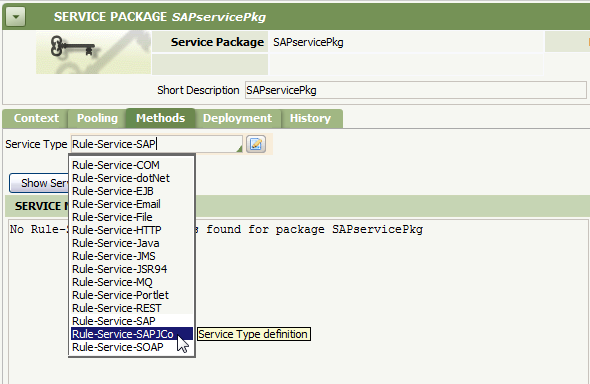
- Click Service Package to display a list of available Service Packages instances.
- Select a Service Package.
- On the Methods tab, in the Service Type field, select Rule-Service-SAP.
- On the Deployment tab, in the Deployment Type field, select SAP WSDL.
- Select the Service Class.
- Click Generate Deployment Files.
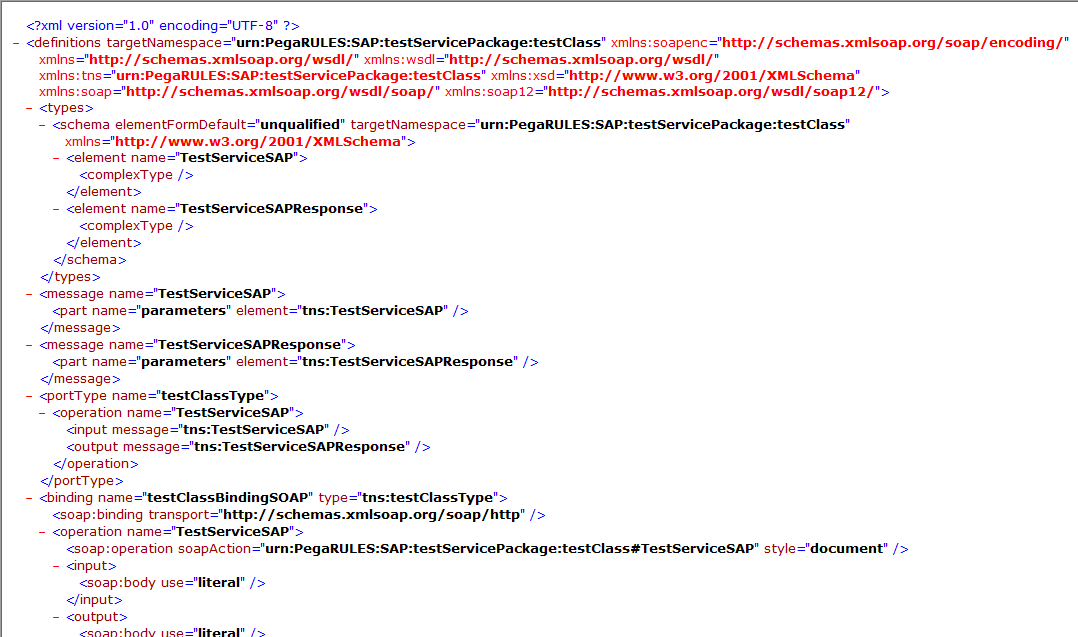
- In the Deployment Results section, click the link to the WSDL location.

- The system displays the WSDL in a new browser window. Verify the file was generated appropriately.
You can invoke this service from an SAP R/3 (ECC) or NetWeaver Process Integration environment.
Connect SAPJCo Connectors
This section describes how to:
- Download prerequisite software from the SAP Service Marketplace before you begin
- Create a Connect SAPJCo connector using the Connector and Metadata Wizard
- View the Connect SAP JCo connector in Designer Studio
Overview
The Java-based (JCo) Connect-SAPJCo rules connect to SAP systems using SAP JCo3. The connector requires software provided by SAP, which includes Java archive (JAR) files to be included in PRPC's classpath, and a dynamic link library (DLL) used by your Java Virtual Machine (JVM). See the "Before you begin" section below for information on downloading files from SAP's Service Marketplace. Note that access to the site requires an SAP customer account and user logon.
Once you have the prerequisite SAP software, create a Java class (or multiple classes) for consumption by the Connector and Metadata Accelerator. These classes (JAR files) contain the method(s) that correspond to the SAP methods (BAPIs) responding to PRPC's requests. If you are creating a connector for a specific PRPC method, you will need a specific Java class for each method. In every case, you must also have the SAP-supplied file sapjco3.jar in your PRPC runtime.
The Connector and Metadata Accelerator parses your Java class for method names, and you can select which should be included in your connector. Lastly, you modify the connector in its rule form to set the Java class constructor and set object initialization.
Before you begin
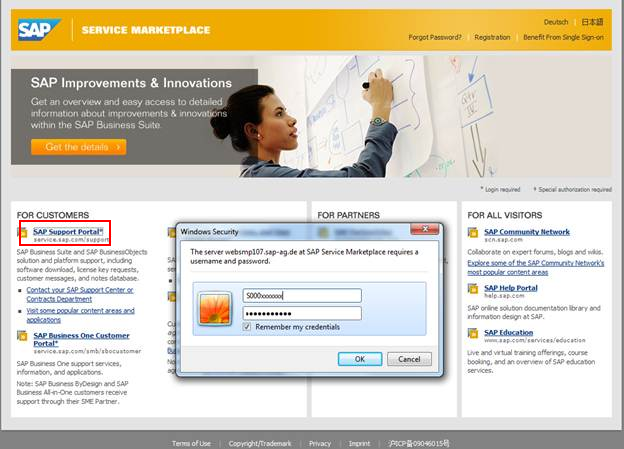
Follow these steps to download the SAP software from the SAP Service Marketplace. If necessary, create an account for the marketplace.
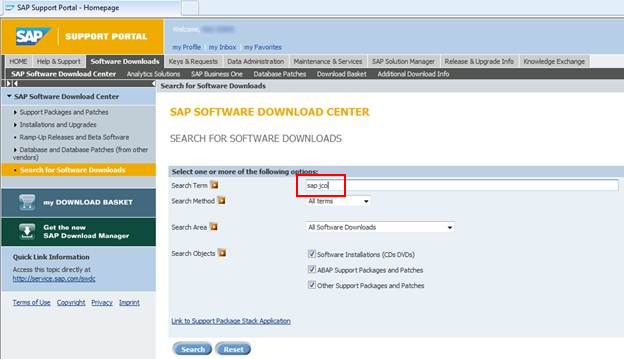
- Browse to the SAP Service Marketplace website and click the SAP Support Portal link. Enter your SAP S-number and password.
- On the Software Downloads tab, click Search for Software Downloads in the left pane. In the Search Term field, enter sap jco and click Search.
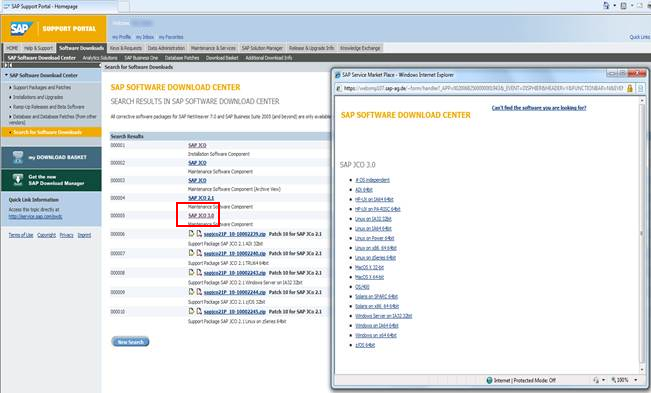
- Click the SAP JCO 3.0 link and click the link for your operating system.
- After the system downloads the zip file, create a directory, for example, C:\SAPJCo.
- Extract the JCo zip files to the folder.
- Add the file sapjco3.jar to the classpath for PRPC's production server.
- Add the folder containing sapjco3.dll to the JVM argument java.library.path. For example, if sapjco3.dll is in folder C:\SAPJco, your JVM argument should be: -Djava.library.path=”C:\sapjco”
Overview - Connect-SAPJCo
For Connect-SAPJCo, you:
- Create one or more Java classes containing one or more PRPC methods corresponding to the SAP BAPIs used for your operation.
- Use the Connector and Metadata Accelerator to choose the PRPC methods to include in the connector.
- Provide the JAR files containing the Java class for your connector and the JCo library in the PRPC classpath.
- Create and deploy a Service Package containing your proxy Java interface.
The Connector and Metadata Accelerator generates a connector activity you can use in an integrator flow to initiate connection with the SAP system.
Creating a Connect SAP-JCo connector using the Connector and Metadata Wizard
You must provide the Connector and Metadata Accelerator with a Java class specifying the SAP system's BAPIs that correspond to your PRPC application's methods (RFCs). This file implements the JCoServerFunctionHandler and the coding to be executed when RFCs from your application are received by the SAP system.
You can create one Java class for a single method and connector, or define multiple methods in one Java class and choose which methods the generated connector will execute.
NOTE: Connect-SAPJCo connectors are Java-based and generated by the wizard the same way as a Java connector. Refer to "About Connect Java rules" in the Developer Help for details on entering information in tabs other than the Service tab.
- Click the .
- In the Purpose field, select Generate Connector Rules.
- In the Metadata Type field, select SAP JCo Class.
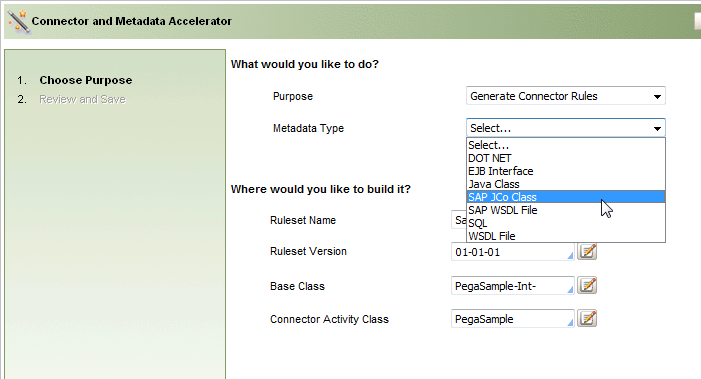
- In the Where would you like to build it? section, select appropriate RuleSet and Class information.
- Click Next >>.
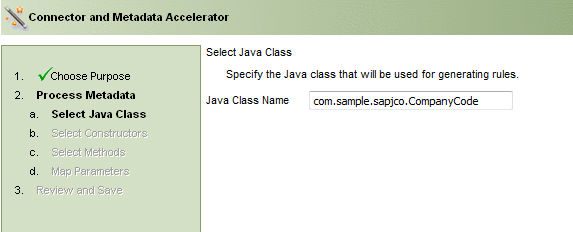
- Enter the fully qualified class name of the Java class that will specify the PRPC methods corresponding to your SAP system's inbound RFCs. Click Next >>.
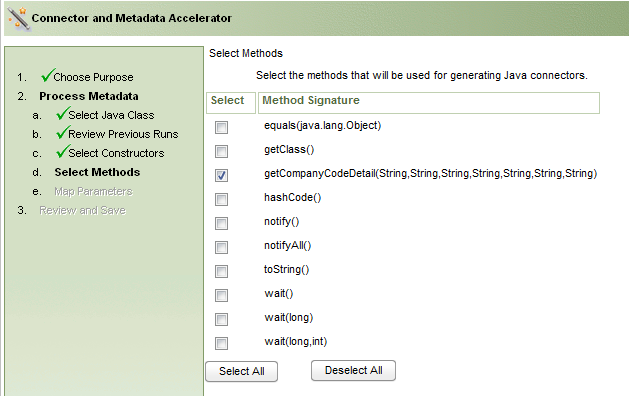
- Select the constructor.
- Select the methods to be included in the connector.
- Continue through the wizard as for other Java connectors: Select the output type, map request and response parameters for the methods, review generated rules and click Finish.
View the Connect SAP JCo connector in Designer Studio
- Access Rules Explorer and expand Integration-Connectors.
- Click Connect SAPJCo. In the Instances panel, click your connector to display its rule form.
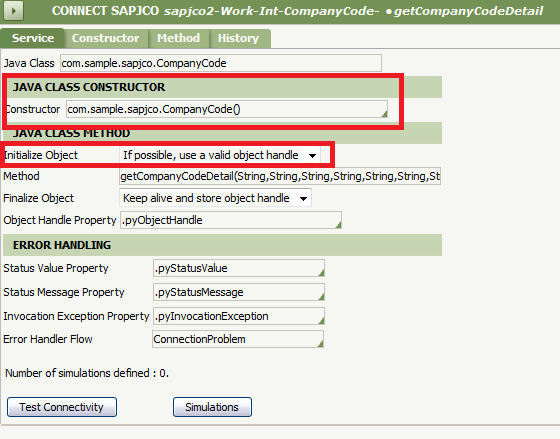
- In the Java Class Constructor section, select the constructor for your connector from the Constructor field.
- In the Initialize Object field, select "If possible, use a valid object handle" or "Create a new object every time".
- Save the Connector.
Service-SAPJCo Service
This section describes how to:
- Create a PRPC Service SAPJCo Service
- Deploy a proxy SAPJCo Java interface with Service Package
To create a Service-SAPJCo service, you must download prerequisite software from the SAP Service Marketplace as described in the before you begin section above.
Create a PRPC Service SAPJCo Service
NOTE: Service SAPJCo services are Java-based and defined the same way as a Java service. Refer to About Service Java rules in the Developer Help for details on entering information in tabs other than the Service tab.
- In the Rules Explorer, expand Integration-Services.
- Right-click Service SAPJCo and click New.
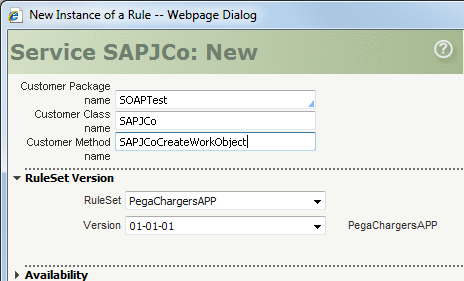
- In the Customer Package Name field, select the name of the service package (instance of the Data-Admin-ServicePackage class); this package groups related Service rules. Choose a name already defined through a Service Package data instance.
- In the Customer Class Name field, enter a class name to logically group related methods. This name need not match the PRPC class that the activity belongs to, but must be a valid Java identifier.
- In the Customer Method Name field, enter an identifier that describes the function of the PRPC activity that the service calls.
- Enter the appropriate values in the RuleSet and Version fields.
- Enter Availability information as needed.
- Click Create.
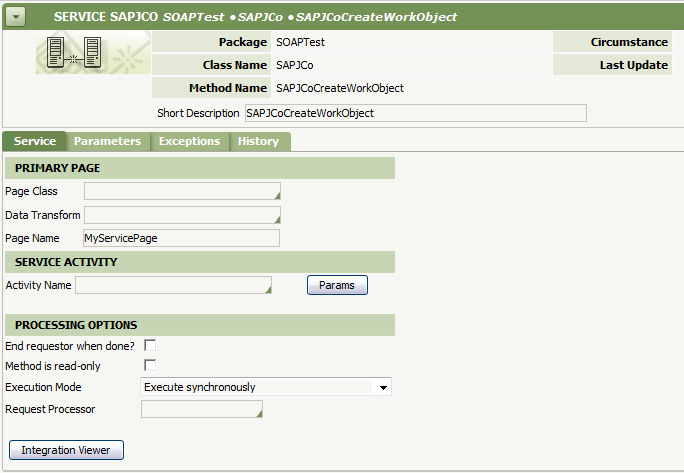
- On the Service tab, enter the appropriate information in the Primary Page, Service Activity, Style and Use, and Processing Options sections. These fields work the same as those in Java services.
- Complete the remaining necessary fields in the Service SAP tabs as required and save the service. Refer to About Service Java rules in the Developer Help for more information.
Deploy a proxy SAPJCo Java interface with Service Package
Service Package can generate a proxy JAR file, using the Deployment tab. You can download and place the JAR in the PRPC classpath. For information on working with Service Packages, refer to About Service Package data instances in the Developer Help.
- In Rules Explorer, expand Integration-Resources.
- Click Service Package to display a list of available Service Packages instances.
- Select a Service Package.
- On the Methods tab, in the Service Type field, select Rule-Service-SAPJCo.
- On the Deployment tab, in the Deployment Type field, select SAPJCo.
- Select the Service Class.
- Click Generate Deployment Files.
- In the Deployment Results section, click the link to the file location.
- The system displays a link to the Java proxy class. Click the link to verify the file was generated appropriately.
- Place the JAR file in the PRPC classpath.
You can invoke this service from an SAP R/3 (ECC) or NetWeaver Process Integration environment.