Configuring search properties
You can dynamically configure which properties are available on the search screens for plan entities as per the user's role.
Pega Product Composer for Healthcare
This configuration includes not only high-level optimized properties but also the
properties within the plan flattened data model.
To configure the properties that are available on the compare search screen for the entities, follow these steps:
- In the header of Dev Studio, click .
- Click Compare search configuration.
- Click Plan and Network search items.
- Click Edit.The search properties of the plan metadata
are displayed, as shown in the following figure.
Compare search configuration 
- Optional: To remove the search parameter, click Delete row.
- Optional: To add a search parameter. click the Add icon:
- In the Property list, select a property that corresponds to the search parameter that you want to display.
- In the Label field, enter text for the new
search parameter.
- Click the Configure source
 icon to add the Data page name and Property
to map.
icon to add the Data page name and Property
to map. - Configure the source of the property to display the list of values.
- Click Submit.
- Select the Multiple Search check box to search for more than one of the specified parameters.
- To search for plans with multiple values, in the
Plan search fields section of the configuration
page, add the property corresponding to the name, and then select the
Multiple Search check box. When you search for plans, you can add multiple values such as Commercial and Individual lines of business in the plan search.
- Click the Open icon to specify the roles for which the property is displayed. By default, all roles are selected for each property. If no value is specified for a property, all roles are applicable, click the Delete icon to the right of the specified role to remove the role from the list.
Any check box property is displayed as a Yes/No list on the Search and Compare page. By default, no value is selected in the list. - Repeat steps 5 and 6 for each entity that you want to modify.
- When you finalize your search parameters, click . In the navigation pane of the Product Development portal, click
Plan search and compare and then examine the search
parameters that are displayed.
Results search and compare 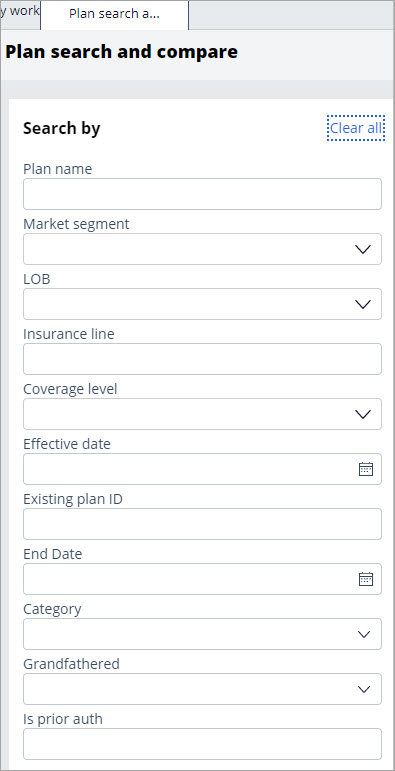
Previous topic Search and compare Next topic Searching and comparing plans