Accumulator manager manual functions
While the Accumulator Manager’s functions are enabled primarily through automated processes with external systems during claims adjudication, the accumulator manager can also accommodate a number of functions performed manually.
Those functions include creating new accumulators, updating existing accumulators, and deleting accumulators and their associated transaction details.
Creating a new accumulator- From the Accumulators screen, click Create accumulator in the top
right corner of the screen. The New accumulator screen opens in a new
tab.
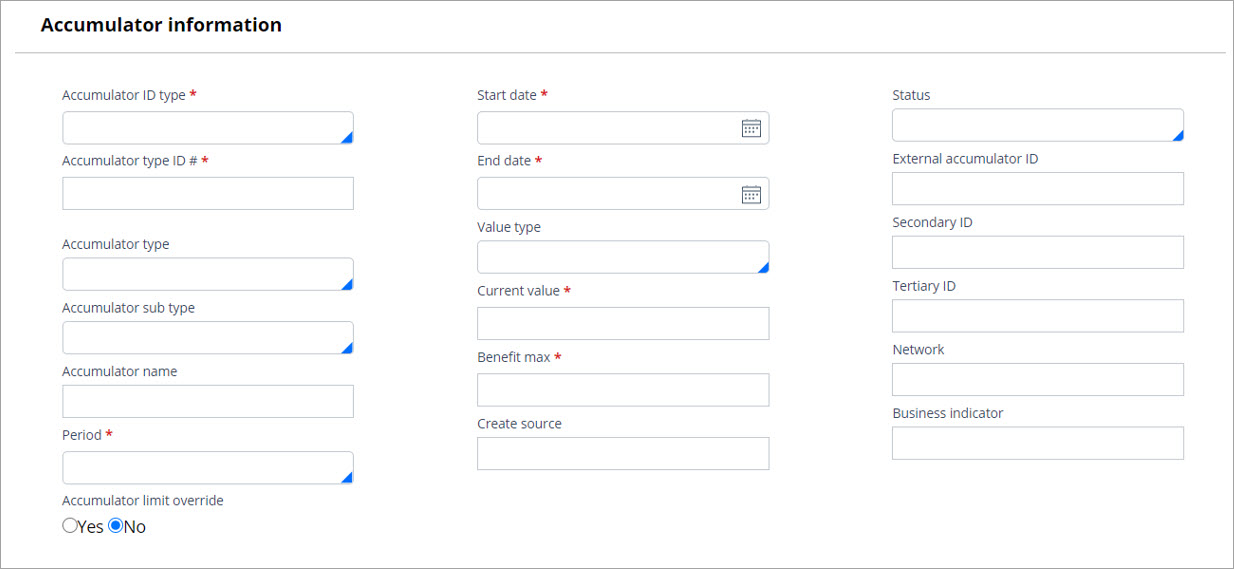
Enter the data into the fields (required fields are indicated with an asterisk *) and click Next.
The new accumulator record appears. All user-defined
data is displayed in the Accumulator information slot, and all auto-generated
data in the Audit slot. 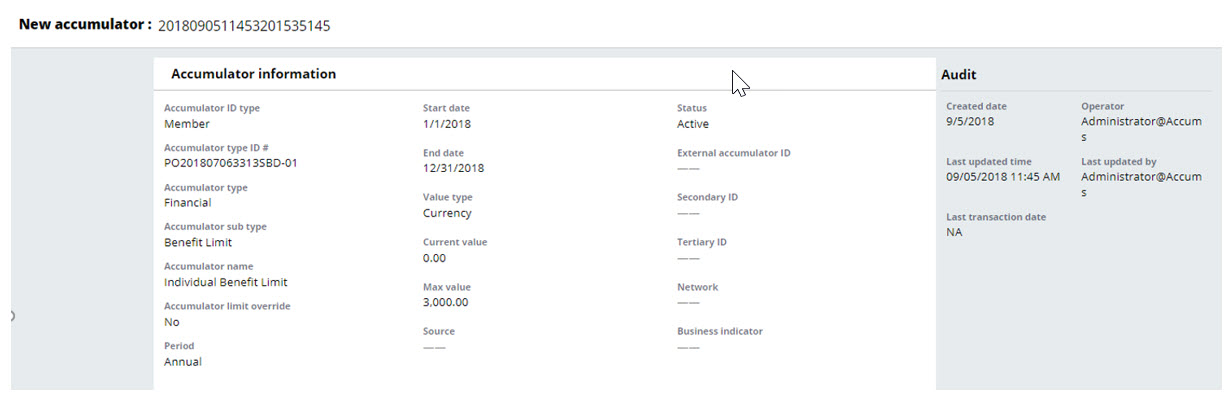
To edit the new accumulator, click Previous, which takes you back to the accumulator form populated with the most recent information. From here you can make changes to any of the fields. When completed, finalize the new accumulator by clicking Create.
Validation is displayed with the successful creation
of the new accumulator: 
You can manually update or edit an accumulator in the Accumulator Manager portal by first selecting an existing accumulator from the Accumulators list.
- From the Accumulator screen, click Edit button in the top right corner of the page.
The original screen containing editable accumulator fields is displayed. You can edit all user-defined fields in the accumulator record.
- A free text note may be entered in the Comments text box.
- Click Save to display the updated accumulator record including all header and detail data.
To add a transaction to an accumulator record, click +Add transaction from the Accumulator screen.
The Add
transaction modal is displayed. When you have completed the required fields
and populated any pertinent non-required fields, click Add. ![]()
The new transaction is displayed in the Transaction history slot. Additional transactions may be added. Each new transaction is displayed on the top row.
Editing a transactionTo edit a transaction, click the gear icon to the right of the corresponding transaction. This action will display the single transaction modal, from which the fields may be edited. When complete, click on the Update button.
Deleting a transactionTo delete a
transaction, click on the trash can icon to the right of the corresponding
transaction in the Transaction history slot. You will be prompted to validate
that you are deleting the transaction. Click Continue. ![]()
![]()
The transaction that you are deleting will not be erased from the Transaction history slot. The action will be displayed as a decrement, and the accumulator amounts will be re-calculated and updated in the details section. In addition, a corresponding note will be included in the Audit history.
Deleting an accumulatorYou may delete an entire accumulator from the Accumulator manager portal by doing the following:
- On the Accumulators screen, click on the trash can icon on the right-hand
side of the corresponding row.

- You will be prompted to validate the deletion of the accumulator. Click Delete.
- A message is displayed indicating that you have successfully deleted the accumulator.
You can update an accumulator by doing the following:
- Open an existing accumulator
- Click Edit in the upper right
- Update the Revised Max field and click Save.
Note: The Revised max cannot be less than the Benefit Max.
Previous topic Viewing an accumulator Next topic Exchanging data with external systems