Managing a Return authorization subcase
After the dealer submits the Return authorization subcase, it is transferred to the shipping and receiving team and is optionally inspected by the parts inspector.
Resolving the Return authorization subcase
The shipping and receiving team receives the Return authorization subcase for the return materials, processes it, and assigns a Good or Bad condition to it. The returned material is then assigned to a BIN number (storage space or slot) and the Return authorization subcase is resolved.
If the material being returned was set up to be inspected upon receipt, the Inspection case is initiated by the system.
The inspection process
If the returned material needs to be inspected, you should trigger the Inspection case after the return authorization is resolved.
The Inspection case has the following tasks:
Each step is performed by the parts inspector, who is provided with the list of steps that are needed to move the case through each stage.
Performing the teardown
- Log in as a parts inspector. For more information on login credentials, see Operators list and description.
- Search for the particular Inspection ID or to start the assignments, click .
- To confirm that you performed all of the displayed instructions, click the Instructions check box.
- To finish the assignment and move to the testing part of the inspection process, click .
Testing the part
- Log in as a parts inspector. For more information on login credentials, see Operators list and description.
- Search for the particular Inspection ID or to start the assignments, click .
- To confirm that you performed all of the displayed instructions, click the Instructions check box.
- To finish the assignment and move to the disposition part of the inspection process, click .
Performing the disposition
- Log in as a parts inspector. For more information on login credentials, see Operators list and description.
- Search for the particular Inspection ID or to start the assignments, click .
- Review the status of the previously performed stages and select the disposition type from the displayed list.
- Click .
The complete Inspection process flow is detailed in the following image:
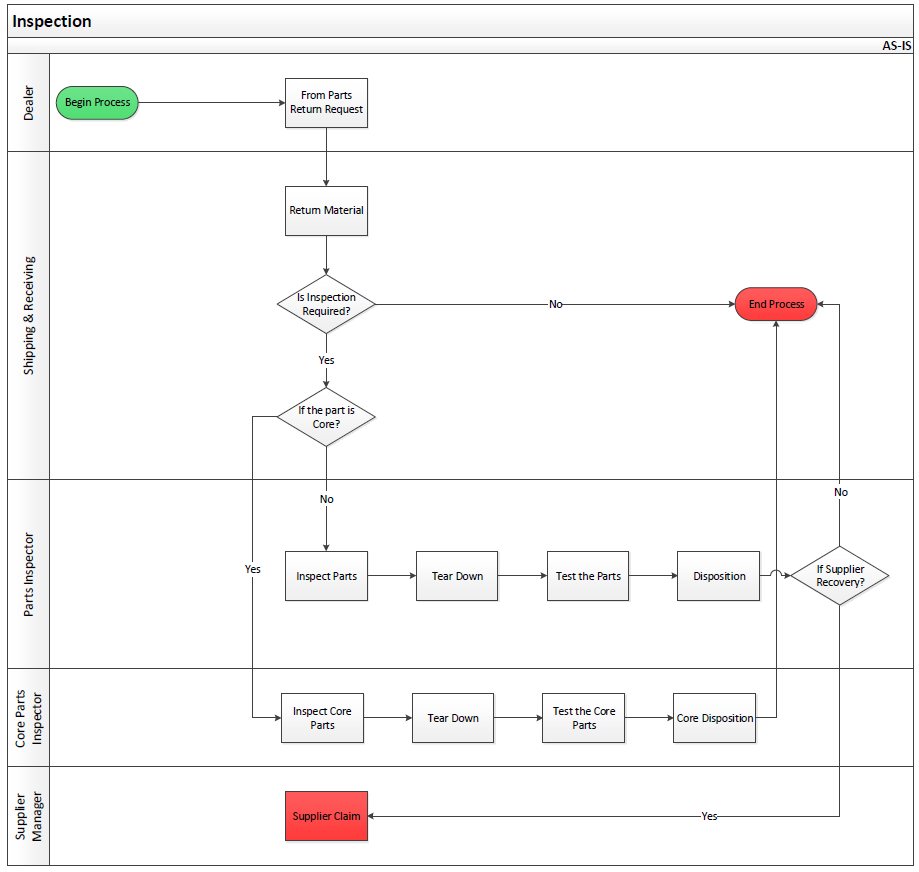 Inspection process flow
Previous topic Creating and searching for a container Next topic Return authorization case type business rules