Routing an assignment
A process often must be routed to the appropriate person or team to complete a task. For example, the manager of a cost center must approve an employee expense or a member of the accounting team must process a refund. In these cases, the assignment can be routed to a worklist or a workbasket.
| Routing destination | Assignment type | Routing method options |
|---|---|---|
| An operator | Worklist |
|
| A team | Workbasket |
|
Before you begin
Before you begin, take a look at the default configuration for an assignment. As each step begins, routing is set to be completed by the current operator.
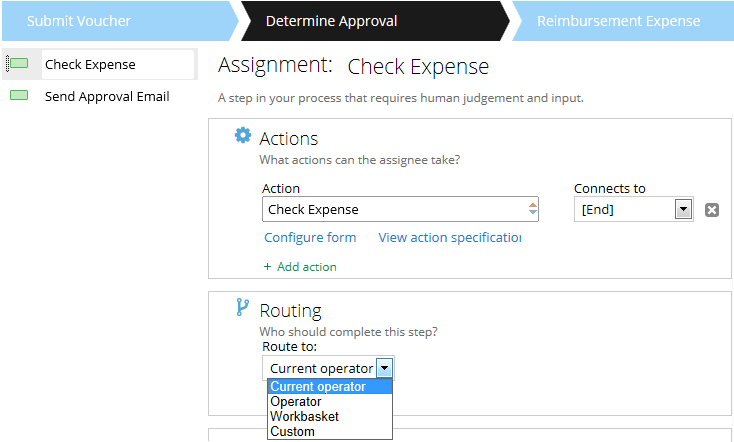
You can also:
- Route to an Operator ID
- Route to a Workbasket name
- Perform custom routing based on a parameter
- Perform custom routing based on a decision
Route to an Operator ID
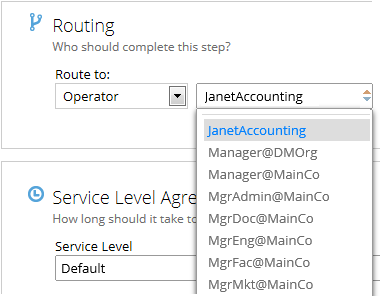
To route to an operator, change the Route to field in the properties panel to Operator. When the field has been updated, a list of operator IDs is made available in an auto-complete field. To route to an operator, select an operator ID from the list.
In the example below, an expense voucher is being routed to Janet in Accounting.
Route to a Workbasket name
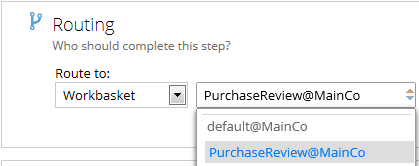
To route to a workbasket, change the Route to field in the properties panel to Workbasket. When the field has been updated, a list of workbasket names is displayed in an auto-complete field. To route to a workbasket, select a name from the list.
In the example below, an expense voucher is being routed to the PurchaseReview workbasket so that a member of the team can review the request.
Perform custom routing based on a parameter
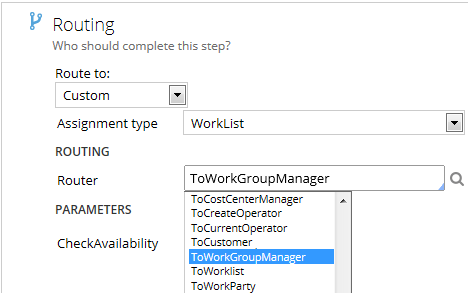
To determine the operator that should complete the assignment at run time, select Custom routing. You can then select an assignment type:
- Worklist – place the assignment into the worklist of the operator identified by the router
- Workbasket – place the assignment in a workbasket determined by the router
In the example below, a request to take time off is being routed to the worklist that belongs to the manager of the current operator.
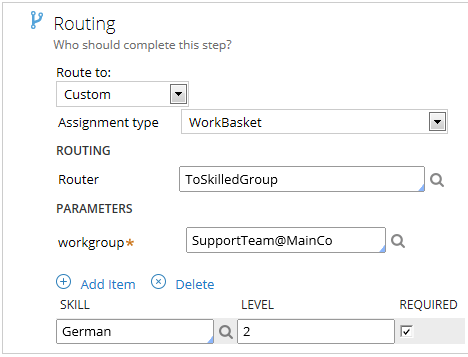
In the example below, a support request is being routed to the workbasket of the support team. The customer requires that the request be completed by a team member with German language skills.
Perform custom routing based on a decision
Routing to an operator can also be determined by a decision. To determine the operator or team that should complete the assignment at run time, select:
- Route to: Custom
- Assignment type: WorkList or Workbasket
- Router: ToDecisionMap, ToDecisionTable, or ToDecisionTree
The following steps demonstrate how to route a request for reimbursement to the department’s cost center manager.
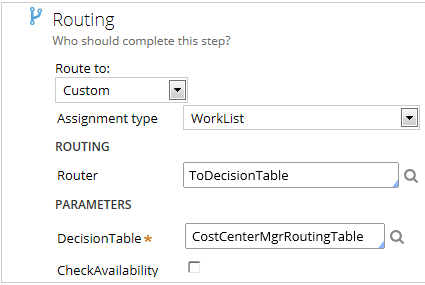
- In the properties for the assignment, set the parameters for routing:
- Route to: Custom
- Assignment type: WorkList
- Router: ToDecisionTable
- Decision Table: CostCenterMgrRoutingTable
- Click the Open icon
 next to the decision table name to create the decision table.
- Use the prepopulated parameters to save the decision table in the context of the current assignment, and click Create and open.
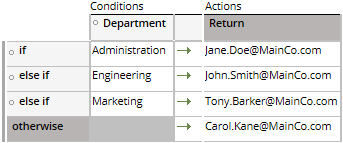
- Set the condition for the routing table to be the requestor’s department. For example, if the page property is Employee with a Department field, then the condition property would be .Employee.Department.
- Complete the CostCenterMgrRouting table by specifying the cost center manager for each department.
- Save changes to the decision table and then close the Decision Table tab.
- Save changes to the case type.