Initializing DMSample data
Generate the data that you need to fully explore DMSample use cases by creating
and running the Initialize Application case.
By
initializing DMSample data, you populate database tables with sample customer and
analytical records, simulate the previous customer interactions and survey results,
create simulation data sources, and generate work assignments that you can view in the
Case Manager portal.
Before you begin: Configure your operator ID with the following settings:
- Access group: DMSample:Administrators
- Team: default@DMOrg
Figure: Specifying operator access group and team
-
Verify that the system populated Interaction History reports with impressions
and responses:
- In the header of Dev Studio, click .
-
Check if the Interaction History reports contain data.
For example:
Figure: Sample Interaction History reports
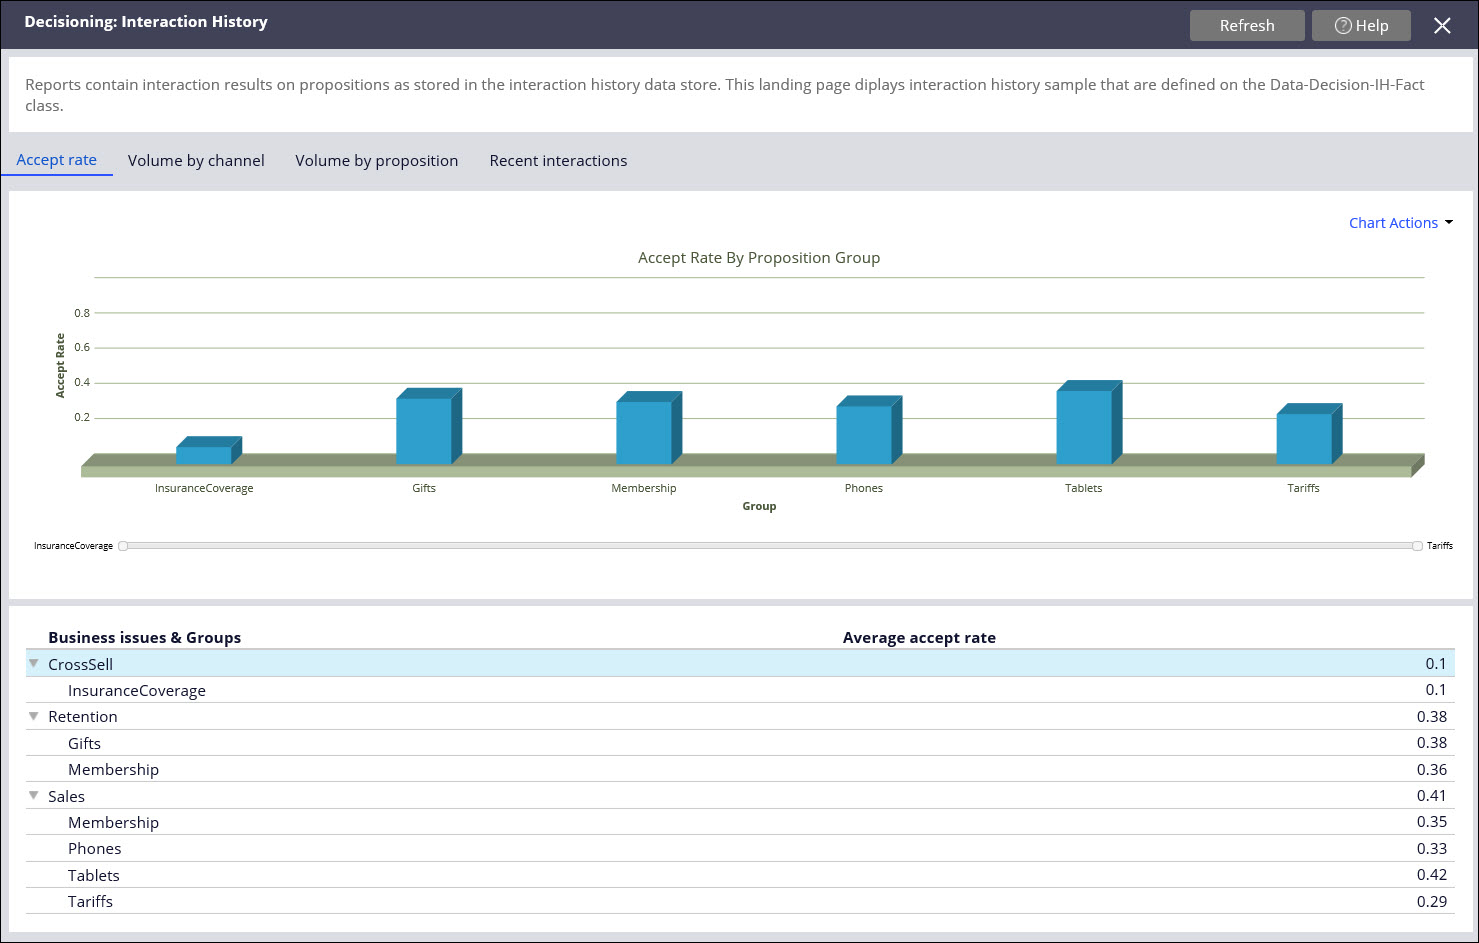 Interaction History is the data layer that stores all interactions with customers. The interactions consist of customer responses to given propositions. By providing Interaction History records to a next-best-actions strategy, you can discover which proposition your customer is most likely to accept.
-
Verify that the system created data sources for Visual Business Director:
- In the header of Dev Studio, click .
-
Check if Visual Business Director datasets contain
data.
For example:
Figure: Visual Business Director data sources
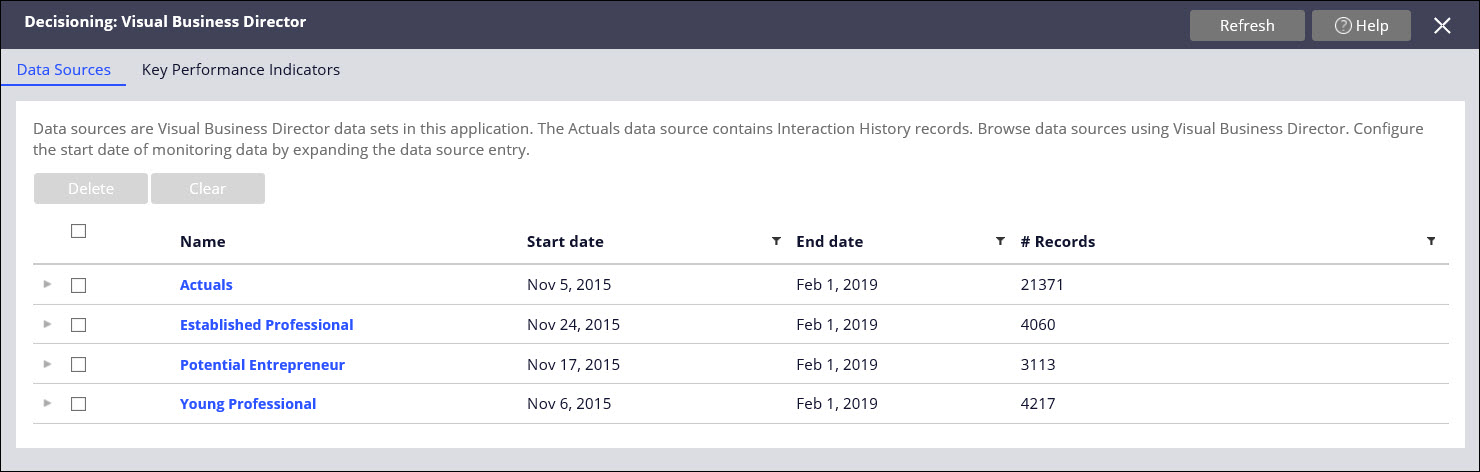 With Visual Business Director, you can visualize decision results and fully understand the likely impact of each decision before you make that choice.
-
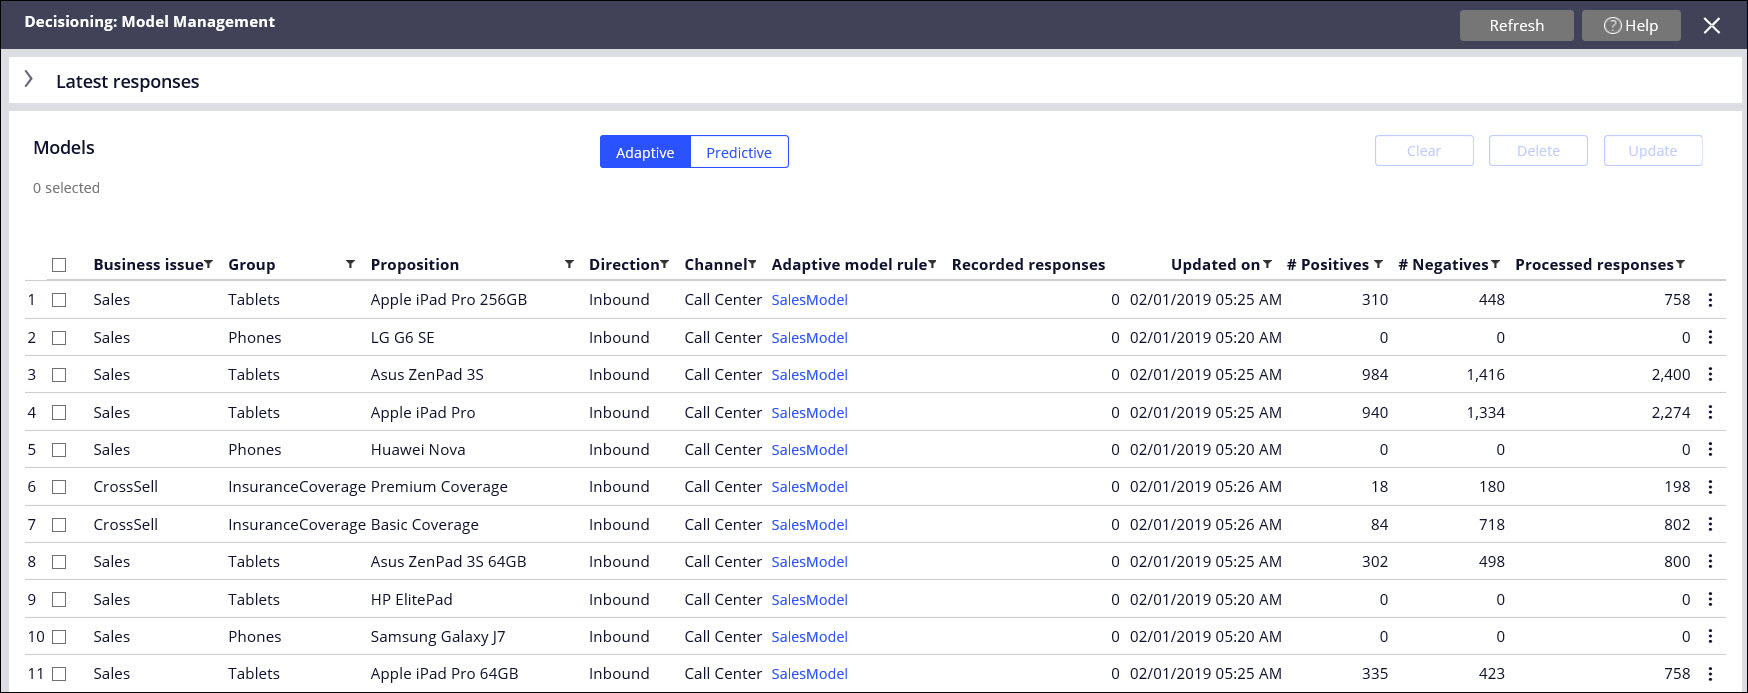
Verify if the system created adaptive models:
- In the header of Dev Studio, click .
-
Check if the
Model
Management landing page contains models.
For example:
Figure: Adaptive models on the Model Monitoring landing page
-
Click a model name to view the reports.
Figure: Monitoring adaptive model performance
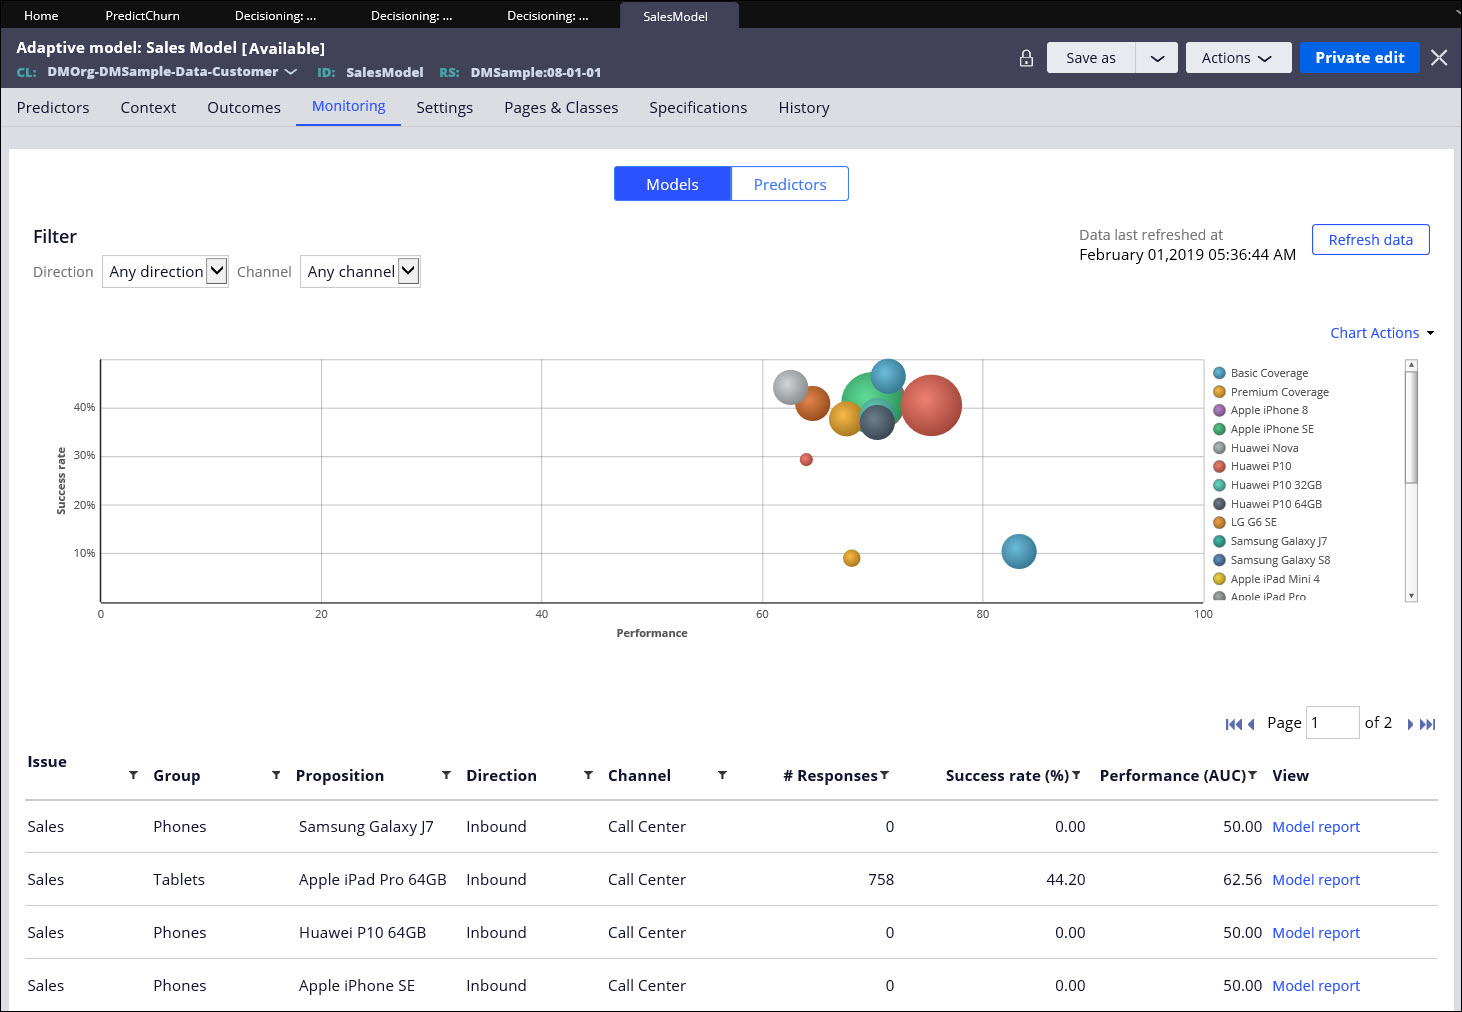 Adaptive models calculate who is likely to accept or reject an offer by capturing and analyzing response data in real time. With adaptive models, you can select the best offer for your customer without providing information on previous interactions.
-
Verify that the event browser, which contains the Customer Movie timeline,
contains events.
- In the navigation pane of Dev Studio, click Records.
- Expand the Data Model category, and then click Data Flow.
- Click any Data Flow rule that writes data in the event store, for example, Offer CMF.
- On the Data Flow tab, right-click the Event summary convert shape, and then click Preview.
- On the clipboard page, copy a customer ID from the pxCustomerId property.
- In the header of Dev Studio, click .
- In the Action column, start a run for the data flow that you selected in step 7.c by clicking Start.
- When the data flow runs in the event catalog are completed, click the Event Browser tab.
- In the Search criteria section, in the Customer ID field, enter the customer ID that you copied in step 7.e.
- Click Find events.
-
Check if the customer timeline contains events of various types.
For example:
Figure: Events for customer CE-715 in the event browser
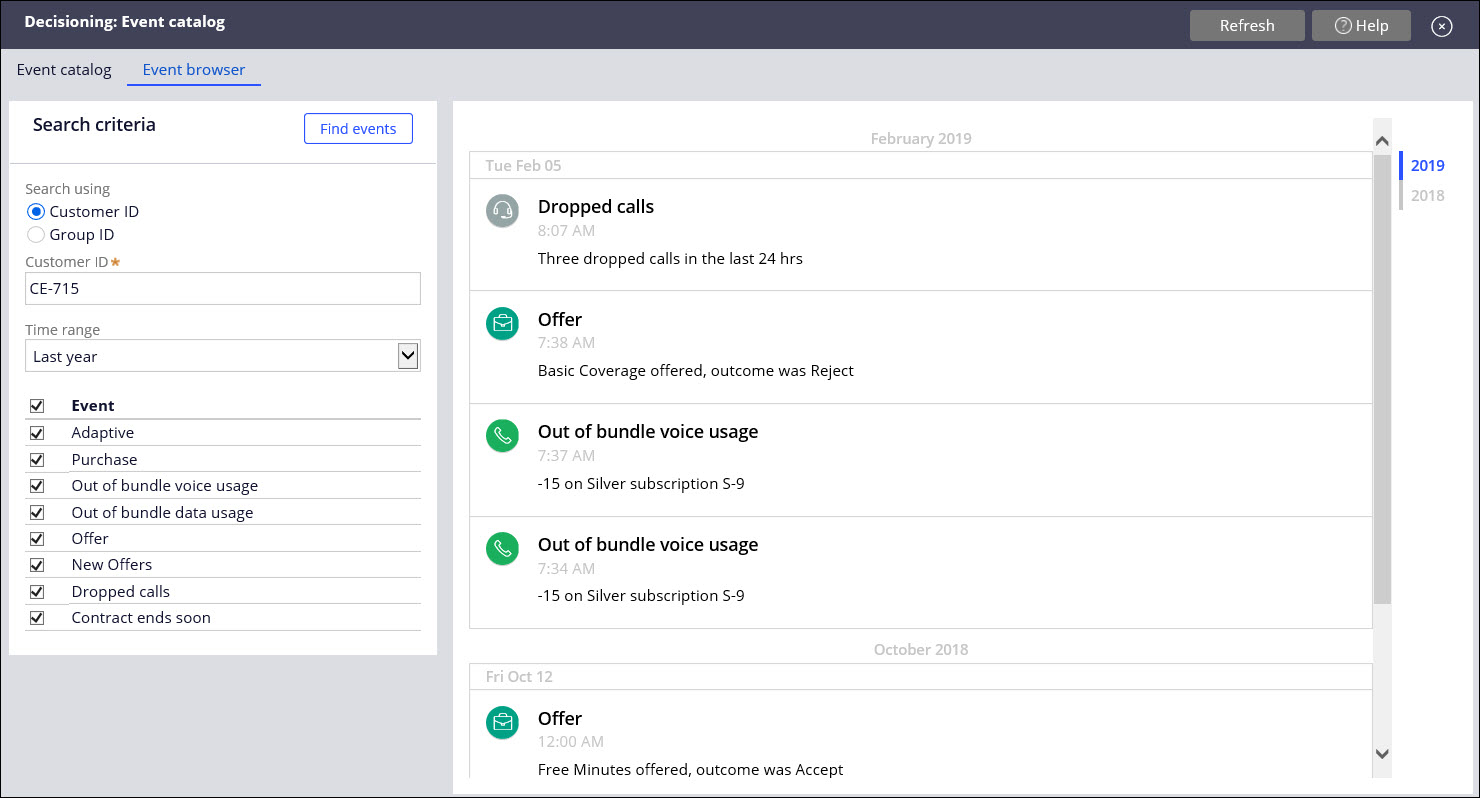 In the event catalog, you can create multiple event types to collect customer data from specific input streams or batch uploads. With Customer Movie, you can make informed and personalized decisions for your customers.