Configuring a modal dialog box for a list-based layout
Give your users the tools to edit entries of a list-based layout in a modal dialog box. This approach helps your users perform their tasks without leaving the main screen, which reduces context switching.
You can configure the modal dialog box for the following elements:- Hierarchical table (legacy markup)
- Navigational tree
- Table
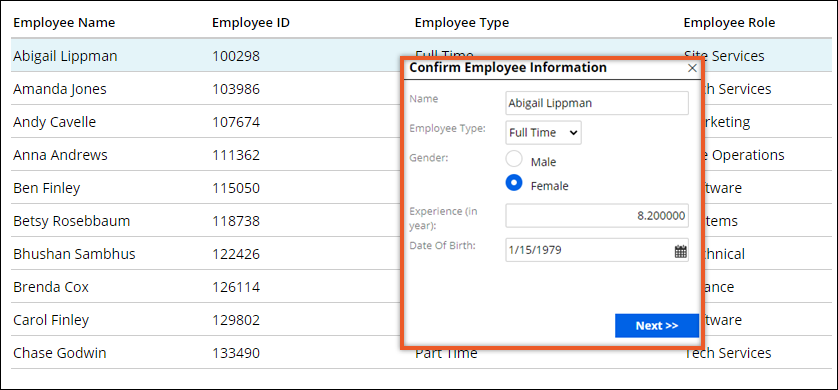
The following figure represents a table with rows that you can edit in a pop-up modal dialog box.
- In Dev Studio, search for and open the section that you want to modify.
- Click the list-based layout that you want to edit, and then click the View properties icon.
- In the Layout properties window, enable row editing in a modal
dialog box:
Choices Actions - Hierarchical table (legacy markup)
- Navigational tree
- Table (non-optimized)
- On the Operations tab, in the Row operations section, select the Master-detail option.
- In the Display of details list, select Modal dialog.
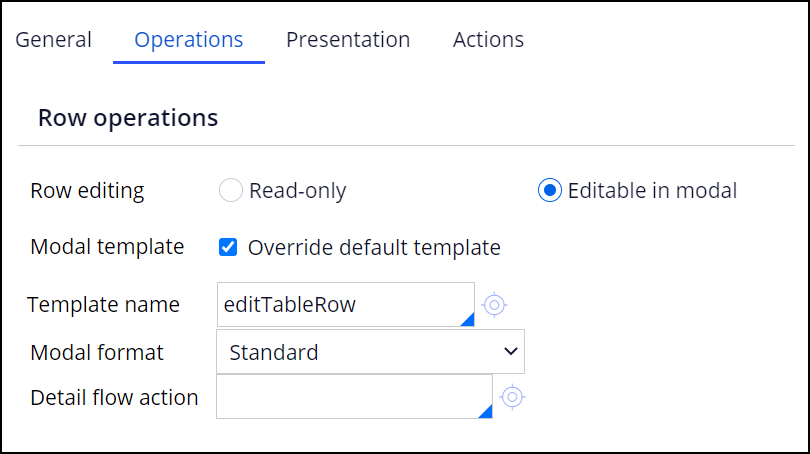
Table (optimized) On the Operations tab, in the Row operations section, select the Editable in modal option. - Optional: To use the default modal dialog box template, clear the Override default modal template check box.
- In the Template name field, enter the name of the template that you want to use for the modal dialog box.
- Optional: To specify a format of the modal dialog box that is defined in the skin, in the Modal format list, select Other, and then press the down arrow key to select the format that you want to use.
- Optional: To specify a flow action that you want to use to display content in the modal dialog box, in the Detail flow action field, enter the name of that action.
- Click Submit.
- On the section form, click Save.
Previous topic Configuring a modal dialog box for a button Next topic Adding a chart