Creating custom menus
Build custom navigation to ensure that your users can more conveniently move between different parts and features of your application. By pairing the Menu control with a navigation rule, you can set up a navigation scheme that meets the requirements of your business.
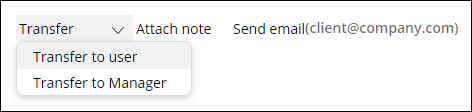
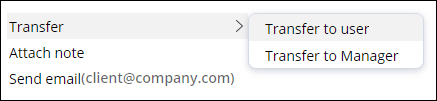
For example, in a loan application form, you might want to add a menu that helps the user access frequently used actions, such as transferring the case to the manager, or sending an email to the customer.- In Dev Studio, open the section to which you want to add a menu.
- Add the menu control:
- If you are using the view editor, in the pane on the right side of the screen, in the header of the region where you want to add the control, click Add, and then click .
- If you are using the full section editor, from the Action menu, drag the Menu component into the layout.
- Open the Cell properties dialog box:
- If you are using the view editor, in the pane on the right side of the screen, hover over the newly added Menu control, and then click the Edit icon.
- If you are using the full section editor, click on the newly added Menu control, and then click the View properties icon.
- On the General tab, in the Navigation field, enter the name of the navigation rule on which you want to base your menu.
- Optional: To improve performance by deferring the loading of sub-menu content, select the Defer load sub menu check box.
- On the Presentation tab, in the Menu type list, define whether you want the menu to open horizontally or vertically.
- In the Menu format field, enter the format that you want
to apply to the menu.For more information, see Styling a control.
- Click Submit.
- On the section form, click Save.
- Creating navigation rules
Build intuitive menus that match the business requirements of your application bycreating custom navigation rules. Navigation rules help you define the structure and content of a context menu or a navigation panel.
Previous topic Adding a chart Next topic Creating navigation rules