Editing screen rules
Update display names, workflow and opportunity tags, and other details for screen rules based on the changing needs of analysts and other business users.
You cannot edit the URL pattern for screen rules that you created prior to version Pega Workforce Intelligence 8.6.3. If you want any of these existing screen rules to use multiple parts of the URL in addition to the path, you need to disable the existing screen rule and then add a new screen rule instead. For more information, see Disabling screen rules and Adding screen rules.- In the header of Pega Workforce Intelligence, click .
- Review the time period selected in the top-right corner of the page, and select a different time period if you want to view applications for a different range of dates.
- Optional: Because you can only edit screen rules for an application that has screen rules turned on, sort the list using the on state.
- Optional: Using the search fields at the top of the list, enter text to find the
application you want. For example:
Enter search terms to find applications 
- Click the application for which you want to edit a screen rule.Result: The list of applications is replaced with the list of screens for the application you selected. If needed, you can return to the list of applications using the navigation link in the top-left corner. For example:
Return to applications list 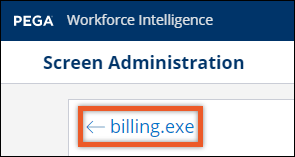
- At the bottom of the page, next to the screen rule you want to edit, click the More options icon and click Edit.
- Complete only the changes that are needed:
- In the Rule Name field, update the name to help you and other administrators recognize the rule.
- In the Priority field, change the number that defines the order in which you want the rule applied. For example, enter 1 to apply this rule before all other rules created for this screen.
- In the Enable field, click the slider to enable or disable the rule.
- To edit tags for the screen rule, complete these steps:
- Click in the Tags field to display a list of available opportunity and workflow tags.
- In the Tags search box, type text to find a tag and then select the check box to add the tag, or clear the check box if you want to remove the tag.
- To close the search and verify your updated selections, click outside of the Tags field.
- If you cannot see all of the tags in the Tags field, hover over the ellipsis to view the full list in a tooltip.
- In the Display Name field, verify or change the name that you want to use for the screen in reports.
- To enter or update a screen pattern, in the Screen
Pattern field, enter the pattern that the system should use to
search for screens when applying the rule. For example, enter the text that
displays in the tab or top of the screen.
- To enter or update a URL pattern, in the URL Pattern
field, specify the text pattern you want the system to search for.If you add a URL pattern, you can use portions of the path, query, and results for the rule. The protocol and domain are ignored. The following image identifies each part of a URL related to screen rules in Workforce Intelligence.
Parts of a URL for screen rules in Workforce Intelligence 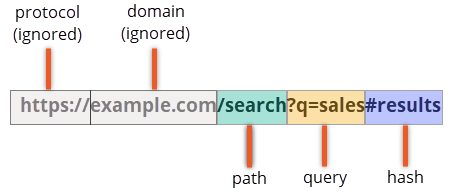
- Click Submit.
Previous topic Adding screen rules Next topic Adding opportunity and workflow tags to screens