

         This documentation site is for previous versions. Visit our new documentation site for current releases.      
 

This content has been archived and is no longer being updated.

Links may not function; however, this content may be relevant to outdated versions of the product.

Creating cases

Updated on November 22, 2021

Meet your business goals by creating cases that users of your application, such as customer service representatives (CSR) resolve to achieve a specific outcome. When you create a case, you ensure that CSRs can perform their work by collecting and processing information from customers.

To create a case, you use a case type, which is a template of one of your business processes. Case types consist of stages, processes, and steps, that the case worker completes to resolve the case.
Before you begin:
  1. Create case types that you can reuse for multiple business processes. For more information, see Creating a case type.
  2. Define which cases the user can create. For more information, see Creating the main menu for a portal.
  1. In the header of App Studio, click the name of a portal in which you process cases.
  2. In the navigation panel, click New, and then select the case type that you want to use to create your new case.
    For example: The following figure shows creating a case in the Case Worker portal.
    Selecting a case type to create a case.
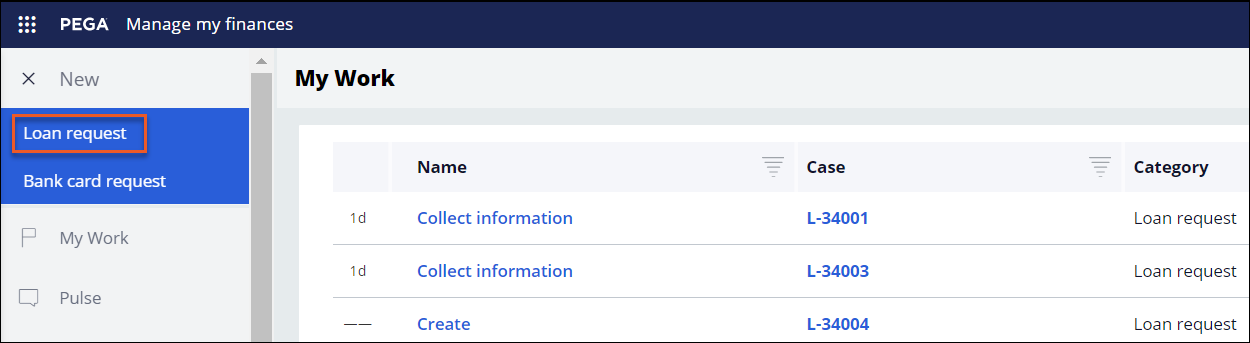
    Selecting a case type to create a case in the Case Worker portal.
Result: You have created a case, which can now be processed to achieve a specific result.

Have a question? Get answers now.

Visit the Support Center to ask questions, engage in discussions, share ideas, and help others.

Did you find this content helpful?

Want to help us improve this content?

We'd prefer it if you saw us at our best.

Pega.com is not optimized for Internet Explorer. For the optimal experience, please use:

Close Deprecation Notice
Contact us