Match the branding of your mobile app with the requirements of your company or
project by customizing the interface elements, such as the buttons and navigation menu.
Branded applications ensure that your users recognize your brand's identity.
Before you begin: Create a mobile channel for your mobile app. For more
information, see Setting up mobile apps.
Open your mobile channel:
In the navigation pane of
App Studio, click Channels.
In the Current channel interfaces section, click
the tile that represents a mobile channel for your app.
On the mobile channel page, on the Layout tab, click
Theme.
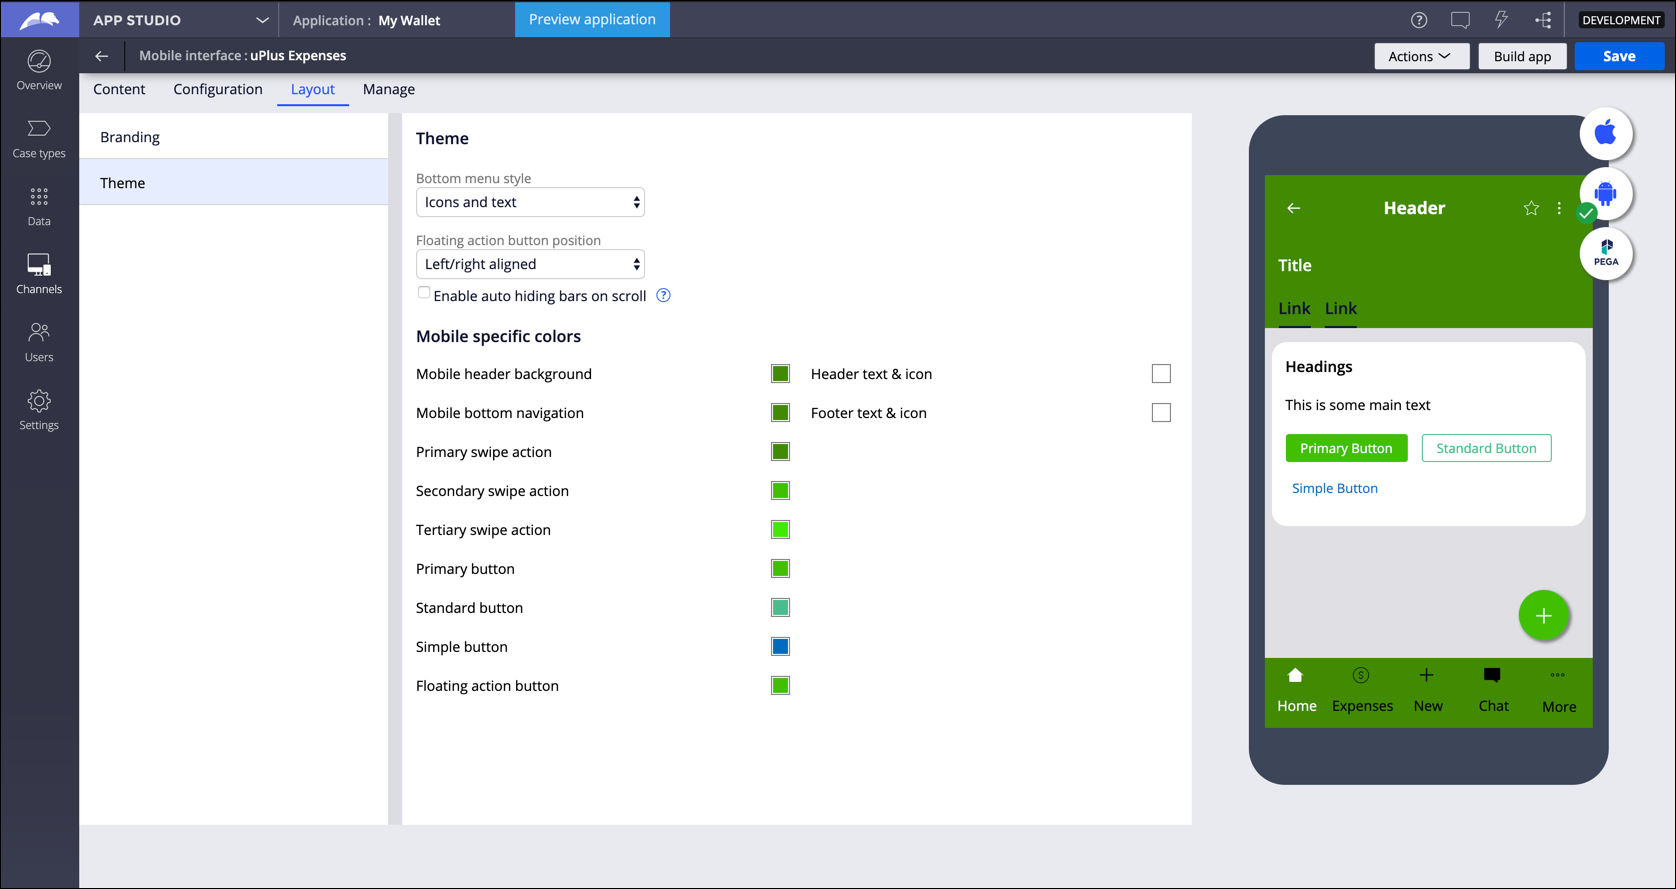
In the Theme section, specify how you want to display the
bottom navigation menu and the floating action button:
In the Bottom menu style list, choose whether
you want the bottom navigation menu to consist of icons with
corresponding labels or icons without labels.
Optional: To automatically hide the bottom navigation bar when users scroll up or
down the screen, select the Enable auto hiding bars on
scroll check box.
In the Floating action button position list,
choose whether you want to position the floating action button in the
bottom right or in the bottom center of the screen.
The floating action button creates a new work item when users tap the
button. For example, on a mobile list page with expense reports, the
floating action button creates a new expense report. To add a floating
action button to your mobile list page, see Designing a new mobile list page.
In the Mobile specific colors section, customize the
colors of the listed interface elements by clicking the color picker icon and
then selecting a color for the element.
Click Save.
Example:
Figure: Design of a custom mobile app theme
What to do next: Verify the changes to your mobile app by generating,
installing, and launching the app. For more information, see Generating native mobile apps.