Creating a deployment pipeline
Deployment pipelines are an application pipeline type to generate artifacts from the system of record and deliver them through the various stages of the workflow. When you add a pipeline, you define all the stages and tasks that you want to do on each system. If you are using a QA system, you can run test tasks to validate application data. Pipelines are the first step in getting started with setting up a process for deploying a change through the release.
Add a new deployment pipeline
To add a new pipeline, follow the steps below:
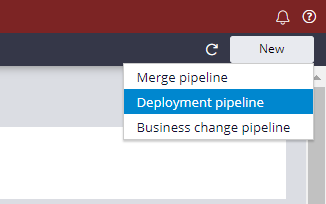
- Click Pipelines.
- Click New on the top right.
- Select the Deployment pipeline template. Pipeline
templates drive the required information needed to complete the creation of
a pipeline. For more information, see Pipeline templates.
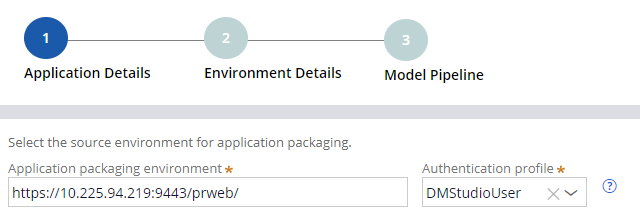
Configuring a new pipeline - Application Details
Application Packaging Environment
- Specify the environment URL from where the application is packaged in the Application packaging environment field and select or enter the Authentication profile to be used for connection to the application packaging environment.
Application Details
Application details specify the application that this pipeline progresses through.
- In the Application field, select the name of the application.
- In the Version field, select the application version.
- In the Access group field, select the access group
for which pipeline tasks are run.
- This access group must be present on all candidate systems and have at least the sysadmin4 role.
- In the Product rule field, enter the name of the product rule that defines the contents of the application.
- In the Version field, enter the product rule version.
- In the Pipeline name field, enter a unique name for the pipeline.
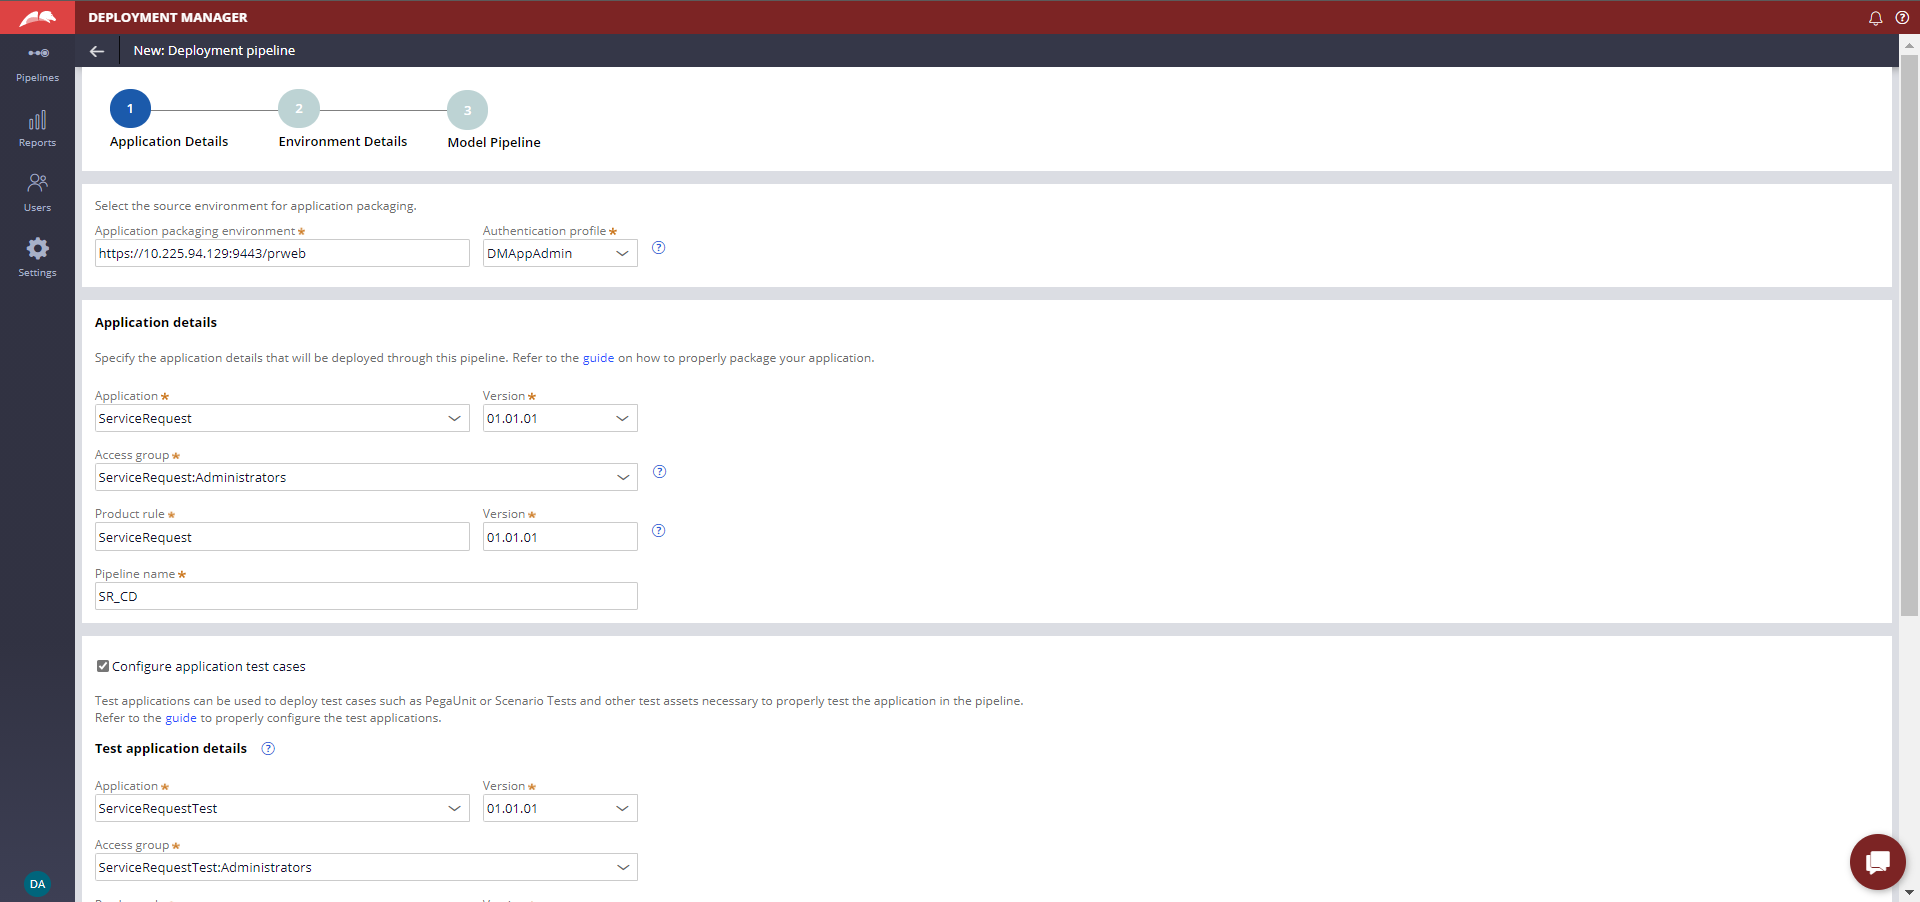
Deploy Application Test Cases
If you are using a separate product rule to manage test cases, in the Application test cases section select the Configure application test cases check box to deploy a test case. Then, complete the following steps to generate the artifact consisting of the test cases to run on a target environment.
- In the Application field, select the name of the application.
- In the Version field, select the application version.
- In the Access group field, select the access group
for which pipeline tasks are run.
- This access group must be present on all candidate systems and have at least the sysadmin4 role.
- In the Product rule field, enter the name of the product rule that defines the contents of the application.
- In the Version field, enter the product rule version.
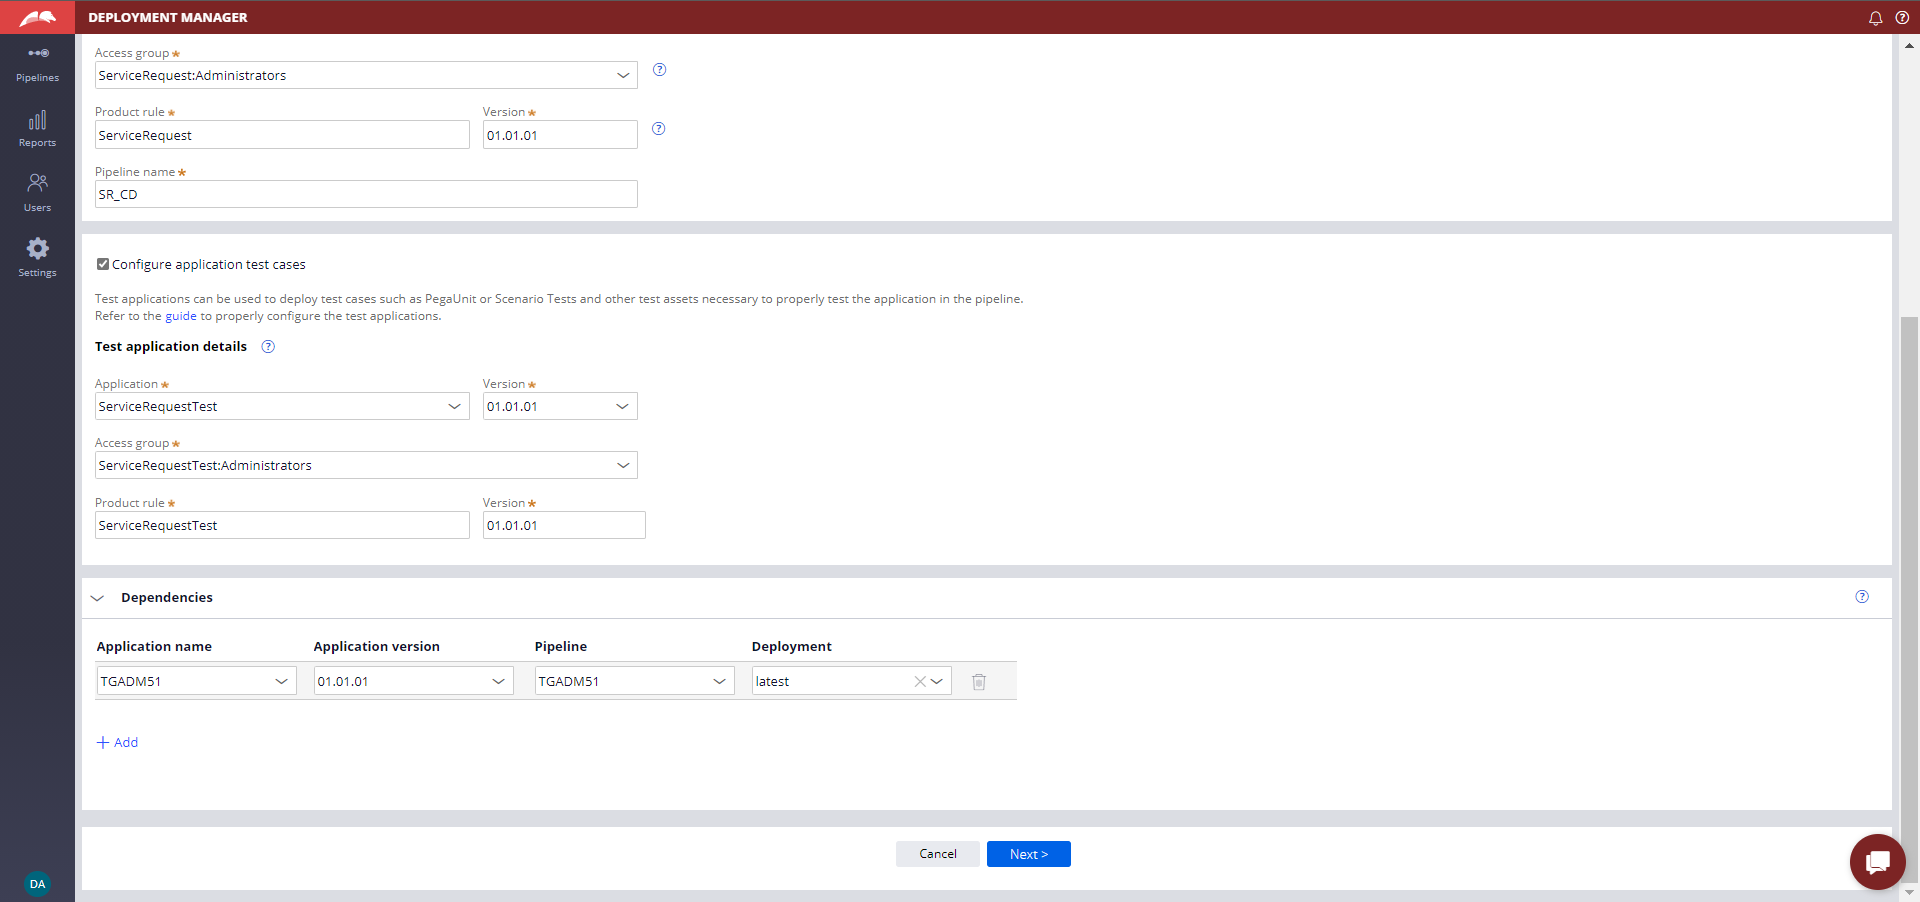
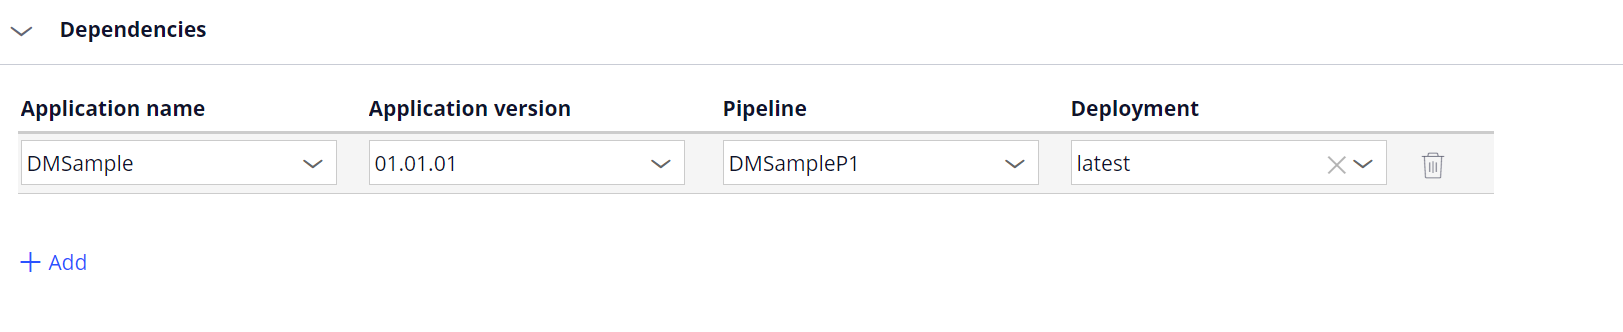
Dependencies
To configure dependent applications:
- Click Add in the Dependencies section.
- In the Application field, select the application name.
- In the Application version field, select the application version.
- In the Pipeline field, select the pipeline.
- In the Deployment field, select the deployment that
contains the production-ready artifact of the dependent application. If you
want the latest artifact of the dependent application to be automatically
populated, select latest.
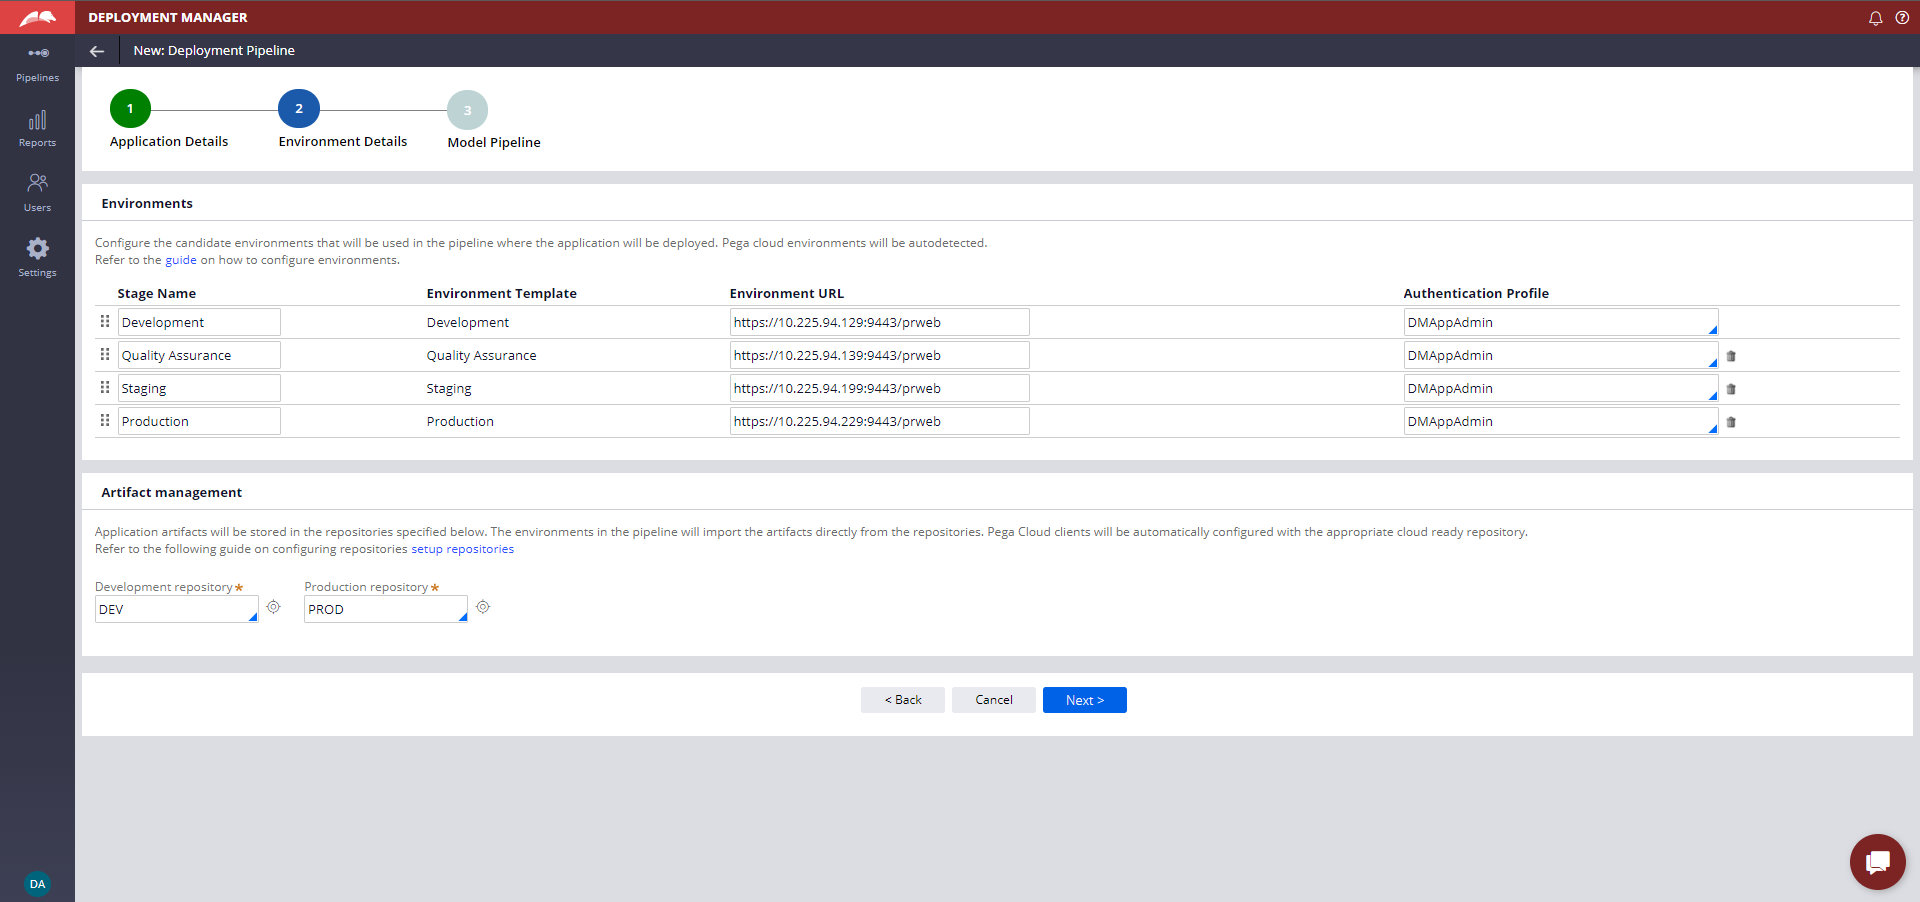
Configuring a new pipeline - Environment Details
Environments
- The default stages are populated based on the pipeline template created. See Pipeline templates for more information.
- In the Environment URL field for the system, press the Down arrow key and select the URL of the system.
- If you are using your own authentication profiles, in the
Authentication Profile field for the system,
press the Down arrow key and select the authentication profile that you want
to communicate from the orchestration server to the system.
- By default, the fields are populated with the DMAppAdmin authentication profile.
Repositories
- In the Artifact management section, specify the development and production repositories through which the product rule that contains application contents moves through the pipeline.
- In the Development repository field, select the development repository.
- In the Production repository field, select the production repository.
- Click Next.
Configuring a new pipeline - Model Pipeline
From the model pipeline screen, you can tailor your stages and tasks to replicate the quality standard of the release process defined by your organization. You can modify the deployment process here by configuring tasks and modifying stages.
For more information on adding, editing, or deleting a stage, see .
- Stages can be modified here by clicking the More icon on each stage.
- To add a stage, click the +Stage button. You can apply an environment template to each new stage. See Environment templates.
- To add a task to a stage, click the +Task button within a
stage. The available tasks that you can add are specific to the associated
stage. The available tasks that you can add are specific to the associated
stage. For a list of task related information, see the Task catalog.
- The environment template assigned to a stage drives the availability of tasks. Mandatory tasks cannot be deleted.
- Click Create to save the pipeline.

Previous topic Creating pipelines Next topic Creating a merge pipeline