Configuring relationship intelligence
Relationship intelligence helps to identify sales reps within the organization who have a better relationship strength with a particular contact. Engagement strength is defined based on relationship activities performed by the sales reps. Relationship activities are defined as emails, meetings, and phone calls (additionally, the email engagement includes sentiment analysis, custom weighted according to your business needs). By default, the system dynamically calculates the relationship score for a given contact record based on their relationship activities over a period of time, which by default is 90 days.
- In the header of App Studio, launch the User portal.
- In the User portal navigation pane, click Tools, and
then click Relationship weights.
- To edit the weight for a category, click the Edit icon next to the activity category and enter a number between 1 and 10.
- To further customize relationship intelligence by editing relationship scoring,
you can add and edit relationship health by adding the when rule from Dev Studio:
- Switch from App Studio to Dev Studio.
- In the navigation pane of Dev Studio, click .
- Search for and open the isRIHealthConfigRequired when rule.
- Set the when rule to true.
- Click Save.
- In the navigation pane of Dev Studio, click .
- Search for and open the SetDataFlowAccessGroup data transform.
- Change the Source field to point to your particular access group.
- Click Save as and save the data transform into your implementation layer.
- In the navigation pane of Dev Studio, click .
- Search for and open the SetRelationshipIntelligenceforEmails data transform.
- Update the default weights for email sentiment analysis.
- Click Save as and save the data transform into your implementation layer.
- To configure relationship scoring, switch from Dev Studio to
App Studio and perform the following steps:
- In the header of App Studio, launch the User portal, and then in the navigation pane, click Tools.
- Click Relationship Health.
- Edit the lower or upper scoring limits for each relationship category by clicking the Edit icon next to any category.
- Switch from App Studio to Admin Studio and perform
the following steps:
- In the navigation pane of Admin Studio, click Resources, and then click Jobs.
- Search for and open the RelationshipIntelligence job scheduler.
- Toggle the Enable job scheduler switch On to
start the job scheduler.By default, the job scheduler runs once a day. To change this behavior, override the RelationshipIntelligence job scheduler in your implementation ruleset.
- Click Save.
Using relationship intelligence
Relationship intelligence helps sales representatives to find a person in their internal organization that can help them make a warm introduction with a new external prospect or customer.
- Log into the application as either a Sales Ops, Sales Representative, or Sales Manager persona.
- Depending if you wish to use the relationship intelligence for a contact or an
organization, perform one of the following actions.
- In the User portal navigation pane, click Contacts and open any contact for which you want to view the relationship status. Continue to step 3.
- In the User portal navigation pane, click Organizations and open any organization for which you want to view the relationship status. Continue to step 6.
- For contacts, expand the right navigation pane to see the details of the
Relationship tile and review the following lists of
relationships between the contact that you select and their contacts:
- The first relationship list is with currently logged in users.
- The remaining relationships lists are presented in an order calculated by the system.
- To see recent activity, for example, how many emails or phone calls you exchanged with that person, hover over the relationship status bar next to each person.
- To send a prepopulated Pulse post or launch the New email
screen, click the More icon, and then click either
Pulse or Email.
Relationship intelligence user actions 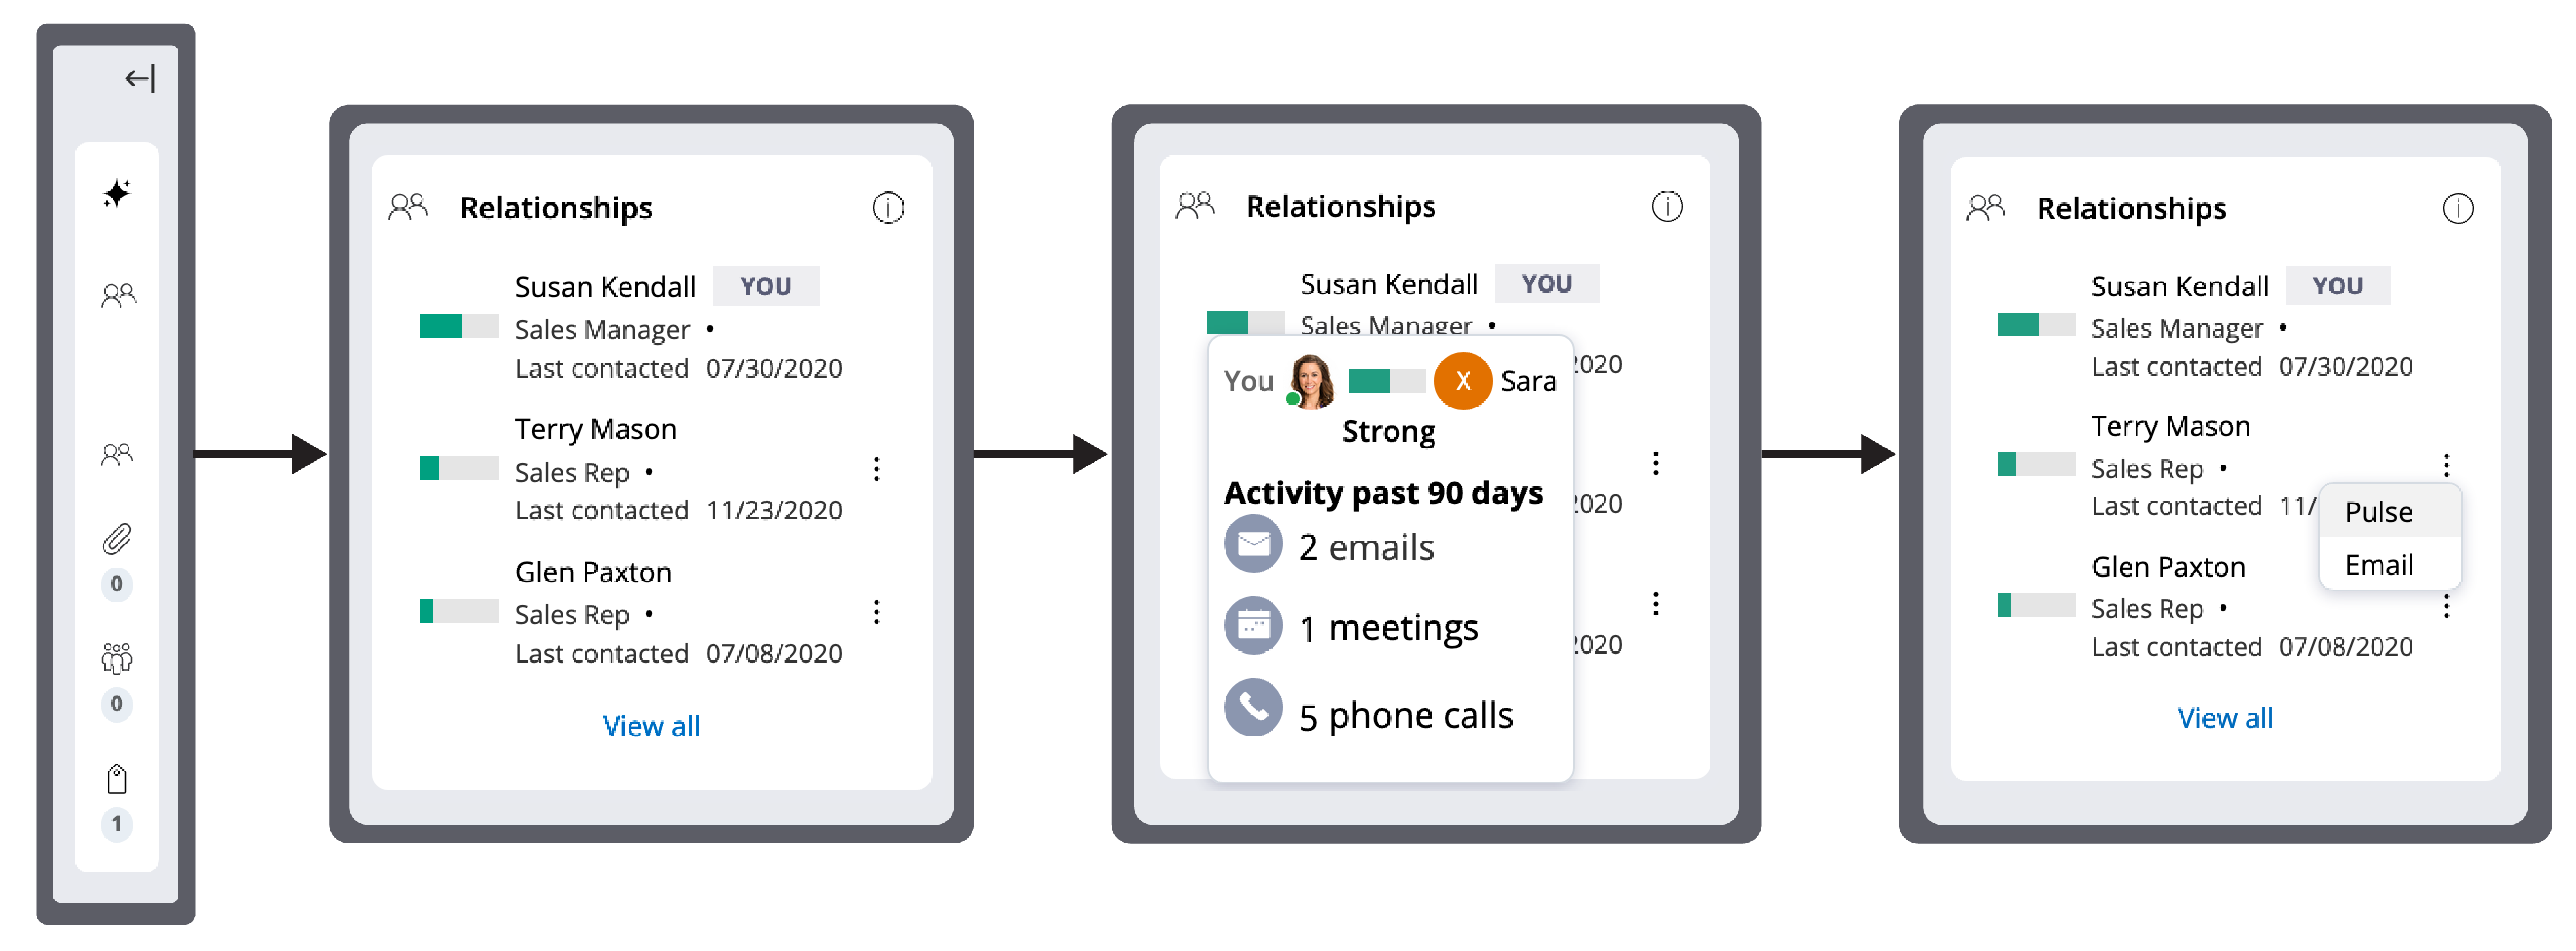
- For organizations, to see recent activity (for example, how many emails or phone calls you exchanged with a person), click the relationship status bar next to a chosen person.
- To send a prepopulated Pulse post or launch the New email
screen, click the More icon, and then click either
Pulse or Email.
Relationship intelligence for organizations 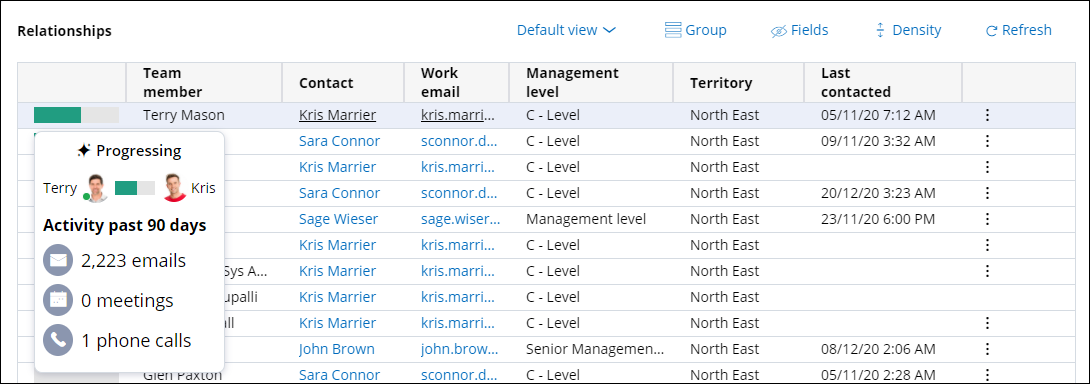
Previous topic Configuring Prepare for meeting Next topic Configuring signatures