Home
The Home landing page provides the user with a quick overview of your application. You can populate the home page with out-of-the-box widgets, as well as fields and views that best meet the needs of your business.
Unlike a traditional Pega Platform dashboard that the end user can customize, the Home page in a Cosmos React application is a curated experience. Consequently, it is the application designers who specify what users see when they log in.
You can add the following widgets to the home page:
- App announcements
- Displays a welcome banner for the user. You can modify the text and the
background of the announcement, as well as the destination of the action
button.
For more information, see Configuring the Home page welcome banner.
- Pulse
- Displays a message feed.
- To do
- Displays list of open cases assigned to the user.

Configuring the Home page welcome banner
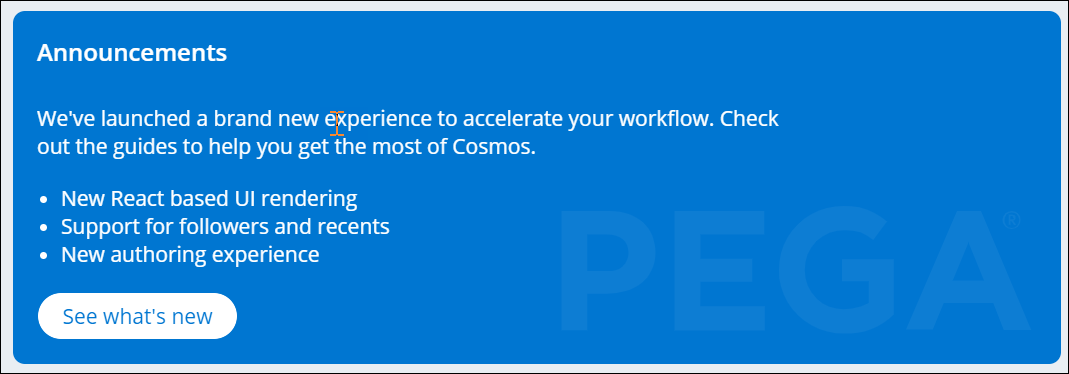
Send a customized message to your users by configuring the welcome banner on the Home page of your application with the App announcement widget. For example, you can configure the banner to display a bulleted list of the latest changes to the application.
- Open the App announcement widget:
- In the navigation pane of App Studio, click Channels.
- In the Current channel interfaces section, click the icon that represents the portal whose App announcement widget you want to configure.
- On the portal page, on the Content tab, click the Landing pages category.
- In the Landing pages pane on the left side of the screen, click Home.
- In the Edit page: Home pane, in the row that holds the App announcement widget, click Configure App announcement.
- In the Header text field, enter the title of your message.
- In the Description field, enter the text of your message.
- In the What's New link field, enter the address of the web page that you want to open when the user clicks the What's New button on the banner.
- In the Image URL field, enter the address of the image
that you want to use as the banner's background.The field accepts external links or images that are provided in the data:image format with base64 encoding.
- Click Submit.
- Provide text for the details bullet points:
- In the header of your workspace, click the Switch Studio menu, and then click Dev Studio.
- In the Dev Studio search field, search for and
open the pyInitAnnouncements data transform.The system sources the bullet points in your announcement from the D_pyAnnouncements data page. The pyInitAnnouncements data transform populates D_pyAnnouncements with content.
- On the Definition tab of the
pyInitAnnouncements data transform, in the
Source column, enter the text for the
bullets.
For example: In this scenario, the pyInitAnnouncements data transform contains three actions, each representing a bullet. You can remove the bullets or add new ones by copying the existing configuration. Sample bullet configuration 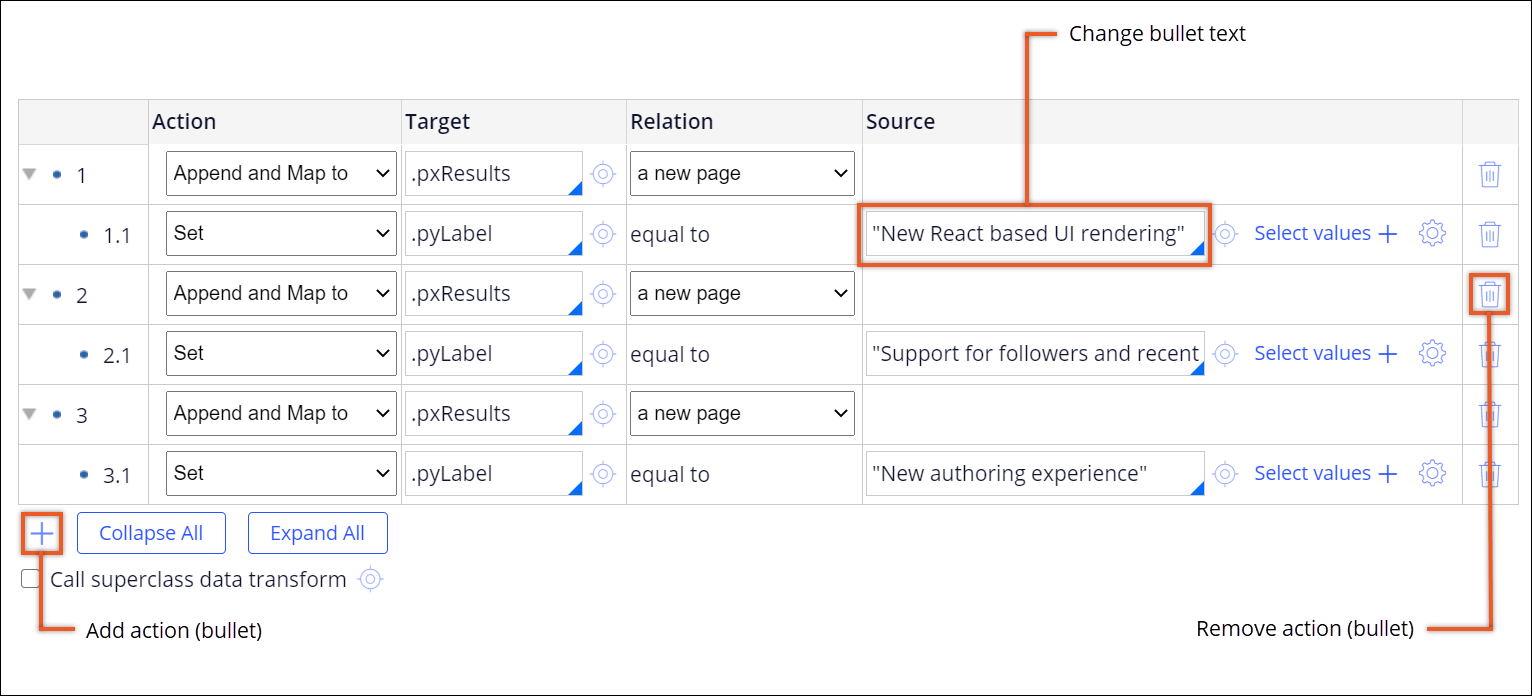
- On the ruleform, click Save.
Previous topic Landing pages Next topic Explore Data