Configuring display options for a harness
Define the look and behavior of your application by setting display options at a harness level. Display options help you configure error presentation, container settings, and harness auditing to further customize your user interface.
For example, you can set up a section to display a customized message when the harness registers an error.
Search for and open the harness that you want to edit.
On the Display options tab, in the Form-level errors list, define how you want to display form-level errors:
- To display errors in a standard section at the top and bottom of the user form, select Default.
- To display errors in a standard section at the top of the user form, select Top of harness.
- To display errors in a custom section that you place in the harness, select In configurable section, and then, in the Custom error section field, define the section that contains the error message.
If you decide to use a custom section, the standard form-level error section is not displayed at run time. Therefore, ensure that the harness layout contains the custom section. Otherwise, the system does not display error messages.To display form-level errors even when a field-level error occurs, select Always show.
To cause the entire run-time work item to scroll vertically as a single unit, select Keep error display visible.
In the Field-level errors list, define how you want to display field-level errors:
- To mark fields with errors with a standard error icon and display error text in a tooltip, select As image with tooltip.
- To display the error text above the field with the error, select As full error text.
To display header icons, select Show container icons.
To force the harness to adopt the minimum width that is defined in the skin rule, select Enforce CSS minimum width.
For more information, see Skins.To record every time that a user requests the form that is produced by the harness, select Enable auditing, and then define the when condition for the audit.
Each time that the form is displayed, your application can add an instance of the Log-DataAccessAudit class to support auditing, reporting, and analysis. The added instance identifies the date, time, operator ID, harness, customer party and work item ID.For harnesses that are the basis of a landing page in a portal, in the Initialization section, define the behavior of the harness on load:
In the Visibility list, define when the users can see the harness.
To launch a data transform when the harness loads, in the Data transform field, enter target data transform.
For more information, see Data transforms.In the Activity field, enter the activity that you want to launch when the harness loads.
For more information, see Available UI actions.
In the form, click Save.
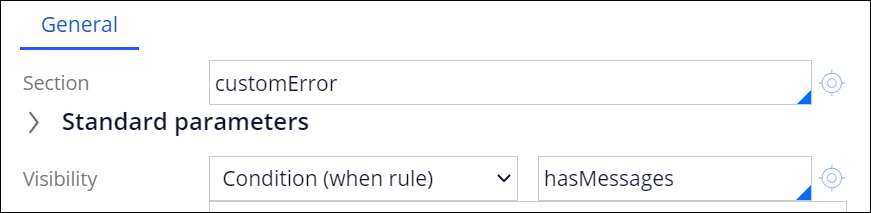
For more information, see Creating an embedded section and Creating a When rule.
Previous topic Adding scripts and style sheets to a harness Next topic Harness and Section forms: Help — Client Event Editor